Changing your Galaxy Watch band is one of the easiest ways to refresh your style, improve comfort, or match your watch to different activities. Whether you want a sleek leather strap for the office, a durable silicone band for workouts, or a premium metal link for special occasions, swapping bands takes less than a minute once you know the proper technique. Samsung designed most Galaxy Watch models with a tool-free, quick-release mechanism that makes changing bands simple and damage-free. However, different models use different attachment systems, so knowing which mechanism your watch uses is essential for a smooth swap. This guide covers every detail from release mechanisms and removal techniques to installation steps and compatibility checks.
Use the Right Release Mechanism

Samsung Galaxy Watches use different attachment systems depending on the model. Understanding which mechanism your watch has prevents damage and makes the process much easier.
One-Click Button System
Most Galaxy Watch models use this standard quick-release mechanism. The system appears on Watch 4 through Watch 8, Watch 3, and Gear S3.
Small circular release buttons sit on the back of the watch at each lug. You press the button to disengage a spring-loaded pin that holds the band in place. This mechanism works with most official Samsung bands and compatible third-party straps. You need only your fingernail or thumb to operate it.
Press firmly and hold the button while pulling the band straight out. Never twist or yank the band during removal.
Proprietary Latch System
The Galaxy Watch Ultra uses a unique ruggedized system that differs from all other models. It features oval-shaped external buttons at the 12 and 6 o’clock positions on the back of the watch. Pressing the button reveals an internal latch that must be depressed to release the band. Installation requires a firm push-pull action with an audible snap when the band seats properly.
This system is not compatible with any other Galaxy Watch model. Never attempt to force a standard band onto the Ultra.
Quick-Release Lever
Some premium third-party bands use a lever instead of a button. You press the lever inward toward the watch case to unlock the pin, then insert or remove the band at a 45-degree angle. This design appears in metal mesh, NATO, and hybrid bands.
If the lever resists, realign the pin rather than forcing it. Forcing can bend the mechanism.
Remove the Old Band Safely
Always remove the current band using the correct technique for your specific model before installing a new strap.
For One-Click Button Models
Flip the watch so the sensors face up. Locate the small release button on the back near one end of the band. Press and hold the button with your thumb or fingernail. While pressing, gently pull the band straight out from the lug. Repeat on the opposite side. Set the old band aside on a soft surface.
You will feel slight resistance when the pin disengages. A soft click may be heard.
For Galaxy Watch Ultra
Turn the watch over and locate the oval buttons at the top and bottom. Press one button to expose the internal latch. While holding it down, pull firmly on the band until it releases. Repeat on the other side and remove the band completely.
The attachment point is thin and delicate. Avoid twisting or prying.
For Lever-Release Third-Party Bands
Press the lever inward toward the watch body. Pull the band away at a slight upward angle. Repeat on the opposite side. Store the band safely if reusing later.
If the lever sticks, clean the area with a dry microfiber cloth. Dust can jam the mechanism.
Install a New Band Correctly
Proper installation ensures a secure, scratch-free fit that will last.
Attach One-Click Button Bands
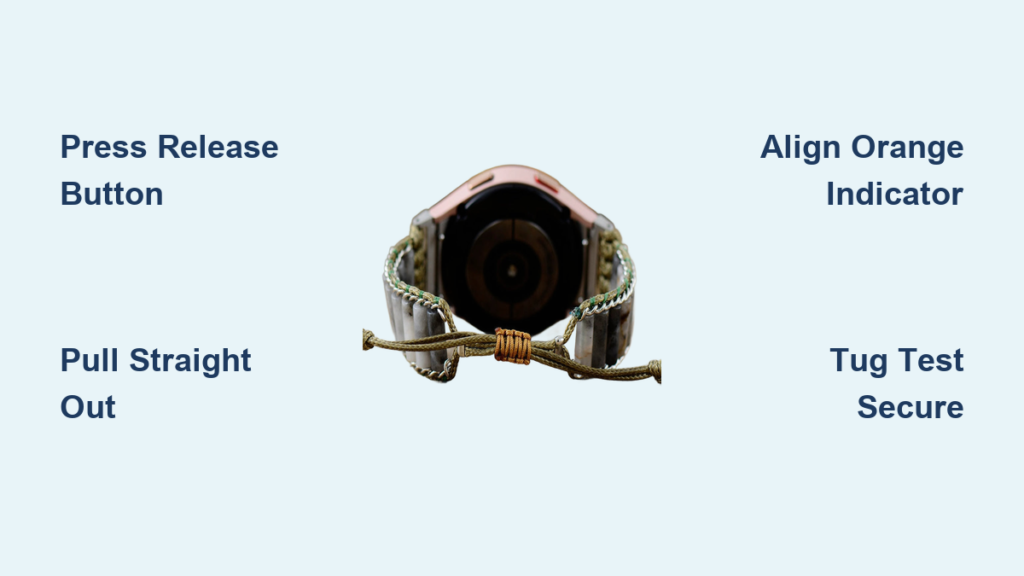
Align the new band’s connector pin with the lug slot on one side. Press and hold the release button on that side. Slide the pin fully into the slot until it seats flush. Release the button. You may hear a soft click. Repeat on the opposite side. Perform a tug test to confirm both ends are locked.
Install one side first, then press the other firmly. Apply a slight twisting motion after both sides are in to ensure full engagement. For bands with an orange alignment indicator, match the orange side to the Home button side. Position the longer band segment downward for better ergonomics.
Install Bands on Galaxy Watch Ultra
Check orientation first. The latch should face outward, away from your wrist. Start with one end by aligning the band’s slot with the lug pin. Press the oval button and slide the band in. You should feel a distinct snap when fully seated. Repeat on the other side. After both sides are attached, press each button again and give a firm tug to verify security. Adjust the latch position by moving it one notch over if needed for a snug fit.
The Trail Band may require more force due to thicker material. Ensure it clicks on both ends.
Install Lever-Release Third-Party Bands
Hold the band at a 45-degree angle. Insert one pin into the lug notch. Press the lever inward and slide the opposite end into place. Release the lever. It should snap shut. Repeat if necessary and perform a tug test.
If the lever does not close smoothly, realign the band. Forcing it can damage the pin.
Verify Band Security

Always perform a final safety check before wearing your watch. A loose band can fall off and damage your device.
Perform a Tug Test
Gently pull the band outward from both ends. There should be no movement, wobble, or detachment. If the band shifts, remove and reinsert it. Ensure the pin is fully inserted.
Listen for the Click
Most bands emit a subtle click when properly seated. Some high-end or silent mechanisms lock without sound, so do not rely solely on audio confirmation.
Check Flush Alignment
The band should sit flat and flush against the watch case. No gaps, tilting, or uneven angles should be visible. Misalignment often means the pin is not fully inserted.
View the watch from multiple angles under bright light to spot any misalignment.
Choose the Right Compatible Band

Not all bands fit all models. Selecting the correct one prevents frustration and potential damage.
Compatibility by Model
Galaxy Watch 4 through Watch 6 all use 20mm lug width and are interchangeable. Galaxy Watch 7 and FE also use 20mm with an orange alignment indicator. Galaxy Watch 3 uses 20mm and is compatible with Watch 4 through 6 bands. Galaxy Gear S3 uses 22mm, which is slightly wider, so verify specifications carefully. Galaxy Watch Ultra uses a proprietary system and accepts only Ultra-specific bands.
Even if a band claims to fit your Galaxy Watch, confirm it is designed for your exact model.
Band Material Guide
Silicone and rubber bands work best for workouts, swimming, and daily wear. They are sweat-resistant, lightweight, and affordable but can develop odor over time. Leather bands suit office and formal events. They are stylish and comfortable but should avoid water exposure. Metal bands including stainless steel and titanium work well for professional settings. They offer a premium look and excellent durability but are heavier and may require micro-adjustments. Nylon and fabric bands including NATO and Perlon styles excel for outdoor use and travel. They are breathable and quick-drying but may loosen over time. Carbon fiber bands appeal to tech lovers seeking minimalist style. They are lightweight, rigid, and sleek but come at a higher price with limited sizing options.
Adjust for Perfect Fit
A well-fitted band improves comfort and tracking accuracy, especially for sleep and fitness monitoring.
Paka Carbon-Fiber Band Adjustment
This band includes removable rings to fine-tune length. Remove one ring at a time until the band feels snug but not tight. This feature proves ideal for shared devices or seasonal wrist changes.
Metal Band Micro-Adjustment
Use butterfly clasps or sliding links to tweak the fit. Some require slight bending, but do so gently to avoid breakage. Avoid over-tightening, which can stress the clasp.
For sleep tracking, choose a soft, hypoallergenic band to prevent skin irritation.
Prevent Damage During Changes
Even simple swaps can go wrong without proper care. Follow these steps to protect your watch.
Enable Water Lock
Prevent accidental screen activation on Watch 8 and newer models. Swipe down from the top to open Quick Settings. Swipe right until you see the water droplet icon. Tap to enable Water Lock, which disables all touch input. After changing bands, tap the icon twice rapidly to disable Water Lock.
This prevents unintended calls, workouts, or alarms during handling.
Work on a Soft Surface
Place the watch on a microfiber cloth or towel. This prevents scratches on sensors and back glass. It also reduces the risk of slipping or dropping the device.
Avoid Metal Tools
Use only fingernails, thumbs, or plastic tools. Metal screwdrivers or knives can scratch the case. If needed, use a butter knife edge gently and never pry laterally.
Troubleshoot Common Problems
Even experienced users encounter issues. Here is how to fix them quickly.
Band Won’t Detach
The button may not be fully pressed, or debris could be in the lug. Use your thumb for better pressure and clean the area with a dry brush.
Band Feels Loose
Incomplete insertion or misalignment is likely the cause. Remove and reinsert the band, ensuring the pin goes all the way in.
No Click Sound
Some mechanisms lock silently. Confirm security with a tug test and visual check rather than relying on audio.
Orange Indicator Misaligned
The band may be installed backward. Reinstall with the orange side matching the Home button side.
Lever Won’t Close
The pin may be misaligned or the mechanism dirty. Reinsert at a 45-degree angle. Use compressed air to clean if needed.
Scratches on Watch Body
Metal tools or rough handling likely caused the damage. Switch to plastic tools and work slowly.
Maintain Your Watch and Bands
Long-term care keeps your device looking new and functioning properly.
Clean Lugs Regularly
Wipe with a dry microfiber cloth weekly. Use a soft toothbrush to remove dust from release buttons. Avoid water, alcohol, or cleaners near the mechanism.
Rotate Between Bands
Use two or three bands and rotate them weekly. This reduces wear on pins and lugs and extends the life of each strap.
Inspect for Wear
Check band pins and watch lugs every two to three months. Replace frayed, cracked, or loose bands immediately.
Samsung designs the system for hundreds of insertions, so it is built to last under normal use.
Final Tips for a Smooth Swap
The entire process takes less than 60 seconds once you are familiar with the technique. No technical knowledge is required, and the process is beginner-friendly. Third-party bands on Amazon offer great value. Just verify the correct size and mechanism before purchasing. Keep your original strap as a backup in case you change your mind. Band changes do not void your warranty.
Use your thumb for better pressure, align orange indicators correctly, enable Water Lock, and always perform a tug test.
Frequently Asked Questions About Changing Galaxy Watch Bands
Do I need tools to change my Galaxy Watch band?
No. Most Galaxy Watch models use a tool-free quick-release mechanism. You need only your fingernail or thumb to press the release buttons. The Galaxy Watch Ultra uses a proprietary latch system that also requires no tools.
How long does it take to change a Galaxy Watch band?
The entire process takes 30 to 60 seconds once you are familiar with the technique. First-time users may need a minute or two to locate the buttons and practice the proper motion.
Can I use any band from other Galaxy Watch models?
Galaxy Watch 4 through Watch 8 and Watch 3 all use the same 20mm standard quick-release system and are interchangeable. However, the Galaxy Watch Ultra uses a proprietary system that accepts only Ultra-specific bands. Never attempt to use standard bands on the Ultra.
Will changing my band void my warranty?
No. Band replacement is a user-serviceable action that does not void your warranty. Samsung designed the attachment system for repeated changes.
Why won’t my band click into place?
The pin may not be fully seated in the lug slot, or the release button may not be fully pressed. Remove the band and try again, ensuring you press the button while sliding the pin in completely. Check for debris in the lugs if the problem persists.
How do I know if my band is secure after installation?
Perform a tug test by gently pulling the band outward from both ends. There should be no movement or detachment. Also check that the band sits flush against the case with no gaps or tilting.
Key Takeaways for Changing Your Galaxy Watch Band
Changing your Galaxy Watch band is fast, safe, and completely customizable when done correctly. The process requires no tools for most models. Simply match the band to your watch model, use the proper technique for your specific release mechanism, and always verify the fit with a tug test before wearing. Whether you want a sleek metal strap for the office, a sporty silicone band for the gym, or a premium leather option for formal occasions, you can confidently swap straps anytime using this guide. Keep your watch clean, rotate bands regularly, and enjoy a fresh look whenever the mood strikes.


