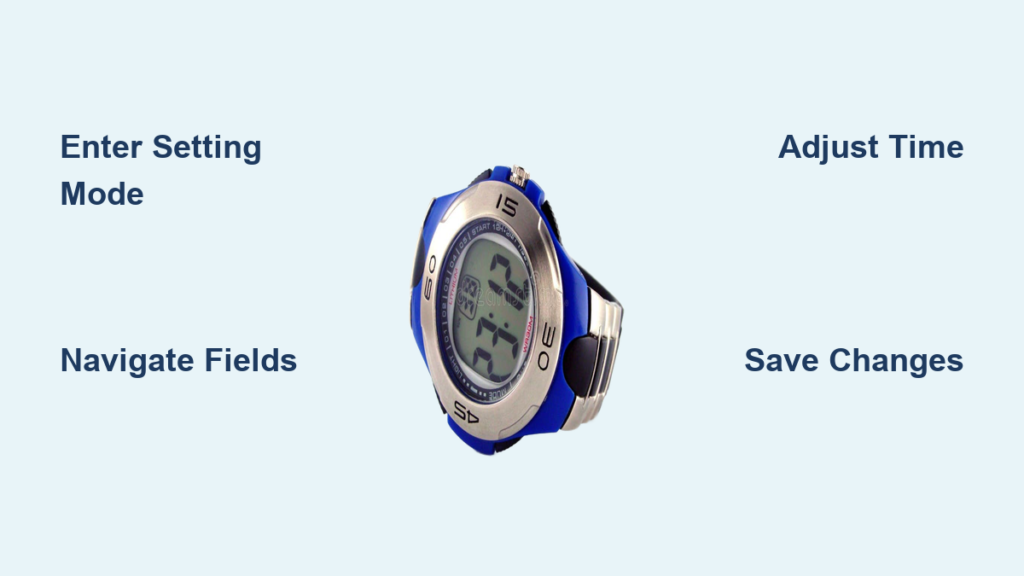
You glance at your digital watch only to realize it is showing the wrong time. Perhaps you forgot to adjust for daylight saving, returned from a trip across time zones, or just replaced the battery. Most digital watches can be reset in under a minute once you understand the right button sequence. The key is knowing how your watch buttons work together to enter, navigate, adjust, and save the time. Whether you own a budget no-name watch or a rugged G-Shock, this guide walks you through every step clearly and concisely.
Enter Time-Setting Mode
Before adjusting anything, you must activate the setting function. This is done by triggering a flashing display, which indicates an editable field is ready for changes.
Press and Hold the Set Button
On four-button watches like most Timex and Casio models, the Set button is your entry point. Press and hold the Set button for two to five seconds. The seconds or time digits will begin to flash. Once flashing starts, release the button and you are now in edit mode.
Pro Tip: If nothing happens, check the battery. A weak power source often prevents entry into setting mode.
Use Mode or Lap/Reset on Three-Button Models
Many three-button watches like Dakota or generic sport models lack a dedicated Set button. Instead, you will use one of two methods. Hold Lap/Reset for three to five seconds until digits blink. Some variants require holding Start/Stop instead.
Press LL Three Times on Positional Watches
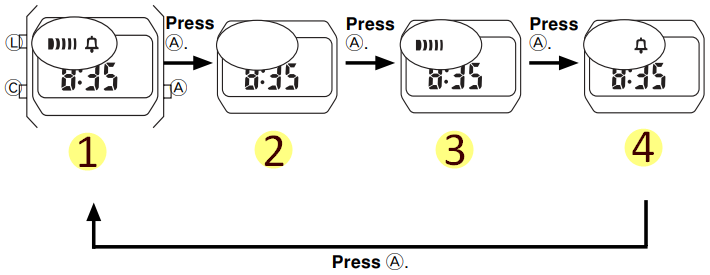
Some fitness or minimalist watches do not label buttons by function. Instead, they are referred to by position. LL (Lower Left) usually serves as Mode. LR (Lower Right) handles navigation. UR (Upper Right) adjusts values. To enter setting mode, press LL three times rapidly. The display will flash when setting mode is active.
Navigate to Editable Fields
Once in setting mode, you cycle through time and date components. Each press of the navigation button moves to the next field.
Press Mode to Cycle Through Fields
On most watches, the Mode button advances the flashing selection through this sequence. First, seconds appear if adjustable. Next, minutes flash. Then hours. Then date. Then month. Finally, day of the week displays.
Note: Not all watches show seconds as the first field. Some start with minutes flashing immediately.
Use LR or Recessed Button on Positional Models
On watches without labeled buttons, press LR to move from minutes to hours to date to month to day. On single-button models, each press of the recessed button cycles through the field. Wait a second after each press to ensure the watch registers your input.
Adjust the Minutes
With the minutes field flashing, it is time to set the correct value.
Tap or Hold Start/Stop to Increase
Use the Start/Stop button or UR on positional models to adjust. A single press increments by one minute. Hold down the button to rapidly advance for faster setting. Minutes range from 00 to 59. If you go past 59, the watch auto-increments the hour and resets minutes to 00.
Pro Tip: To set 55 minutes, first set the tens digit to five, then increment the units to five. This avoids overshooting.
Set the Correct Hour
After minutes, press Mode or LR to make the hours flash.
Choose 12-Hour or 24-Hour Format
Check your display to identify the format. In 12-hour mode, an A appears for AM or P for PM. In 24-hour mode, the display shows hours from 00 to 23 with no AM/PM indicator. To toggle formats while hours flash, press Mode or Set. Some models require holding Set for three seconds.
Avoid AM/PM Errors
Ensure the AM/PM indicator matches your intended time. Accidentally setting 5:55 AM instead of 5:55 PM is a common mistake. If AM/PM will not toggle, your watch may be locked in 24-hour mode.
Update Date and Day of Week
After hours, continue cycling to set calendar fields.
Set the Date
The day of month field flashes with a range of one to 31. Use Start/Stop to advance. No automatic correction exists for short months like February. If your watch shows February 30, manually fix it yourself.
Select the Month
The month appears as a number from one to 12 or as a name like Jan or Feb. Some models require two-digit input. Enter 01 for January or 09 for September.
Adjust Day of the Week
The day cycles through Sun, Mon, Tue, and so on. The day must match the actual day for accurate alarms and auto-rollover.
Format Note: Most watches use MM/DD format. September 11 displays as 09/11, not 11/09.
Exit and Save the New Time
Once all fields are correct, exit properly to lock in your changes.
Press Set or Mode to Confirm
On four-button models, press Set to save and exit. On three-button models, press Lap/Reset or wait for auto-exit after five to ten seconds. On positional models, press LR then LL to confirm.
Check Success: When no digits flash and the time runs normally, your changes are saved.
Warning: If you remove the battery or walk away without confirming, settings may not save.
Model-Specific Reset Methods
Not all watches follow the same sequence. Here is how to reset common models.
Reset a Casio F-91W
This iconic watch uses a two-button system. Press Mode repeatedly until seconds flash. Press Adjust to enter edit mode. Press Mode to cycle through seconds, minutes, and hours. While flashing, press Adjust to increase the value. Press Adjust again to save and exit.
Configure a Timex Ironman
This multi-function model has a complex menu. Hold Start/Split plus Lap/Reset for two to three seconds. The time display flashes, indicating it is now editable. Use Start/Split to adjust values. Press Mode to move between fields. Press Set or wait to exit.
Use a G-Shock or Baby-G
These durable watches have stiff buttons by design. Press and hold Mode or Adjust until time flashes. Use Start/Stop to increase and Lap/Reset to confirm. Some models support auto-sync via smartphone or radio signal.
Fix a Generic Dollar Store Watch
These watches often lack a Set button and use Mode plus Light instead. Press Mode until time blinks. Press Light to activate editing. Use Start/Stop to adjust. Press Light again to move to the next field. Press Mode to exit.
Switch Between 12-Hour and 24-Hour Time
Avoid confusion by using the correct format for your needs.
Identify Your Current Format
In 12-hour mode, the display shows A or P. In 24-hour mode, hours range from 00 to 23 with no AM/PM indicator.
Toggle During Hour Setting
While hours flash, press Mode or Set to switch formats. If no toggle appears, the format may be locked. Check your manual.
Best For: Military, medical, or shift workers should use 24-hour format. Everyday use typically works fine with 12-hour format.
Troubleshoot Common Setting Problems
Even with the right steps, issues can arise. Here is how to fix them.
No Button Response
A dead battery, moisture, or dirt causes this problem. Replace the CR2032 battery. Clean contacts with a dry cloth. Never press buttons underwater unless rated for diving.
Stuck in Seconds Mode
This occurs from watch design quirks or incorrect sequences. Press Mode again to skip. Some models require resetting seconds to 00 before moving on.
Time Resets After Battery Change
A weak battery or drained capacitor in solar models causes this. Fully charge solar watches in sunlight for two hours. Replace old batteries immediately after they die.
Date Does Not Roll Over at Midnight
This happens when the time is set just before 12:00 AM and never crosses into the next day. Ensure the hour passes 12:00 AM correctly during setup. Set to 1:00 AM rather than 11:59 PM to trigger the date change.
Expert Tips for Accurate Time Setting
Follow these best practices to keep your watch precise and reliable.
Sync With an Atomic Clock
For perfect accuracy, use time.gov on your smartphone. Match seconds exactly when possible. Start the final second adjustment when the reference clock hits 58 seconds. This gives you time to confirm.
Remove the Watch During Setup
This reduces finger pressure on the band and improves visibility and button control. It also prevents accidental mode switches from wrist movement.
Account for Daylight Saving and Time Zones
Manually adjust when DST starts or ends. On dual-time models, use the second timezone feature. Set home time in 24-hour mode to avoid confusion when traveling.
Replace Weak Batteries Promptly
A dying battery causes dim display, slow response, and unsaved settings. A CR2032 battery lasts two to five years. Replace when performance drops.
Warning: A fully dead battery may erase memory. Reset time immediately after replacement.
Keep the Manual Handy
Every watch has a model number usually on the back of the case. Search online for the brand plus model plus manual PDF. Save it on your phone for future reference.
Frequently Asked Questions About Resetting Digital Watch Time
How do I enter setting mode on a three-button watch?
Hold the Lap/Reset button for three to five seconds until digits blink. Some variants require holding Start/Stop instead. Once blinking starts, you can navigate with Mode and adjust with Start/Stop.
Why does my watch time reset after battery change?
A weak battery or drained capacitor in solar models causes settings to lost. Replace batteries promptly. For solar watches, expose the watch to sunlight for two hours to recharge the capacitor before setting the time.
Can I change from 12-hour to 24-hour format?
Yes. While the hours field is flashing during time setting, press Mode or Set to toggle between formats. If no toggle appears, your watch may be locked to one format.
What if no buttons respond when I press them?
Check the battery first. A dead battery prevents any button response. Clean the button contacts with a dry cloth. Never use liquids that could damage internal circuits.
Why does my date not change at midnight?
You likely set the time just before midnight without crossing into the next day. Set the time to 1:00 AM rather than 11:59 PM to ensure the date rolls over correctly.
Where do I find my watch model number?
The model number is engraved on the back of the watch case. You may need to remove the watch band to see it. Search for this number plus manual PDF online.
Key Takeaways for Resetting Your Digital Watch
Resetting a digital watch follows a universal pattern regardless of brand or price. First, enter setting mode by holding Set or the equivalent button. Next, navigate through fields using Mode. Then, adjust values with Start/Stop. Finally, confirm and save by pressing Set or waiting for auto-exit. Understanding this Enter, Navigate, Adjust, Save sequence empowers you to fix the time on nearly any digital watch model.
When problems arise, check the battery first. Most issues trace back to weak power or improper exit. Keep your watch manual saved digitally for quick reference. With the right steps, your watch will stay accurate for years to come.


