

If your Michael Kors watch slips or feels too tight, adjusting the band can make all the difference. The good news? You don’t need to visit a jeweler. Most metal bracelet-style Michael Kors watches can be adjusted at home in under 20 minutes. With just a few basic tools and clear guidance, you can achieve a custom, comfortable fit that looks polished and professional. This guide walks you through every step, from identifying removable links and using the right tools to reassembling the band with precision.
Tools You Will Need for Michael Kors Watch Band Adjustment
Before starting, gather the right tools to avoid damaging your watch. Having the correct equipment ensures clean, damage-free adjustments and pays for itself after one use.
Essential Adjustment Tools
You will need a few specific items to complete this task successfully.
• Push-out pin tool: Designed specifically for removing watch pins without bending
• 0.35-inch hex screwdriver: A sturdy alternative if you do not have a pin tool
• Support base: Use a spool of solder, padded vice, or any object with a small hole to let the pin push through freely
• Small hammer: Optional, for added force if the pin resists
• Clear storage baggie: To safely keep removed links and pins
Never use pliers — they can crush delicate pins and ruin the band finish.
Identifying Removable Links on Your Michael Kors Watch
Not all links on a Michael Kors band are meant to be removed. Taking the wrong ones can damage the design balance and weaken the structure.
Plain Links vs. Jewel Links
Understanding the difference between link types is crucial before proceeding.
• Plain links (standard metal): These can be safely removed
• Jewel links (with crystals or decorative stones): Do not remove — doing so unbalances the design and may weaken the structure
Always check the inner side of the band for markings. Remove only plain links, preserving symmetry and aesthetics.
Count how many links you plan to remove before starting — this helps maintain balance on both sides of the clasp.
Understanding Pin Direction: The Critical Step
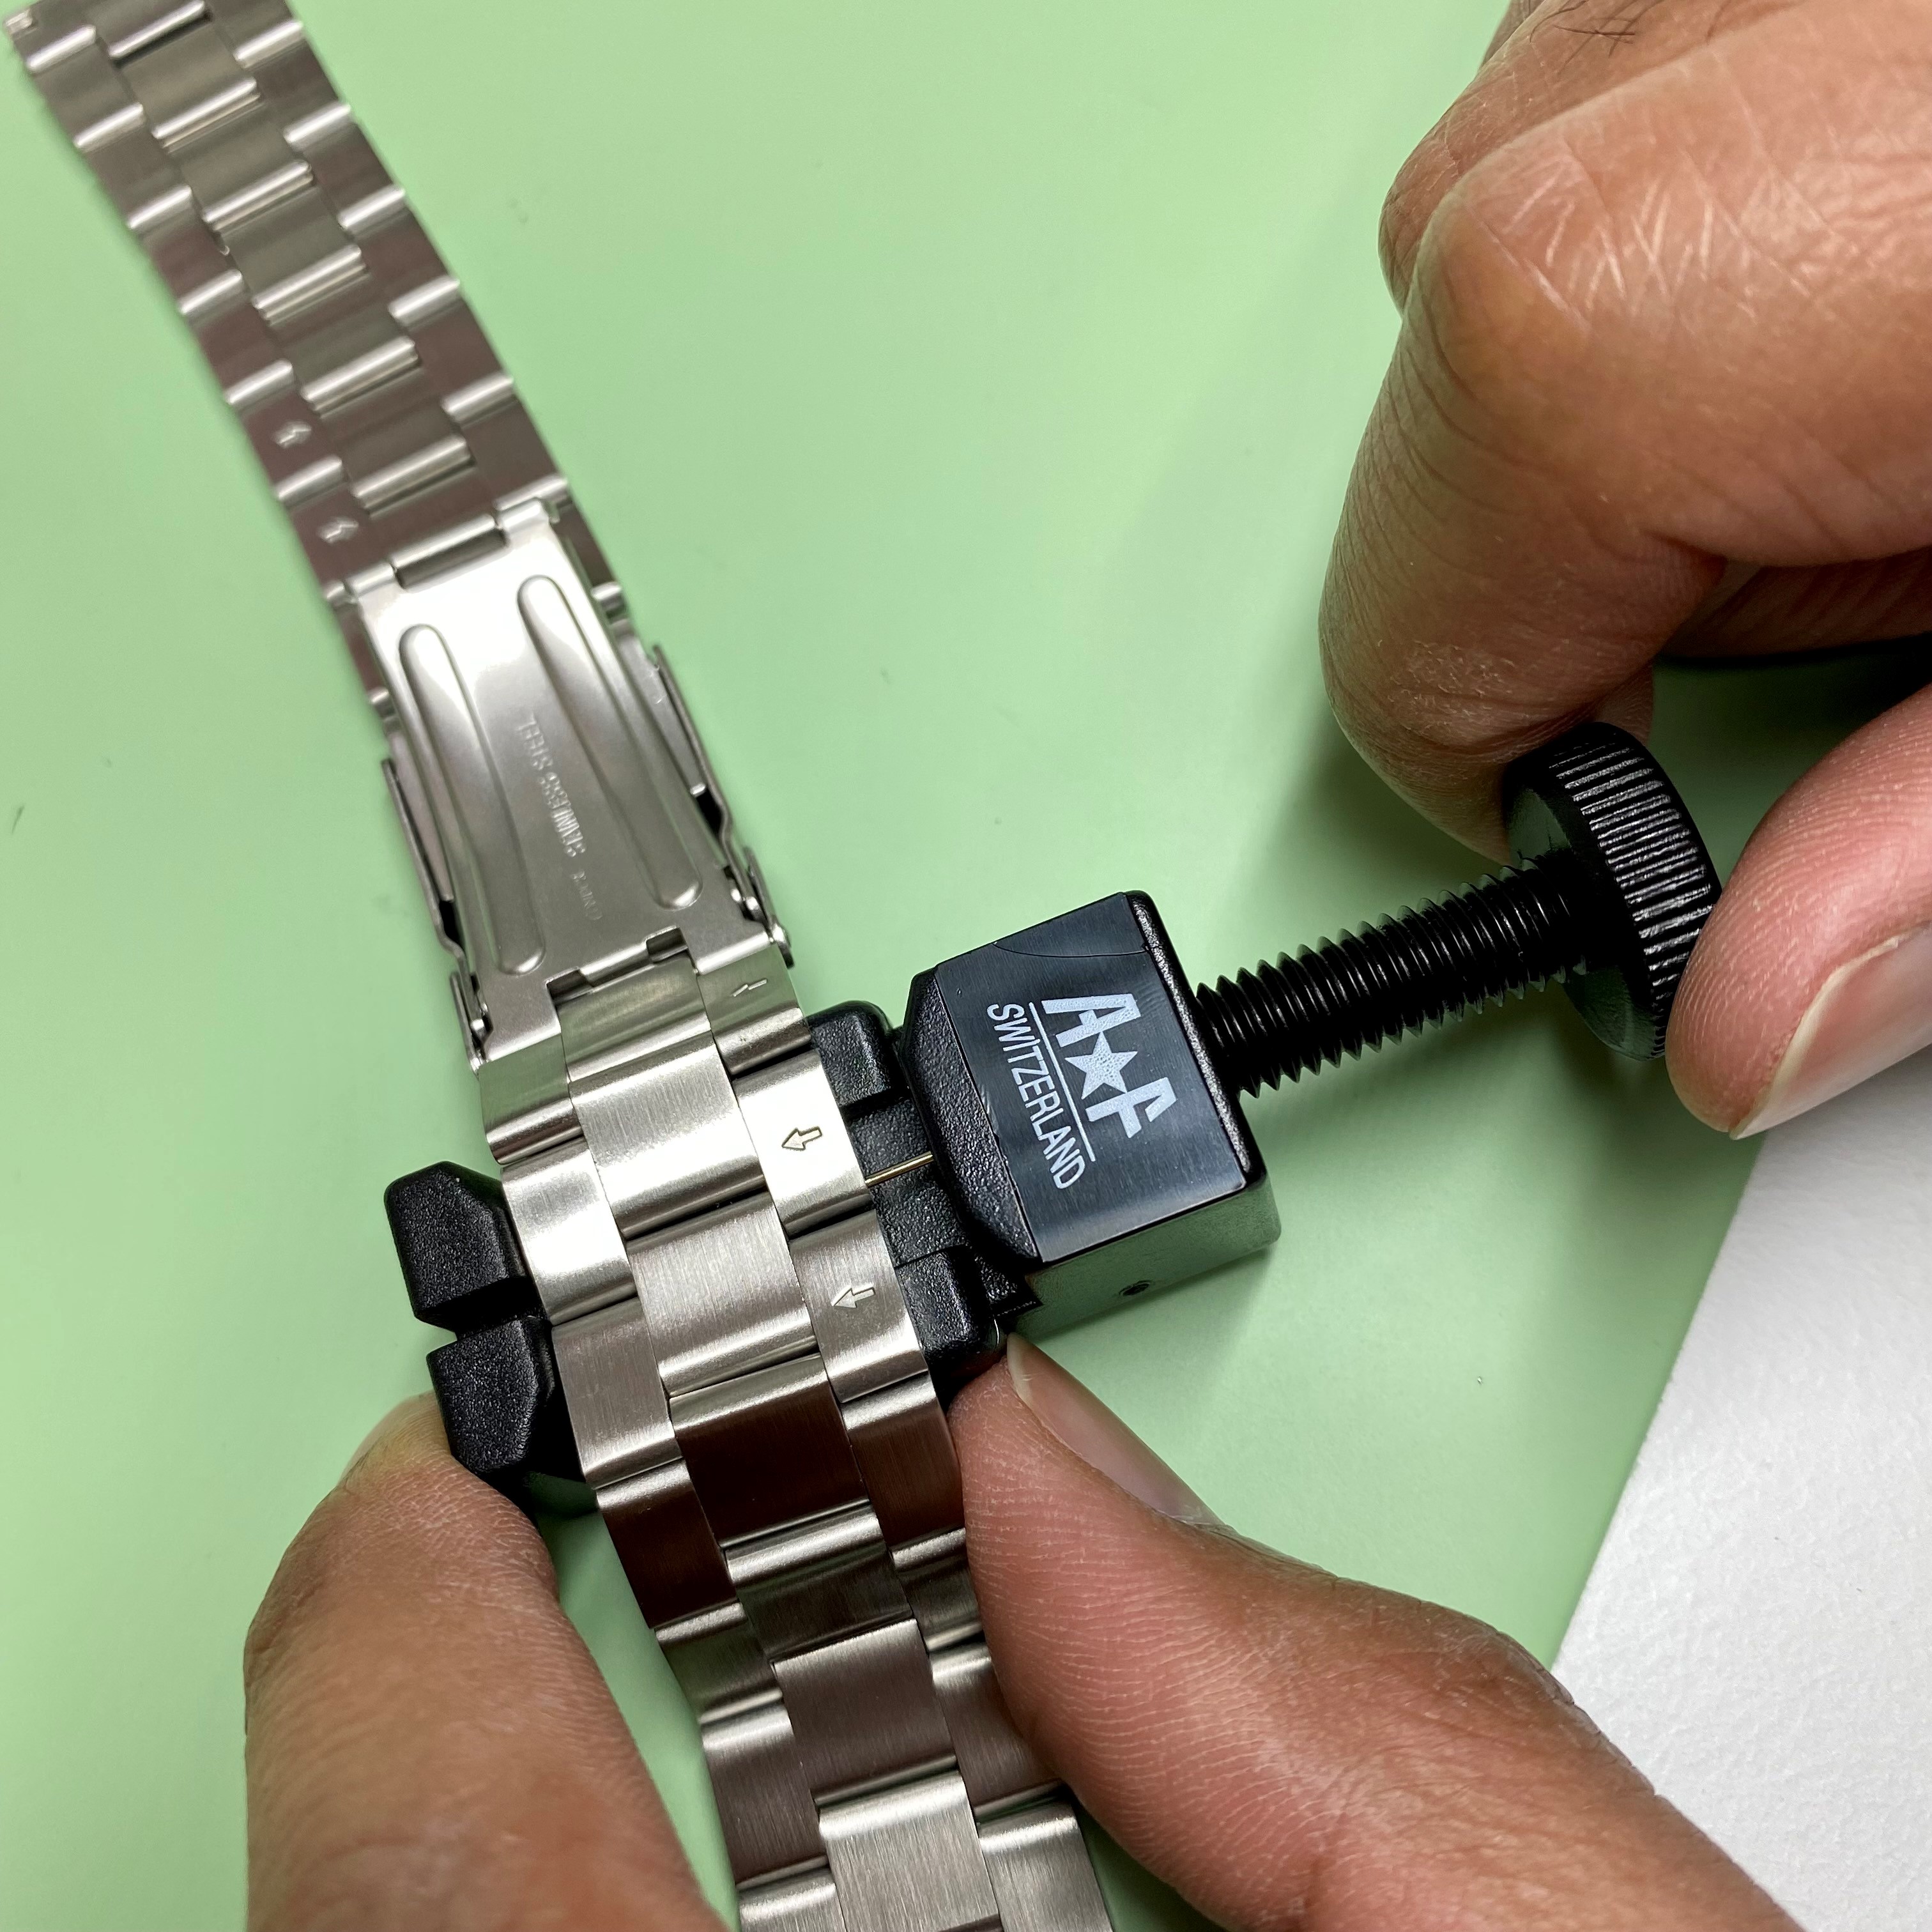
Getting the pin direction wrong is the most common mistake — and it can bend or break the pin completely. This step requires careful attention.
Locate the Directional Arrow
Follow these steps to find the correct direction.
-
Flip the watch over and inspect the inner side of the metal band
-
Look for a tiny arrow stamped near each link pin hole
-
This arrow shows the exact direction to push the pin out
Push the Thick End First
The pin has a split down the center, resembling a tiny screw, but it is not threaded. One end is thicker than the other.
• Always push from the side where the arrow points
• Start with the thicker end of the pin
Never force the pin from the wrong side — it will not budge and could snap.
Remove Links Step by Step
Now that you know which links to remove and which way to push, follow these sequential steps for success.
1. Measure Your Wrist First
Wrap a soft measuring tape around your wrist just above the bone. Compare that size to the current band length and decide how many links to remove. Typically, two to four links provide an average fit.
Aim for a snug fit with room for a finger between the band and wrist.
2. Position the Watch Correctly
Place the watch on your support (such as a solder spool) with the arrow side facing down. Align the target pin over the hole so it can slide out cleanly. This prevents bending and ensures even pressure.
3. Start Pushing the Pin
Place the tip of your tool on the pin head on the arrow side. Apply firm, steady pressure. If the pin sticks, tap gently with a hammer until the pin begins to move. Watch the opposite side — you will see the pin emerge. Stop once it is halfway out.
4. Pull the Pin Fully
Use tweezers or fingers to pull the pin the rest of the way. Repeat for the second pin on the same link. Each link requires two pins removed before it can be taken off.
5. Slide Out the Link
Gently separate the link from the chain. Set it aside in your labeled baggie with the pins. Repeat as needed for additional links.
Reassemble the Band Properly
After removing links, reconnecting the band correctly is crucial for safety and comfort. This step determines how your watch feels on your wrist.
Align Links Correctly
Before inserting pins, ensure adjacent links are oriented so their arrows point in opposite directions. Misalignment causes stiffness and poor fit. Take a moment to check each connection before proceeding.
Reinsert the Pin the Right Way
Insert the pin from the same side it came out, following the arrow direction. Use the flat end of your tool to push it back in. Push slowly until it clicks into place and sits flush with the band.
Check both sides — no part of the pin should stick out. Protruding pins can scratch your skin or catch on clothing.
Balance the Band for Symmetry
A centered clasp looks better and fits more comfortably. Symmetry matters for both appearance and function.
Remove Links in Pairs
For even appearance, remove the same number from each side of the clasp.
• Example: Take two links from the left, then two from the right
• This keeps the clasp centered and maintains the watch elegant profile
Avoid removing all links from one side — this pulls the clasp off-center and looks unprofessional.
A balanced removal results in a snug fit that does not twist or slide.
Store Spare Parts Safely
Do not throw anything away. Even if you are downsizing now, keeping spare parts offers flexibility for the future.
Save Removed Components
Place extra links and pins in a small clear baggie. Label it with the date or watch model (such as MK5670 — 4 links). Store the bag in your jewelry box or watch case.
Reasons to keep them include wrist size changes with temperature and weight, potential resale value with original parts, and easier future adjustments.
Test the Final Fit
Once reassembled, verify your work before wearing the watch. A few quick checks ensure everything is correct.
Check These Key Points
• Snugness: The band should stay in place without pinching
• Clasp function: Opens and closes smoothly
• Pin flushness: Run a finger over each link — no sharp edges should be present
• Time setting: If the watch was handled extensively, reset the time and date
Ideal fit is secure with slight movement — not too loose, not too tight. Wear it for a few minutes to confirm comfort during motion.
Avoid These Common Mistakes
Even small errors can damage your watch or ruin the look. Knowing what to avoid saves time and money.
Top Mistakes and How to Prevent Them

| Mistake | Risk | Fix |
|---|---|---|
| Pushing pin against the arrow | Pin jams or bends | Always follow arrow direction |
| Using pliers | Crushed pins, scratched band | Use only pin tools or hex drivers |
| Removing jewel links | Ruins design balance | Only remove plain links |
| Skipping support base | Uneven pressure, bent links | Use a spool or padded vice |
| Forcing stuck pins | Broken pin, unusable band | Tap gently or seek professional help |
Double-check each step. Rushing leads to costly fixes.
When to See a Professional
Some situations are better left to experts. Knowing when to stop saves your watch from damage.
Seek Help If You
• Do not have the right tools
• Pins are extremely tight and will not budge
• Are unsure about arrow directions or link types
• Have a water-resistant watch — improper handling may break the seal
Many jewelers charge $15–$20 for adjustment. Some Michael Kors stores offer free link removal with purchase.
If you are uncomfortable at any point, stop and consult a professional.
Save Time and Money with DIY Adjustment
Adjusting your Michael Kors watch band at home is smart and simple. The benefits extend beyond just saving money.
Benefits of Home Adjustment
• Time saved: 10–20 minutes at home versus a trip to the store
• Money saved: Avoid $15–$20 jeweler fees
• Flexibility: Re-adjust as your wrist size changes with seasons or weight
• Confidence: Master a useful skill for future watch care
Once you have done it once, the next adjustment takes half the time. You will wonder why you ever paid someone else to do it.
Maintain the Luxury Look
Michael Kors watches are designed for style and precision. Proper care preserves their elegant appearance.
Preserve the Finish
Work on a clean, soft surface to avoid scratches. Handle pins carefully since bent or lost pins affect function. Ensure the band lies flat on the wrist with no gaps or twists.
Final check: Does it look like it came from the store? It should. Every detail adds to the polished look.
Key Takeaways for Adjusting Your Michael Kors Watch Band
Adjusting a Michael Kors watch band does not require expertise. It requires attention to detail, the right tools, and patience. By following the arrows, using proper equipment, and removing links symmetrically, you can achieve a perfect custom fit at home.
The most important points to remember are using a push-out pin tool or hex driver rather than pliers, always pushing pins in the direction the arrow indicates, removing only plain links while preserving jewel links, reinserting pins flush with no protrusion, balancing removal by taking equal links from both sides, and storing spare links in a labeled baggie for future use.
With this guide, you are fully equipped to master how to adjust a Michael Kors watch band confidently, safely, and affordably. Keep your spare links, avoid common mistakes, and enjoy a watch that looks and feels tailor-made.
Frequently Asked Questions About Adjusting a Michael Kors Watch Band
Can I adjust a Michael Kors watch band without special tools?
You can use a small 0.35-inch hex screwdriver as an alternative to a push-out pin tool. However, avoid using pliers since they crush and damage the delicate pins. A support base like a spool of solder is also helpful for stability.
How do I know which links are removable on my Michael Kors watch?
Look at the inner side of the band. Plain metal links are removable, while links with crystals or decorative stones (jewel links) should never be removed. Removing jewel links ruins the design balance and structural integrity.
What happens if I push the pin in the wrong direction?
Pushing against the arrow direction will not release the pin and may bend or break it. Always check for the tiny arrow stamped on the inner side of the link and push in that direction, starting with the thicker end of the pin.
How many links should I remove for a proper fit?
Most people need to remove two to four links for a comfortable fit. Measure your wrist with a tape measure and compare it to the current band length. Aim for a snug fit with room for one finger between the band and your wrist.
Can I re-adjust the band later if my wrist size changes?
Yes. Keep all removed links and pins in a labeled baggie. As your wrist size changes with seasons or weight, you can easily add the links back or remove more for a perfect fit.
Should I seek professional help for my Michael Kors watch adjustment?
Seek professional help if you lack proper tools, pins are extremely tight and will not budge, you are unsure about arrow directions, or the watch is water-resistant. Many jewelers charge $15–$20, and some Michael Kors stores offer free adjustment with purchase.



