If your Invicta watch bracelet feels loose or slides around your wrist, removing a link is the most practical solution. Removing a link from an Invicta watch is straightforward once you understand the push-pin system and directional arrows that guide the process. Popular models like the Pro Diver 14593, 8926OB, and 23191 feature solid stainless steel bracelets designed for user adjustment, meaning you can achieve a custom fit at home without professional help.
This guide walks you through identifying removable links, gathering the correct tools, executing the removal safely, and reassembling the bracelet to ensure a secure fit. You’ll also find troubleshooting tips, model-specific guidance, and answers to common questions.
Identify Removable Links on Your Invicta
Before using any tools, you need to determine which links can be safely removed from your Invicta bracelet.
Check for Directional Arrows
Flip your watch over and examine the inner side of the bracelet. Look for small engraved arrows on the back of certain links. These arrows indicate the direction the pin must be pushed to eject it. This directional guidance is critical, as pushing the pin the wrong way can bend it or damage the internal retaining clip.
Pro Tip: Arrows typically appear on inner links between the end links and the watch case. Only remove links located between arrow-marked sections.
Avoid Removing End Links
The end links connect directly to the watch case and are not designed for removal. Attempting to remove these can damage the case or compromise the structural integrity of the band. Focus only on intermediate links in the center portion of the bracelet.
Balance Removal on Both Sides
Invicta bracelets are symmetrical to maintain a balanced appearance. To keep the clasp centered, remove an equal number of links from both sides. For example, if you need to remove two links total, take one from the left side and one from the right side.
Fit Guide: Each link removed typically shortens the band by 7 to 8 millimeters. Measure your wrist first to estimate how many links you’ll need to remove.
Gather the Right Tools for Link Removal

Using proper tools prevents scratches, bent pins, and frustration during the removal process.
Essential Tools List
A pin pusher tool with a 1.5mm tip is the most important investment. Most Invicta models use 1.5mm push pins, so ensure your tool has a matching tip. A soft work surface such as a folded towel, foam pad, or padded wooden block protects the watch face and stabilizes the band during work. Tweezers or flat-nose pliers help extract and reinsert pins without dropping them. Light machine oil or silicone lubricant can free stuck pins when applied sparingly. A small 45-gram ball-peen hammer helps drive stubborn pins when used with a pin pusher.
Alternative Method: If you do not have a pin pusher, a blunted hardened steel needle ground to 1.2 to 1.5mm can work, but use extreme care to avoid slipping and damaging the watch.
Verify Spare Parts Availability
Many Invicta watches ship with extra links and matching pins in the original box. Check your packaging and store these spare parts safely. They are useful for future adjustments or if you need to resize the band again.
Remove the Link Step by Step
With your tools ready and the correct links identified, you can now proceed with the removal process.
Align the Pin Pusher Correctly
Place the watch face-down on your soft work surface. Position the pin pusher tip into the hole on the side opposite the arrow. For example, if the arrow points left, insert the tool from the right side. This alignment ensures you push the pin in the correct direction.
Critical Rule: Always push in the direction of the arrow. Pushing against it can damage the pin or internal retaining clip, leading to a loose connection or failed reassembly.
Apply Steady Pressure
Use your thumb to press the plunger of the pin pusher or apply gentle hammer taps. Apply slow, even pressure without jerking or forcing the tool. If resistance is high, back off slightly and add one drop of light oil into the hole. Wait 60 seconds before retrying.
User Insight: One Reddit user shared that they used a toothpick and watch hammer successfully, noting that the process is only difficult if you push against the arrow direction. This highlights that proper technique matters more than expensive tools.
Extract the Pin Fully
Once the pin protrudes 1 to 2 millimeters from the link, switch to tweezers to pull it the rest of the way. Do not wiggle or twist the pin during extraction, as this can bend it. If the pin feels stuck, recheck your alignment, ensure you are pushing in the correct direction, and clean any debris from the hole.
Slide Out the Link
With the pin completely removed, gently slide the unwanted link out of the bracelet. Use tweezers if needed for better grip. If removing a second link for symmetry, repeat the entire process on the opposite side of the bracelet.
Best Practice: Store the removed link and pin together in a labeled bag, especially if you might need to reattach them later.
Reassemble the Bracelet Securely
Proper reassembly ensures the bracelet is safe to wear and maintains the watch’s water resistance.
Align the Links Before Inserting
Line up the remaining links so their pin holes are perfectly aligned. Ensure the arrow on the link points in the same direction as it did during removal. Misalignment can cause difficulty during pin insertion or result in a loose connection.
Insert the Pin from the Correct Side
Start the pin from the side opposite the arrow, the same side you used during removal. The grooved or split end of the pin should emerge on the arrow side when fully inserted. This orientation ensures the internal clip engages properly.
Visual Cue: The pin should slide in smoothly at first. If it stops abruptly, check alignment or clean the hole before proceeding.
Seat the Pin Completely
Use the pin pusher or gentle hammer taps to drive the pin all the way through until it is flush on both ends. Never hammer directly on the pin, as this can mushroom the metal. Use a soft punch or tool tip instead.
Warning: If resistance occurs, apply a tiny amount of silicone lubricant, back out slightly, and realign. Do not force the pin, as bent pins compromise strength and safety.
Final Inspection and Fit Check
Before wearing your watch, verify that the repair is secure and the bracelet fits properly.
Confirm Flush and Secure Pins
Inspect both ends of the pin. It should be even with the surface of the link, not protruding or recessed. Gently wiggle adjacent links to check for movement. If there is play, the pin may not be fully seated.
Test Clasp Function
Open and close the clasp to ensure smooth operation. The bracelet should lie flat on your wrist without twisting. If the band twists or gaps appear, you may need to remove additional links or recheck pin seating.
Wear and Monitor
Wear the watch for a few hours and periodically check for looseness or noise. Some users report pins loosening after impact, especially if not fully inserted during reassembly. Inspect the link pins every few months, particularly after resizing or heavy use.
Model-Specific Tips for Popular Invicta Watches
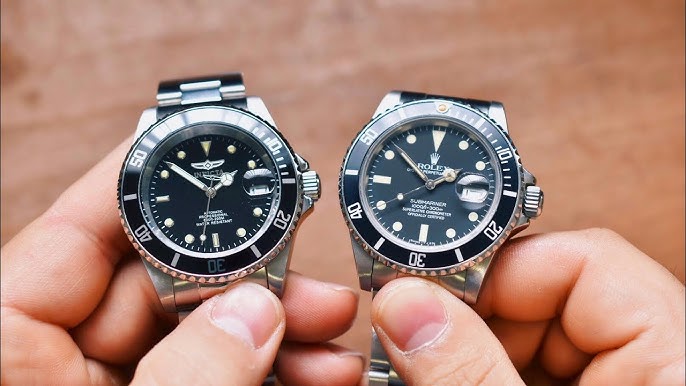
Different Invicta models have slight variations in their link systems. Understanding these differences helps ensure successful removal.
Invicta Pro Diver 14593
This model uses push pins with clear engraved arrows indicating direction. It comes with extra links and pins in the original packaging. A 1.5mm pin pusher with steady pressure is usually sufficient. You can remove up to 4 links per side for large adjustments.
Invicta 8926OB
The push pins on this model are often mistaken for screws due to their head shape. If the fastener turns but does not loosen, it is a push pin, not a screw. One user reported a lug pin dislodging after a fall, emphasizing the need for full pin insertion during reassembly.
Invicta 23191
Similar to the 14593, this model uses a push-pin system with directional arrows. It includes replacement pins in the tool kit. No hammering is required if you use a proper pin pusher.
Invicta 6195
This model may use push pins or screws, so inspect carefully before attempting removal. If using pins, a hardened steel needle and small hammer can serve as alternatives. Always use a soft work surface to protect the finish.
Handle Collars and Sleeves Properly
Some Invicta models include metal collars or sleeves around the pins for a flush fit.
Remove and Reinstall Carefully
Note the collar position before removal. Reinstall it in the same orientation during reassembly. Store each collar with its corresponding pin to avoid mix-ups.
Best Practice: If a collar is missing or damaged, consider replacing the entire pin set for a professional finish.
Troubleshoot Common Issues
Even with careful work, problems can arise. Here is how to fix the most common issues.
Pin Will Not Move
This usually means you are pushing against the arrow direction or the pin lacks lubrication. Reverse your direction, apply one drop of oil, and realign the tool before retrying.
Pin Bends or Breaks
Excessive force or a low-quality tool causes bent pins. Use a hardened steel tool and apply even pressure. Replace bent pins, as they are not safe to reuse.
Link Will Not Separate
The pin may not be fully extracted. Pull the pin until completely removed, then gently wiggle the link side to side to separate it.
Pin Will Not Reinsert
The groove may be misaligned with the internal clip, or debris may be in the hole. Clean the hole, align the slit with the clip, and use lubricant sparingly.
Loose Link After Reassembly
The pin may not be fully seated, or the retaining clip could be damaged. Re-seat the pin completely. If it still wobbles, the clip may be damaged and professional repair is needed.
Watch Falls Off
The pin was not fully inserted before wearing. Always ensure pins are flush and secure. Test by gently pulling on the links before wearing the watch.
Preserve Your Watch’s Warranty and Longevity
Proper care maintains your Invicta’s value and performance over time.
Does Resizing Void the Warranty
No, removing links does not void the warranty if done correctly without causing damage. Invicta designs these bracelets for user adjustment.
Maintain Water Resistance
For dive models like the Pro Diver, proper pin seating preserves water resistance. Avoid exposing the watch to water until you have confirmed all pins are secure.
Store Spare Parts
Keep removed links, pins, and collars in a labeled anti-static bag. Include a note with the side if removed asymmetrically.
Frequently Asked Questions About Invicta Watch Link Removal
What tools do I need to remove an Invicta watch link
You need a pin pusher tool with a 1.5mm tip, a soft work surface, tweezers, and optionally a small hammer and light machine oil. A hardened steel needle can substitute for a pin pusher if needed.
Can I remove links from any part of the Invicta bracelet
No. Only remove links between the arrow-marked sections on the inner side of the bracelet. End links connected to the watch case should not be removed.
How many links can I remove from an Invicta watch
Most Invicta models allow removal of 3 to 4 links per side, depending on the model. The Pro Diver 14593, for example, allows up to 4 links per side.
What happens if I push the pin in the wrong direction
Pushing against the arrow can bend the pin or damage the internal retaining clip. Always follow the arrow direction engraved on the links.
Does removing links affect water resistance
Properly seated pins preserve water resistance. However, ensure all pins are fully flush before exposing the watch to water, especially for dive models.
Can I add links back to my Invicta watch
Yes, you can reverse the process using the original or spare links and pins retained from removal. Ensure proper alignment and full pin seating.
Key Takeaways for Removing Invicta Watch Links
Removing a link from an Invicta watch is a straightforward process when you follow the correct steps. Always check for directional arrows on the inner links and push pins in the indicated direction. Use a proper 1.5mm pin pusher and work on a soft surface to protect your watch. Remove an equal number of links from both sides to keep the clasp centered and the band balanced. Store removed links and pins together in case you need to resize again later.
Apply steady, even pressure when pushing pins, and never force them if resistance is high. Use light oil to free stuck pins and ensure proper alignment before reinserting. After reassembly, verify that all pins are flush and secure by gently wiggling the links. Test the clasp function and wear the watch for a short time to confirm a comfortable fit.
If you encounter difficulties or are unsure about any step, consider taking your watch to a professional jeweler. The cost is minimal compared to the risk of damaging your timepiece.