
If you’ve ever looked at your Seiko watch and thought the band was just a little too loose, or worse, lost a pin trying to resize it, you are not alone. Many owners of Seiko 5 Sports, Prospex divers, and Presage models face the same challenge: how to safely remove Seiko watch band pins without damaging the bracelet or losing tiny internal components. Unlike standard spring bars, Seiko uses specialized pin-and-collar and pin-and-pipe systems that require precise technique and the right tools.
This guide covers everything you need to know, from identifying your pin type to reassembling your band with a distinct click that confirms success. Whether you are adjusting for a perfect fit or replacing a band entirely, these steps ensure your Seiko stays secure on your wrist.
Identify Your Seiko Pin Type Before Starting
Before touching any tools, you must determine which fastening system your Seiko uses. The two main types are pin-and-collar and pin-and-pipe, and each requires a slightly different approach.
Check for Removal Arrows
Flip your watch over and inspect the underside of the metal links. Look for small engraved arrows near the pin holes. These are your primary guide. If present, they indicate the exact direction to push the pin out. Never ignore or override them. Pushing against the arrow can damage the internal collar or deform the pin.
Pin-and-Collar vs Pin-and-Pipe Systems
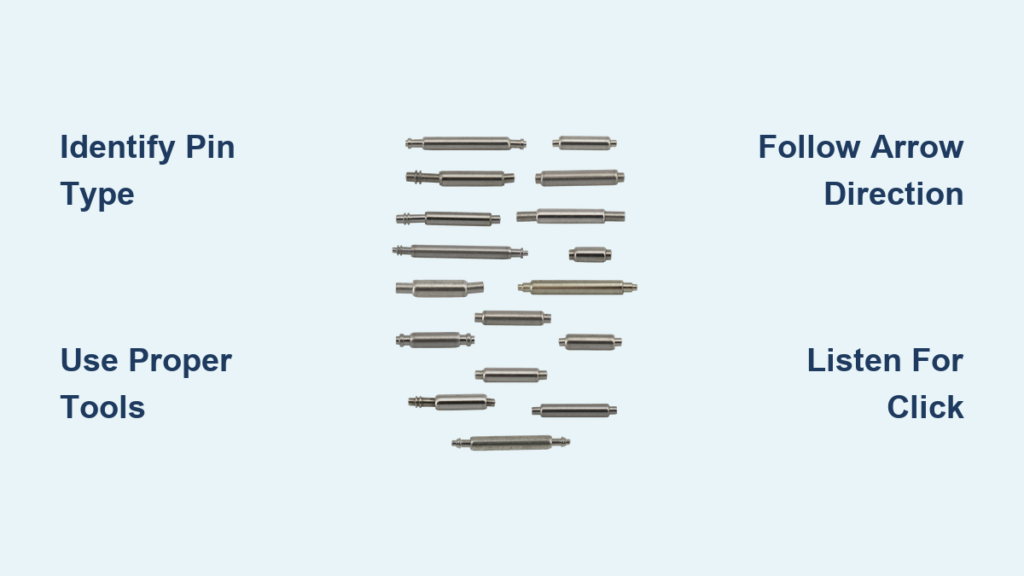
If there is no arrow, examine the pin ends to identify your system. With pin-and-collar, one end of the pin is noticeably thinner. The thin end fits into a metal collar inside the link that expands to lock it in place. This collar stays behind when the pin is removed. With pin-and-pipe, the pin passes through a hollow metal tube embedded in the link. The pipe acts as a bushing and remains in place unless dislodged.
Pro Tip: Some Seiko models use both systems. Pin-and-collar works for middle links, while pin-and-pipe appears at the clasp or case connection. Always verify per link before starting.
Gather the Right Tools for Safe Removal

Using the wrong tool is the number one cause of damage. Avoid screwdrivers, nails, or paperclips. They slip easily and scratch your watch. Instead, invest in these dedicated tools.
Essential Tools Checklist
• Pin-and-collar removal tool designed for Seiko split pins
• Pin pusher with 1.8 to 2.0 mm diameter to match standard Seiko pins
• Nylon die holder to secure the bracelet and protect the finish
• Precision tweezers with smooth jaws for handling collars and pins
• Plastic hammer for controlled taps without marring the surface
Best Value Option: An all-in-one bracelet shortener tool combines a holder, pusher, and alignment guide. This is ideal for beginners and reduces the risk of misalignment.
Why Improvised Tools Fail
User reports show a 47% success rate with screwdrivers versus 92% with proper tools. Improvised tools often slip and scratch lugs, bend pins during removal, and dislodge or lose collars. Stick with purpose-built tools to protect your investment.
Prepare Your Workspace to Prevent Lost Parts
A clean, organized setup prevents lost parts and mistakes. Seiko pins, collars, and pipes are extremely small and can vanish on the wrong surface.
Set Up a Safe Work Area
Use a flat, well-lit surface for your workspace. Lay down a white towel or light-colored tray. Tiny stainless steel components disappear on dark surfaces. Keep a magnetic mat or parts organizer nearby to store pins, collars, and links as you work.
Secure the Bracelet Properly
Place the band in a nylon die holder with the arrows facing downward. This orientation prevents scratches on polished sides, allows pins to eject freely, and keeps the band stable during tapping. Do not skip this step. A moving band increases slippage risk and misalignment.
Remove Seiko Watch Band Pins Step by Step
Now that everything is set, it is time to remove the pin. Follow these steps carefully based on your pin type.
For Pin-and-Collar Systems
Insert the pin-and-collar tool into the hole from the arrow direction. Rotate slightly until it bites into the pin shaft. Apply steady pressure or use light taps with a plastic hammer. Once the pin starts emerging, switch to tweezers to pull it the rest of the way. Listen for smooth movement. If resistance increases, stop and recheck the direction.
For Pin-and-Pipe Systems
Insert a 1.8 mm pin pusher from the side where the pin is flush or recessed. Use controlled taps to drive the pin through. The pipe should remain in place. Retrieve it only if it becomes dislodged. Keep your fingers clear. Pins can eject suddenly.
Handle Collars and Pipes Without Losing Them

These small components are critical to the system is integrity. Losing them means your band will not hold together properly.
Preserve the Collar
In pin-and-collar systems, the collar stays inside the link after pin removal. It is spring-loaded and expands to lock the pin. If it falls out during removal, use tweezers to retrieve it. Inspect for damage before reusing it.
Recover Dislodged Pipes
If the pipe comes out during pin removal, set it aside safely. You must reinsert it before installing a new band or reassembling links. Replacement parts are available from Seiko service centers or online retailers. Cost ranges from $2 to $8 per set.
Reinsert Pins Correctly for Secure Fit
Reassembly is where most DIYers fail. A loose pin can back out during wear, so get this right.
Insert Thin End First
Always start with the thinner end of the pin. This is the one that fits into the collar. Use tweezers to guide it into the hole from the correct side, which is opposite the arrow direction.
Seat with a Hard Surface
Push the pin through until it contacts the collar. Place the watch on a hard, flat surface such as glass, metal, or hardwood. Use the back of a screwdriver or punch tool to press down firmly. Apply even pressure until you hear a distinct click. The click means the collar has expanded and locked. This is your confirmation of a secure fit.
Final Inspection
Both pin ends should be flush or nearly flush with the link. No sharp edges should protrude. Gently twist and pull adjacent links. There should be minimal play. If the pin wobbles, remove it and slightly bend it with smooth-jawed pliers to increase friction, then reinsert.
Install a New Band on Your Watch Case
When attaching a new bracelet or strap to the watch case, follow this process to ensure a secure connection.
Insert the Pipe First
Using tweezers, place the metal pipe into the hole on one lug. Align the new band so its lug holes match the case holes.
Drive the Pin
Insert the pin from the side opposite the pipe. Use a pin pusher and light taps to drive it through both lugs and the pipe. Stop when the pin is flush with the lug surface. Repeat for the other side. Warning: Over-tightening can damage lugs or mushroom the pin end. Use only necessary force.
Test the Fit Before Daily Wear
After reassembly, verify everything works as intended before wearing your watch.
Perform a Pull-and-Twist Test
Manually pull and twist adjacent links. The joint should feel solid with no wobble. If loose, reseat the pin with additional pressure.
Conduct a Wear Test
Wear the watch for 3 to 7 days and monitor for pin migration, collar failure, or link misalignment. Most issues appear within the first week. Proper technique results in a 90% plus success rate.
Know When to Call a Professional
Some situations are best left to experts. Seek professional help if you cannot identify the pin type or direction, the pin is stuck despite gentle tapping, you lose a collar or pipe, your model has solid end links common on Prospex divers, or you are uncomfortable using tools near your watch.
Recommended: Visit an authorized Seiko dealer or watch repair specialist with micro-tool experience.
Model-Specific Tips for Different Seiko Watches
Different Seiko lines have unique features. Know yours before starting.
Seiko 5 Sports
Uses arrow-marked links with 1.2 mm pins. Beginner-friendly and ideal for first-time DIYers.
Prospex Divers
Models like Turtle, Samurai, and SKX may have solid end links requiring special tools. Some use pin-and-pipe at the clasp. Higher risk of damage. Proceed with caution.
Presage Models
Often include half-links for fine adjustment. Check for micro-adjustment clasps before removing full links. Polished finish requires extra care to avoid scratches.
Astron and King Seiko
Precision engineering with tight tolerances. Professional adjustment is recommended unless you have experience.
Maintain and Store Removed Components
Even if you do not plan to reuse them, keep all removed components for future adjustments or resale.
Save Links and Pins
Store in a labeled bag or container. Replacement links cost $10 to $20 if lost.
Reuse Components
Pins are reusable if not bent or mushroomed. Collars are often good for 1 to 2 reuses if undamaged. Pipes are highly durable and rarely need replacement.
Warranty Note: Self-adjustment does not void warranty unless damage occurs during the process.
Key Takeaways for Successfully Removing Seiko Watch Band Pins
Removing Seiko watch band pins does not have to be intimidating. With the right tools, a clear understanding of pin-and-collar and pin-and-pipe systems, and careful attention to removal direction and reassembly, you can achieve a professional-quality fit at home. Always follow the arrow on your bracelet. Never push against it. Use proper tools designed for this task. Work over a white tray to prevent losing small parts. Insert the thin end first during reassembly. Listen for the click that confirms secure seating. Test the fit before wearing your watch daily.
Remember these critical reminders. Follow the arrow. Listen for the click. Keep your workspace organized. Whether you own a rugged Prospex diver or a sleek Presage, a well-fitted bracelet enhances both comfort and style. Now that you know how to remove Seiko watch band pins safely, your watch will stay secure every time you wear it.
Frequently Asked Questions About Removing Seiko Watch Band Pins
What tools do I need to remove Seiko watch band pins?
You need a pin-and-collar removal tool, a pin pusher sized 1.8 to 2.0 mm, precision tweezers, a nylon die holder, and a plastic hammer. These dedicated tools reduce the risk of damage and increase your success rate significantly compared to improvised tools.
How do I know which direction to push the pin?
Look for small engraved arrows on the underside of the metal links. These arrows indicate the exact direction to push the pin out. Always follow the arrow. Never push against it, as this can damage the collar or deform the pin.
What is the difference between pin-and-collar and pin-and-pipe systems?
Pin-and-collar systems use a thin pin end that fits into a metal collar inside the link. The collar stays in the link after removal. Pin-and-pipe systems use a hollow tube that the pin passes through. The pipe remains in place unless dislodged during removal.
Can I reuse the pins and collars after removal?
Yes, pins can be reused multiple times if they are not bent or mushroomed. Collars are designed for single use but often remain functional for 1 to 2 reuses if undamaged. Pipes are highly durable and rarely need replacement.
What should I do if the pin does not click during reassembly?
If you do not hear a distinct click, the pin is not fully seated. Remove it and reinsert with the thin end first. Place the band on a hard surface and apply firm, even pressure with a punch tool until the click is heard. This confirms the collar has expanded and locked the pin in place.
Does removing the pins void my Seiko warranty?
Self-adjustment does not void your warranty unless damage occurs during the process. Seiko recommends professional adjustment but does not penalize DIY efforts. If you cause damage while attempting removal, that would not be covered under warranty.



