

If you have ever finished a run with a sore hip from a bouncing phone or a chafed waist from a poorly fitted belt, you already know that not all running belts work the same. Learning how to use a running belt correctly transforms it from a nuisance into a piece of gear you barely notice. The right setup keeps your phone, keys, gels, and water secure while letting you focus entirely on your stride.
This guide covers everything you need to know, from choosing the right belt type and positioning it on your body to packing smart, testing your setup, and troubleshooting common issues. Whether you run casual 5Ks, train for marathons, or hit the trails, these steps will help your belt work with your body instead of against it.
Pick the Right Belt Type for Your Run
Standard Belts for Short, Light Runs
A standard running belt works best when you only need to carry small essentials like a phone, keys, or a single energy gel. These slim, pocketed bands sit low-profile against your body and pair well with shorts that lack storage. They shine on short jogs, treadmill sessions, or park loops where hydration is not a concern.
Fuel and Hydration Belts for Long Distances
When your run exceeds 5 miles or the weather turns hot, a fuel and hydration belt becomes essential. These belts feature dual bottle holders (usually 4 to 6 oz flasks) and extra pockets for gels, bars, and emergency supplies. Because of the added fluid weight, fit and balance matter more than with lighter belts. Look for adjustable straps and breathable mesh backing to keep bottles stable and your skin dry.
Race Number Belts for Race Day Minimalism
Race number belts serve one primary purpose: holding your bib securely without safety pins. They are ultra-light, thin elastic bands with front clips and small loops for one or two gels or a credit card. Best suited for 5Ks and half marathons, they eliminate flapping bibs and clothing damage. Wear them at your natural waist to prevent sliding during the race.
Trail Belts for Off-Road Demands
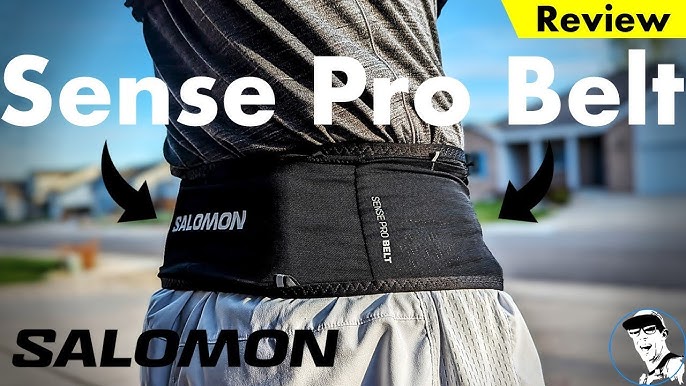
Trail runners need extra storage for weather layers, collapsible poles, and emergency fuel. Specialized trail belts, like the Salomon Sense Pro, function almost like running shorts with leg openings and targeted compartments. Key features include:
- Front and back phone pockets that lock against the skin
- Pole holders that secure collapsible sticks on the lower back
- Expandable compartments for jackets, gloves, and snacks
These belts distribute weight evenly and stay put on technical terrain, making them ideal for ultras or mountain runs.
Position Your Belt for Maximum Stability
Wear Hydration Belts at the Natural Waist
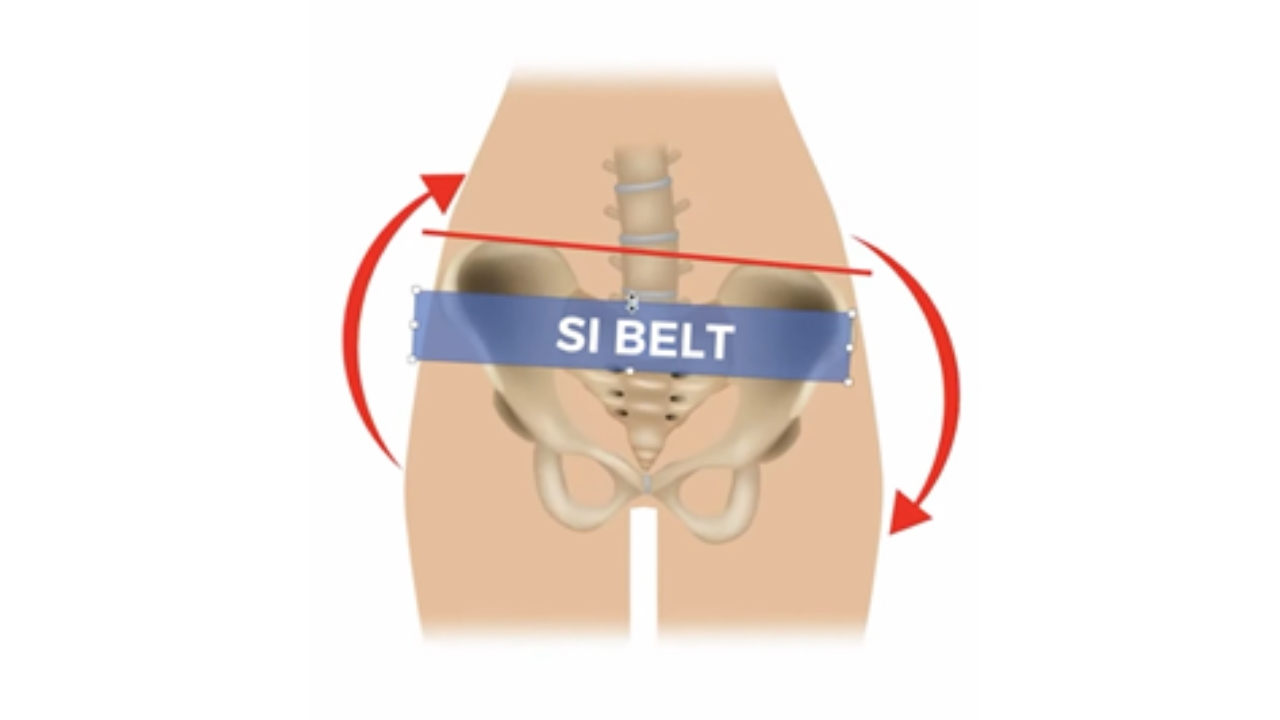
Place any belt carrying weight, especially fluids, at your natural waist, the narrowest part of your torso just above the hips. This spot has minimal muscle movement during running, which reduces bounce and slippage. Belts worn too low ride up as your glutes contract, while belts worn too high shift with spinal flexion. The natural waist acts as a locking point that keeps weight centered.
Use the Hips Only for Lightweight Belts
Standard belts carrying only small essentials can sit slightly above the hips if that feels more comfortable. With no heavy fluid load, minor movement is less disruptive. Test both waist and hip positions during a short jog. If the belt twists or slides after 30 seconds, reposition it higher toward the natural waist for better control.
Rotate the Pouch to Match Your Arm Swing
Many belts let you rotate the pouch 360 degrees. Try each position to find your best fit:
- Back: Neutral balance with the least interference to arm swing
- Side: Easier reach for gels or phone, especially for right-handed runners
- Front: Quickest access but may feel bulky or bounce if not snug
Your arm motion and torso rotation determine the ideal spot. Test each during a walk or slow jog to see what feels most natural.
Lock In the Perfect Fit
Tighten Snugly, But Not Too Tight
A running belt should feel snugger than comfortable when standing still. Once you start moving, body heat and motion cause slight loosening. If it feels loose at rest, it will shift or bounce when running. You should be able to fit one finger under the belt, no more. It must lie flat against your skin or clothing with no wrinkles or bunching, which can cause chafing.
Adjust for Clothing and Fabric Grip
Technical running shirts and shorts are often slick, making belts more likely to slide. Wearing the belt over your base layer (not under) adds friction and stability. If you are prone to chafing, choose a belt with a soft inner lining or wear a fitted shirt underneath to create a grip layer. Avoid cotton, as it retains moisture and increases friction burns.
Balance Bottles and Weight Evenly
For hydration belts, symmetry is non-negotiable. Fill both bottles equally and insert them into opposite-side holders. Uneven weight pulls the belt to one side, causing twisting and bounce. If your belt has a rear pocket, use it for lighter items like gels or a wallet. Never place a heavy phone there unless the pocket is reinforced and snug.
Pack Smart and Travel Light

Carry Only the Essentials
Overpacking turns a helpful tool into a burden. Stick to what you truly need:
- Phone (in a secure, skin-facing pocket)
- Keys (single key, not a full ring)
- One or two energy gels
- ID or cash
- Water (if no nearby aid stations)
If the belt feels heavy or bulky, remove one item. Less is more.
Prioritize Accessibility
Frequently used items should be easiest to reach. Store gels in front or side pockets, not buried in the back. If you use your phone mid-run, place it in a front-access pocket with a clear touchscreen window. Avoid deep pockets that require stopping to dig.
Test the Loaded Fit Before You Run
Never size a belt while empty. Put on all your running clothes, load the belt with your full gear, and adjust the fit. Added volume from a phone or full bottles often requires loosening the strap slightly. Then, jog in place for 30 seconds. If the belt shifts, tighten it or reposition it higher on your waist.
Test Before You Trust the Setup
Try a Home Trial First
Before hitting the road, do a quick home trial:
- Load the belt with all intended items.
- Fasten it snugly at your natural waist.
- Jog in place, twist side to side, and bend forward.
- Check for bounce, pinch points, or chafing.
Fix any issues now rather than discovering them at mile 8.
Run Short Test Sessions
Take the belt on one or two mile test runs. Pay attention to:
- Whether it slides after 10 minutes
- If bottles are easy to remove and reinsert
- Any hot spots or rubbing
Adjust tightness, placement, or packing based on feedback. Repeat until the belt feels invisible.
Simulate Race Conditions
If training for a hot or long race, test the belt in similar conditions. Heat increases sweat and loosening, so a belt that works in winter may fail in summer. Test hydration access by grabbing a bottle without slowing down.
Troubleshoot Common Belt Problems
Fix Bouncing and Sliding
If your belt bounces, try these fixes:
- Tighten the strap slightly
- Reposition to the natural waist, which is the most effective fix
- Balance the load to ensure bottles are even and pouches are not overloaded
- Check bottle fit, since some flasks rattle if not fully seated
Stop Chafing Fast
Chafing usually signals a loose belt, a wrinkle pressing into skin, or rough fabric underneath. To resolve it:
- Tighten the belt so it does not shift
- Smooth out folds and ensure flat contact
- Apply anti-chafe balm to problem areas
- Wear the belt over a fitted layer
Prevent Breathing Restriction
If the belt feels tight when breathing deeply, it is too high or too tight. Lower it to the natural waist, not the ribcage, and loosen just enough to allow full expansion. You should never feel compressed during hard efforts.
Avoid Arm Swing Interference
Bottles or pouches can clash with your arms, especially if you are a high-elbow runner. Fix this by:
- Moving bottles to the back if side placement interferes
- Rotating the pouch to the opposite side of your dominant arm
- Choosing a belt with low-profile flasks that sit closer to the body
Maintain Your Belt for Long-Term Use
Clean After Every Run
Sweat, dirt, and salt degrade elastic and cause odors. After each run, wipe down the belt with a damp cloth. For deeper cleaning, hand-wash with mild soap and air dry. Avoid bleach or machine washing, which can damage elastic and zippers.
Dry Completely Before Storing
Never toss a damp belt into a gym bag. Moisture leads to mold, odor, and stretched fabric. Hang it to dry in a well-ventilated area, away from direct sunlight, which can degrade materials over time.
Replace Worn Belts
Even durable belts lose elasticity after years of use. If the belt no longer snaps back or requires constant tightening, it is time to replace it. A worn belt will not stay put, no matter how you adjust it.
Match Your Belt to Your Running Goals

Casual Joggers: Keep It Simple
Use a basic running belt for phone and keys. Wear it at the waist or hips, depending on comfort. No need for bottles or extra pockets. Focus on a clean, lightweight design that disappears during your run.
Marathon Trainers: Optimize for Endurance
Your belt is mission-critical. Use a hydration belt with balanced bottles and gel storage. Practice fueling mid-run during training. Always wear it at the natural waist and test it on long runs to perfect timing and access.
Racers: Stick to What Is Proven
On race day, never try a new belt or setup. Use only what you have tested. For 5Ks to half marathons, a race number belt with a few gels is often enough. Pin your bib to the front, keep weight minimal, and ensure it is snug at the waist.
Trail Runners: Gear Up Smartly
Use a trail-specific belt with pole storage and room for layers. Pack a lightweight jacket, beanie, and extra fuel. Practice deploying poles mid-run to ensure smooth transitions. These belts are designed to carry more, so resist the urge to overload them.
Frequently Asked Questions About Running Belts
Where should a running belt sit on your waist?
A running belt should sit at your natural waist, the narrowest part of your torso just above the hips. This position minimizes muscle movement and prevents bouncing. Lightweight belts carrying only small items can sit slightly above the hips, but heavier hydration belts perform best at the natural waist.
How tight should a running belt be?
A running belt should feel snugger than comfortable when standing still, since it loosens slightly as you move and warm up. You should be able to fit one finger under the belt, no more. It must lie flat against your skin or clothing without wrinkles or bunching.
Can you run with a phone in a running belt?
Yes, most running belts are designed to hold a phone securely. Place the phone in a dedicated pocket that sits against your skin to prevent bouncing. Front-access pockets with touchscreen windows allow you to use your phone without removing it.
How do you stop a running belt from bouncing?
To stop bouncing, tighten the strap slightly, reposition the belt to your natural waist, and balance the load evenly. Ensure bottles are filled equally and pouches are not overloaded. If bottles rattle, check that they are fully seated in their holders.
Are running belts worth it for short runs?
Running belts are worth it if your shorts lack pockets or if you want to carry a phone, keys, or ID hands-free. For very short runs where you carry nothing, a belt may be unnecessary. However, even casual joggers benefit from the security and comfort of a well-fitted belt.
How do you clean and care for a running belt?
Wipe down your belt with a damp cloth after every run to remove sweat and dirt. For deeper cleaning, hand-wash with mild soap and air dry away from direct sunlight. Never store a damp belt in a closed bag, as moisture causes odor and material degradation.
Key Takeaways for Using a Running Belt Effectively
A running belt should feel like an extension of your body, not a distraction. Choose the right type for your distance and goals, position it at your natural waist for stability, and secure a snug fit that allows full breathing. Pack only the essentials, balance the load symmetrically, and always test your setup on short runs before committing to a long effort or race day.
Your next step: load your belt with your typical gear, jog in place for 30 seconds, and adjust until it feels invisible. That simple test is the fastest way to dial in your setup and start every run with confidence.



