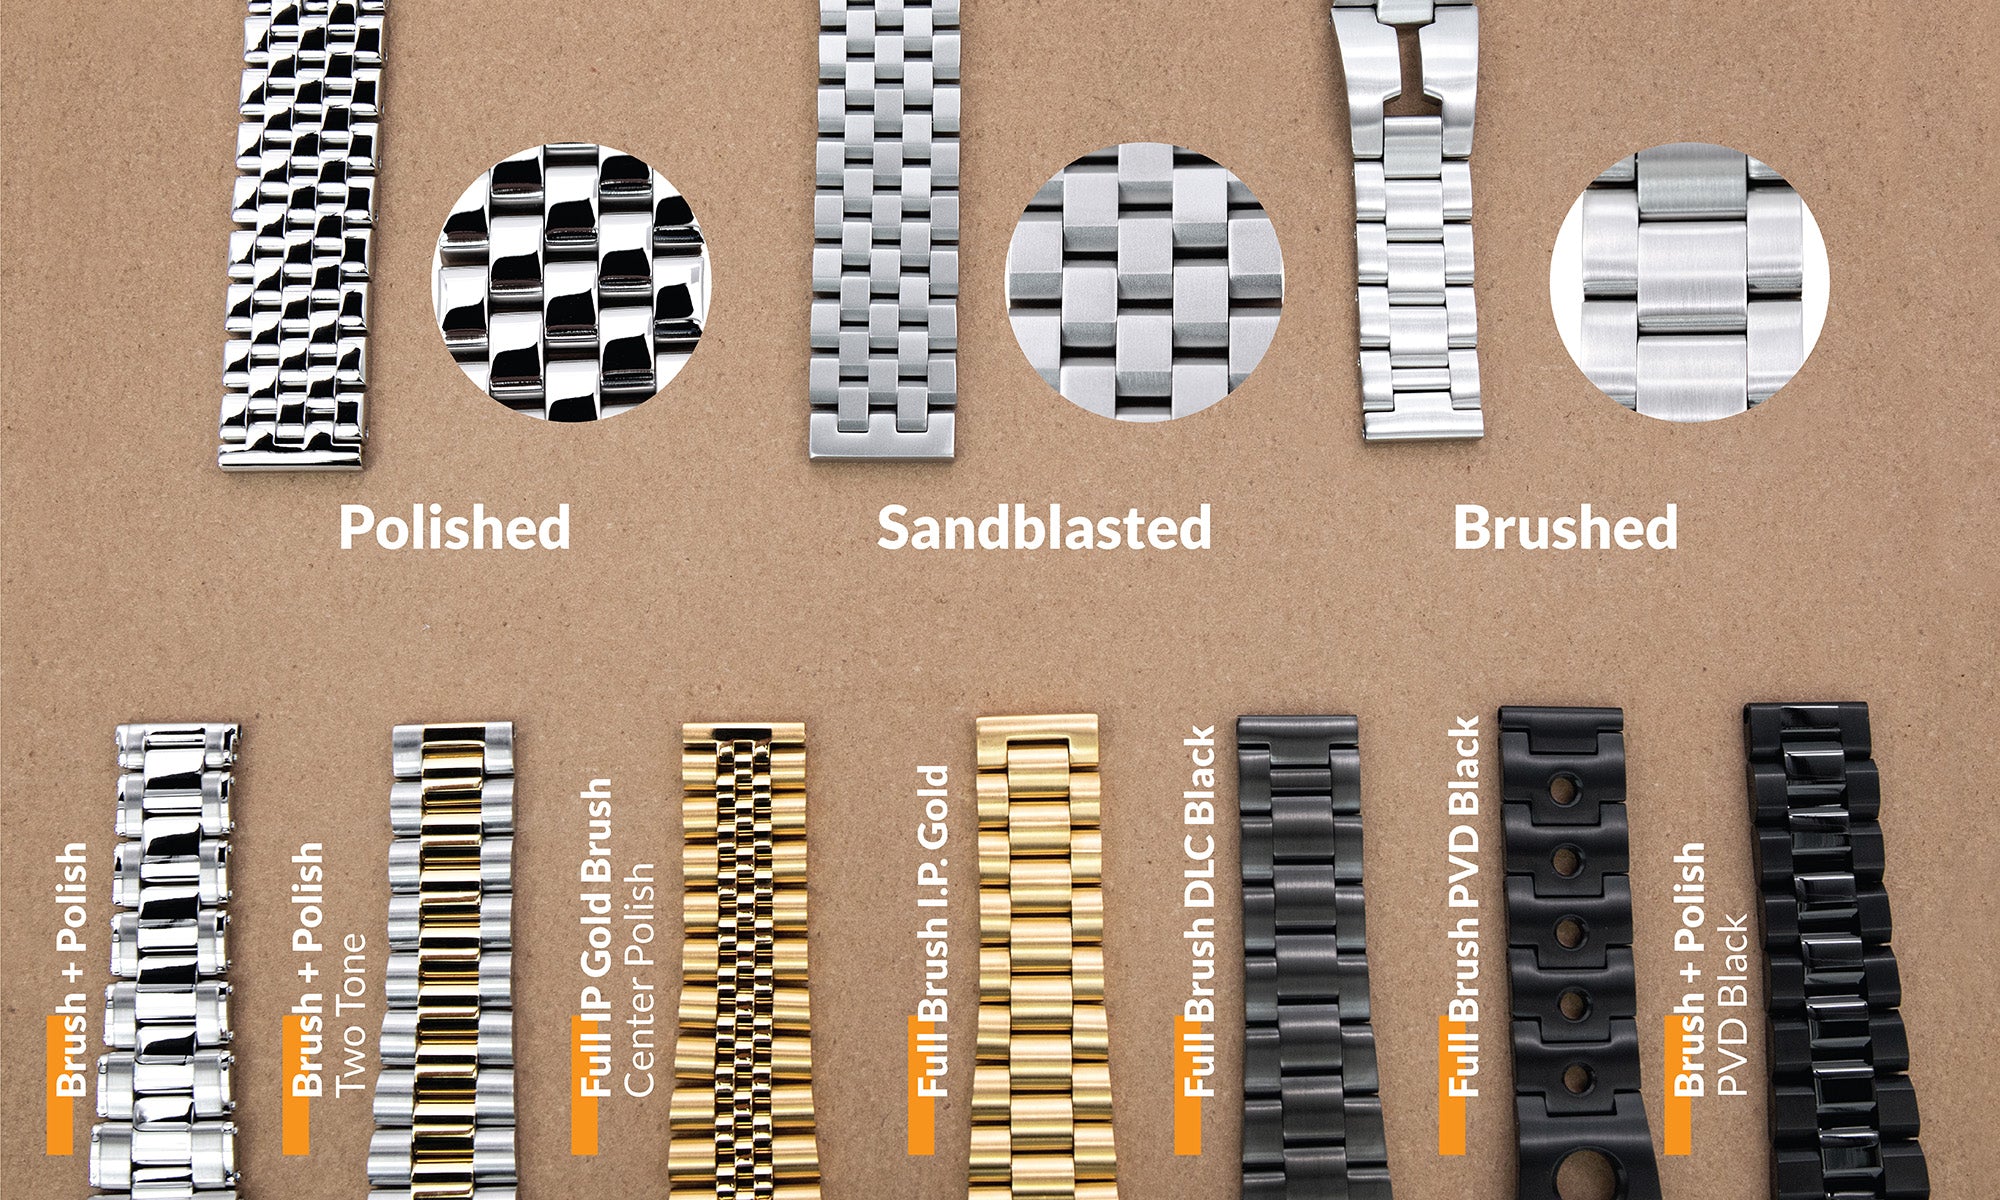
Changing a watch band secured with pins is a simple DIY task that can refresh your timepiece’s style or comfort in minutes. Whether you’re swapping a worn leather strap for a sleek metal bracelet or upgrading to a NATO band, understanding how to safely remove and replace pins is essential. This guide walks you through every step, from recognizing pin types to professional-level installation tips, so you can confidently change your watch band at home.
You’ll learn how to inspect pin condition, select the proper tools, and follow model-specific procedures without risking damage. We’ll also cover when to skip the DIY route and take your watch to a professional.
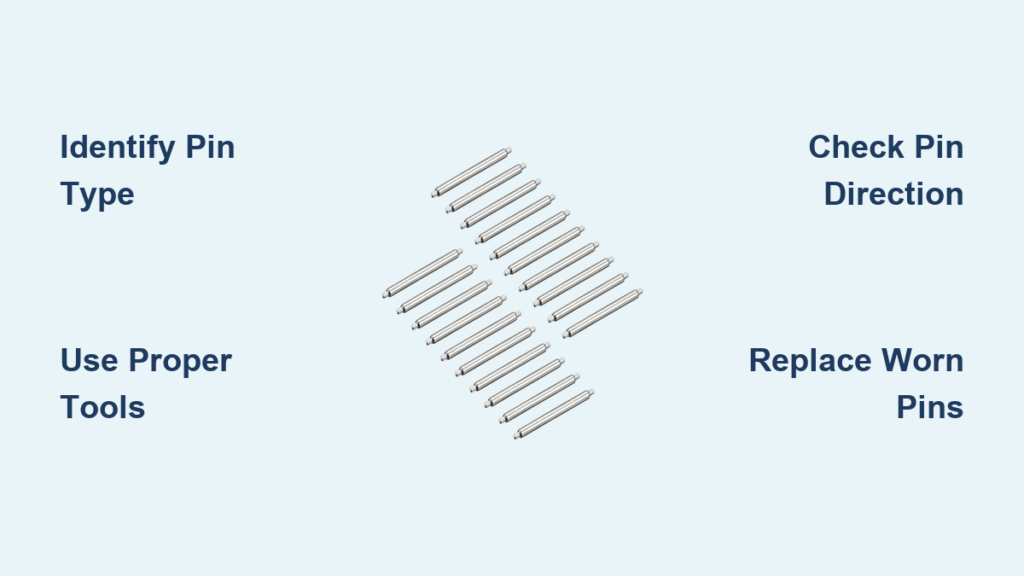
Identify Your Watch Band Pin Type
Before removing any pin, determine which type secures your band. Using the wrong method can bend pins, crack lugs, or void warranties. Each pin type has distinct visual and functional features.
Look for Visual Clues on the Lug
Examine the space between the watch lugs where the band attaches. Use a magnifier to spot telltale signs:
• Notches on the pin ends indicate spring bars
• Tiny screw heads confirm screw pins
• Arrows on the bracelet links show removal direction for friction or split pins
• No visible fasteners may signal a tool-free pushpin system
Common Pin Types and How to Spot Them
Spring bars have small notches on both ends. They compress inward and are most common on leather, rubber, and metal bands.
Friction pins are solid metal rods, slightly tapered, found in many metal bracelets like Seiko’s stock models.
Screw pins feature threaded ends visible under close inspection, often used in luxury or diver’s watches.
Split pins have a flared or bent end that expands after insertion; check for directional arrows.
Easy click pushpins require no tools and use a side lever or catch for release, common in Swatch and fashion watches.
Pro Tip: If you see a small hole or groove on one side of the pin but not the other, it’s likely a friction or split pin. Always insert or remove from the correct side to prevent damage.
Gather the Right Tools for Pin Removal

Using improper tools like pliers or paperclips risks scratching your watch or breaking the pin. Invest in precision instruments designed for watch work.
Essential Tools by Pin Type
Spring bars require a dual-ended spring bar tool (fork and pin), tweezers, and a magnifier.
Friction and split pins require a pin punch, small hammer, and bracelet holding block.
Screw pins require a precision screwdriver (1.4 to 1.8mm) and tweezers.
Easy click pushpins require no tools.
Steel pins require professional tools only.
Must-Have Accessories
A soft work mat prevents scratches and keeps parts from rolling away.
A digital caliper measures lug width and pin size accurately.
A magnifying loupe helps inspect pin condition and alignment.
Tweezers safely handle tiny pins, screws, and collars.
A spring bar storage case keeps spare pins organized and accessible.
Warning: Never use excessive force. If a pin won’t move, double-check its type and direction before proceeding.
Remove a Watch Band with Spring Bars
Spring bars are the most common and easiest to replace. With the right tool, removal takes seconds and poses minimal risk.
Compress the Spring Bar Correctly
- Place your watch face-up on a soft mat.
- Locate the spring bar notch on the side of the lug.
- Insert the fork end of the spring bar tool into the gap between the pin and lug.
- Gently press inward to compress the spring bar end.
- Hold pressure and slide the band down and out.
Key Move: Always compress the end where the notch faces outward. Forcing the wrong side can damage the lug or snap the pin.
Replace Old or Worn Spring Bars
Inspect each removed spring bar carefully:
• Does it spring back when compressed? If not, replace it
• Check for bending, rust, or deformation
• Measure length and diameter with a caliper; common sizes are 18 to 24mm long, 1.8 to 2.0mm thick
Use new spring bars whenever possible. Old ones lose tension over time, increasing the risk of band detachment.
Install a New Band with Spring Bars
A proper installation ensures your band stays secure and fits flush against the watch case.
Align and Insert the New Band
- Insert one end of the spring bar into the new band’s lug hole.
- Compress the opposite end and align it with the watch lug hole.
- Use the pin end of the tool to push the pin through while holding the band steady.
- You’ll feel a slight click as the spring expands and locks in place.
- Gently tug the band to confirm it’s secure.
- Repeat for the second side.
Pro Tip: For tight lugs, slightly bend the spring bar with pliers to match the case curve. This improves fit and reduces stress.
Change a Band with Friction Pins
Friction pins require more precision but are common on metal bracelets. Rushing this process can bend pins or damage links.
Use a Pin Punch and Hammer Safely
- Secure the watch in a bracelet holding block to prevent movement.
- Find the removal arrow on the link; this shows the direction to push.
- Position the pin punch on the thinner end of the pin.
- Tap gently with a small hammer until the pin moves.
- Continue tapping until it clears the link, then remove with tweezers.
Critical: Keep the punch perfectly aligned. Angled hits can deform the pin or crack the link.
Reinstall Friction Pins Without Damage
- Start the new pin with tweezers, ensuring it goes in from the correct side.
- Once seated, use the pin punch to tap it through.
- Stop when the pin is flush with the link; no protrusion.
- Test bracelet movement for smoothness and alignment.
Best Practice: Apply a tiny drop of watch oil to the pin before insertion for smoother operation.
Replace a Band with Screw Pins
Screw pins offer superior security and are common in dive and luxury watches. They require careful handling to avoid stripped threads.
Unscrew and Reinstall with Precision
- Place the watch face-down on a soft surface.
- Use a 1.6mm precision screwdriver on the pin’s head.
- Turn counterclockwise to loosen and remove the pin.
- Pull it out with tweezers.
- Insert the new band and align the holes.
- Thread the screw pin back in clockwise.
- Tighten firmly but do not over-torque.
Pro Tip: Apply a tiny drop of Loctite 222 (low-strength thread locker) to prevent loosening from vibration, especially on active-wear watches.
Handle Easy Click Pushpin Systems
Some brands, like Swatch, use proprietary tool-free systems. These are fast to change but require compatible bands.
Release and Lock Without Tools
- Turn the watch face-up.
- Find the side catch or lever near the lug.
- Slide or pull the catch to release the pin.
- Remove the band.
- Insert the new band’s pin into the lug.
- Push until it clicks into place.
- Return the catch to its locked position.
Note: Only use bands designed for this system. Standard straps won’t fit.
Avoid Changing Steel Pins Yourself
Steel pins are permanently fixed and not meant for DIY removal. Attempting it can destroy your watch.
Why Steel Pins Require a Professional
• They’re press-fit through lugs and often peened or flared on the ends
• Removal requires drilling or specialized extraction tools
• Risk of cracking lugs or deforming the case is extremely high
• Common in Rolex, Omega, and other high-end models
Warning: DIY attempts often result in costly repairs or permanent damage. Always take steel pin watches to an authorized service center.
Install a NATO Band Without Removing Pins
NATO straps are quick to install and don’t require pin removal, making them ideal for beginners.
Thread the NATO Strap Correctly
- Remove the old band completely.
- Thread the long end of the NATO through the bottom lug (closest to the clasp) from back to front.
- Pull it over the watch and through the top lug from front to back.
- Pass it under the watch and through any keepers.
- Adjust length so excess lies flat.
- Secure the short end through the remaining keepers.
Benefit: NATO bands add safety. One lug can fail, and the watch stays on your wrist.
Reinsert Pins Without Misalignment
Whether replacing friction or split pins, alignment is critical for a secure, smooth fit.
Follow the Original Pin Orientation
Split pins have a flared end that should face outward after installation.
Friction pins are tapered; insert from the thicker to thinner side unless arrows indicate otherwise.
Use tweezers to start the pin, then switch to a punch for final insertion.
Ensure the pin is flush. Protruding ends can scratch your wrist.
Pro Tip: Mark the outward side of the pin with a dot of paint before removal to avoid confusion.
Adjust Metal Bands Without Pin Removal
Some metal bands allow fine-tuning without removing links or pins.
Use Micro-Adjustment Features
Fold-over clasps have small levers or slots to shift the band slightly tighter or looser.
Mesh bands allow sliding the clasp along rails and locking it in place.
Solid bands with grooves can be unlocked, repositioned, and relocked.
Benefit: No tools needed. Ideal for temperature or activity-based fit changes.
Avoid Common Pin Replacement Mistakes
Even experienced users make errors that compromise safety or damage the watch.
Top Mistakes and How to Prevent Them
Using pliers instead of proper tools risks scratching or crushing pins. Use a spring bar tool or pin punch instead.
Ignoring pin direction leads to misalignment or broken links. Always follow removal arrows.
Reusing old spring bars can fail unexpectedly. Replace every 1 to 2 years.
Working in poor light increases risk of losing parts. Use a magnifier and bright lamp.
Over-tightening screw pins strips threads. Tighten until snug, not forced.
Pro Tip: Lay out all tools and parts before starting. Create a clean, distraction-free workspace.
Know When to See a Watchmaker
Not all band changes belong in your home workshop. Some watches demand professional expertise.
DIY vs. Professional: When to Call a Pro
DIY is safe for spring bar and screw pin changes, affordable or mid-range watches, and users with proper tools and good eyesight.
See a professional if your watch has steel pins or peened fasteners, is a luxury vintage or collectible model, pins are corroded bent or stuck, you’re unsure of the pin type, or the lugs are thin or delicate.
Recommendation: For watches worth over $500 or those with non-standard lugs, professional service preserves value and safety.
Maintain Pins for Longevity and Safety
Regular care prevents failures and keeps your watch secure on your wrist.
Inspect and Replace Pins Proactively
Check pins every 6 to 12 months for wear, corrosion, or bending.
Replace spring bars every 1 to 2 years, even if they look fine.
Store spare pins in a labeled case.
Keep tools clean and organized.
Avoid water exposure during pin work to prevent internal rust.
Expert Note: A failed pin can cause your watch to fall off, especially during activity. Prevention is cheaper than repair.
Frequently Asked Questions About Changing Watch Bands with Pins
What tools do I need to change a watch band with pins?
You need a spring bar tool for compression-style pins, a pin punch and hammer for friction pins, precision screwdrivers for screw pins, and basic accessories like tweezers, a magnifier, and a soft work mat. The exact tools depend on your pin type.
Can I change my watch band without special tools?
For easy click pushpin systems used by brands like Swatch, no tools are required. For spring bars, friction pins, and screw pins, using proper tools is essential to avoid damaging your watch. Attempting removal with improvised tools like paperclips risks scratching the case or breaking the pin.
How do I know if my watch uses spring bars or friction pins?
Examine the lug area with a magnifier. Spring bars have small notches on the ends and compress when pressed. Friction pins are solid rods, slightly tapered, and often show removal arrows on bracelet links. Spring bars are far more common in casual and dress watches.
Can I reuse old spring bars when changing my watch band?
It’s not recommended. Spring bars lose tension over time and may fail unexpectedly. Always inspect removed spring bars for wear, bending, or corrosion. Replace them with new ones of the same size for safety.
What happens if I try to remove steel pins at home?
Steel pins are press-fit and often peened or flared at the ends. Attempting DIY removal typically cracks the lugs or damages the case. This applies to many Rolex, Omega, and high-end Swiss watches. Always seek professional help.
How often should I replace watch band pins?
Inspect pins every 6 to 12 months. Replace spring bars every 1 to 2 years regardless of appearance. Friction and screw pins last longer but should be replaced if showing signs of wear, corrosion, or damage.
Key Takeaways for Changing Your Watch Band with Pins
Changing a watch band with pins is a simple, rewarding skill that lets you customize your timepiece with confidence. By identifying the pin type, using the right tools, and following precise steps, you can complete most swaps at home in under 10 minutes. Spring bars are the most common and easiest to handle with a fork tool. Friction and split pins require patience and proper punch technique. Screw pins need careful threading and light thread locker for security. Remember to always check pin direction before removal and replace worn spring bars proactively. When in doubt, especially with steel pins or luxury watches, seek professional help. With proper care, your watch will stay secure, stylish, and ready for any occasion.


