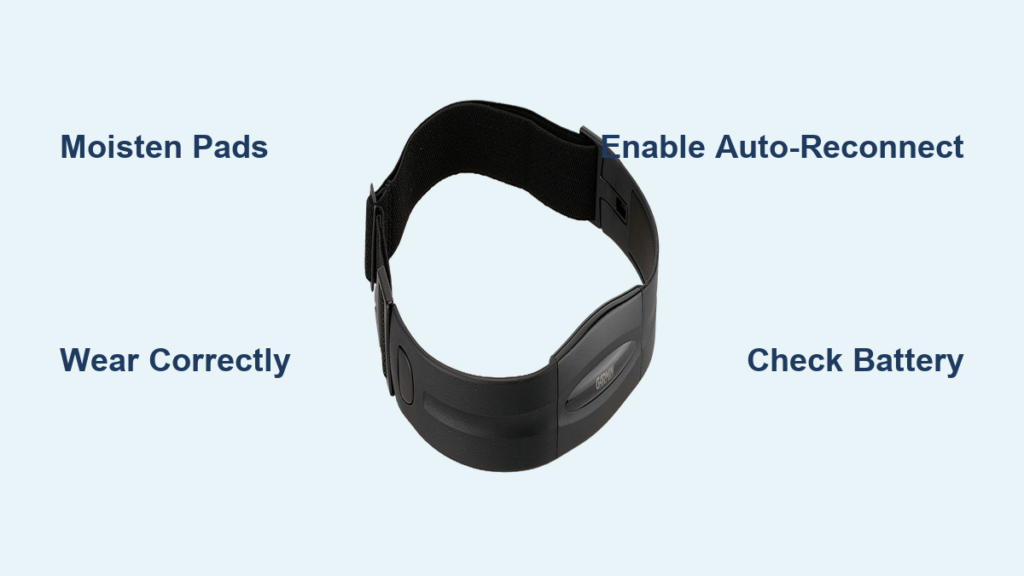
You’ve just unboxed your new Garmin chest strap, eager to track your heart rate with precision during workouts, only to find it won’t connect. Don’t worry: pairing a Garmin chest strap with your watch is simple when you know the steps. Whether you’re using an HRM-Pro, HRM-Dual, or even a compatible third-party model like the Polar H10, this guide walks you through how to pair a Garmin chest strap with your watch correctly and reliably.
Many users struggle not because the process is complex, but because they skip essential prep steps like moistening the sensors or enabling auto-discovery. Inconsistent signals, failed pairing attempts, and missing heart rate data often stem from small oversights. This guide fixes that. You’ll learn how to activate the strap, navigate your watch’s sensor menu, and troubleshoot common issues so you can focus on training, not tech glitches.
By the end, you’ll know how to pair once and enjoy seamless reconnections every time.
Activate the Chest Strap Properly
Before your watch can detect the chest strap, it must be powered on. Unlike smartwatches, Garmin HRMs don’t have power buttons. They activate automatically when conditions are right.
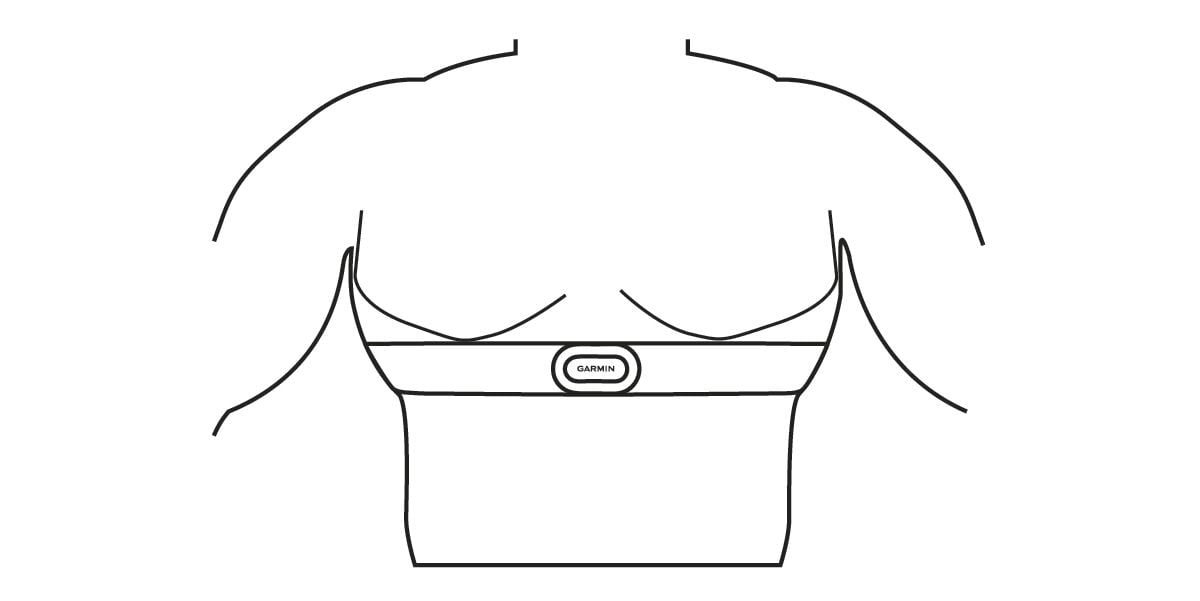
Wear Strap Above the Rib Cage
Position the strap snugly just below the pectoral muscles, centered on the sternum. This placement aligns the electrodes over the heart for optimal signal detection. If the strap sits too high or too low, the watch may fail to read data even if paired.
Ensure the sensor module faces inward and isn’t twisted. Flip it over if the text is upside down when viewed from the outside.
Moisten Electrode Pads
Dry skin blocks electrical signals. Lightly wet the two rubber sensor pads on the inside of the strap with water. No sweat means no signal at first. Even in humid conditions, pre-moistening ensures immediate activation.
Pro Tip: Keep a small spray bottle handy for indoor workouts. A quick mist prevents delayed pairing during early exercise stages.
Once worn and moistened, the chest strap powers on within seconds. You’ll know it’s active when the LED flashes if equipped or when your watch detects it.
Access Sensor Menu on Your Watch
With the strap active, turn to your Garmin watch and begin the pairing process. The exact path varies slightly by model, but the logic remains consistent across devices.
Press Main Button to Open Menu
On most Garmin watches (Forerunner, Fenix, Epix, Vivoactive), press the bottom-left button to access the home screen or main menu. On touchscreen models like the Venu or Vivoactive 4, long-press the side button or swipe up from the watch face.
From here, navigate to Settings. This is where device-level controls live, including sensor management.
Go to Sensors & Accessories
Scroll down and tap Sensors & Accessories (or just Sensors on older models). This section manages all external devices: heart rate straps, cycling power meters, foot pods, and more.
If you’ve paired sensors before, you’ll see them listed here. If not, the screen may show “No sensors connected” or a blank list.
Start Pairing a New Heart Rate Sensor
Now initiate the search for your chest strap. The watch will scan for nearby ANT+ and Bluetooth devices.
Select Add New Sensor
Tap Add New or Connect New Sensor. A list of sensor types appears: Heart Rate, Cycling Speed, Cadence, and more.
Choose Heart Rate or External Heart Rate, depending on your model. Your watch now begins scanning for available transmitters.
Visual Cue: Look for a spinning icon or “Searching…” message. Scanning takes 10 to 30 seconds.
Pick Your Chest Strap from List
When the device appears (e.g., “HRM-Pro,” “HRM-Tri,” or “Polar H10”), select it. Some watches prompt confirmation; others connect automatically.
Once paired, the watch displays a success message. The sensor now appears under Connected Sensors or Paired Devices.
Note: If multiple straps are nearby (e.g., in a gym), double-check the name to avoid pairing with someone else’s device.
Model-Specific Pairing Steps
While the general flow applies to most watches, interface differences exist. Here’s how to pair on popular models.
For Vivoactive 4 and Venu Series
- Long-press the side button.
- Tap Settings → Sensors → Add New.
- Choose Heart Rate.
- Wait for detection and select your strap.
Touchscreen gestures make navigation faster, but ensure fingers are dry to prevent mis-taps.
For Forerunner 245, 255, 945, 955
- Press Menu.
- Go to Settings → Sensors & Accessories → Add New.
- Select External Heart Rate.
- Confirm pairing when device appears.
These models support both ANT+ and Bluetooth, so dual-protocol straps like the HRM-Dual connect seamlessly.
For Fenix 6/7 and Epix Gen 2
- Press Start button.
- Navigate to Settings → Sensors & Accessories → Add New.
- Choose Heart Rate Sensor.
- Select detected device.
Fenix and Epix watches often pair faster due to stronger radio receivers and dual-band support.
Enable Auto-Reconnect for Future Workouts
Manually pairing before every workout gets tedious. Fortunately, Garmin watches support auto-discovery so your strap reconnects automatically when you start an activity.
Turn On Auto Discover Mode
Go to Settings → Sensors & Accessories → Auto Discover. Toggle it On.
With this enabled, your watch scans for known sensors whenever you begin a workout. As long as the chest strap is worn and active, connection happens in seconds.
Time Saver: No need to open menus. Just press Start on your run or cycle profile. The heart rate data appears automatically.
Manually Reconnect if Needed
If auto-discovery fails, return to Sensors & Accessories. Find the paired strap in the list and tap it to reconnect.
This is useful if the strap was previously connected to another device like a phone or bike computer.
Confirm Compatibility and Signal Type
Not all chest straps work the same way. Ensure yours is compatible and understand its connectivity limits.
Check Supported Models
Garmin HRMs like the HRM-Pro, HRM-Tri, and HRM-Dual support both ANT+ and Bluetooth Low Energy (BLE). This allows simultaneous connection to your watch and smartphone apps like Strava or TrainingPeaks.
Older models like the basic HRM-Heart Rate Monitor use only ANT+, limiting multi-device use.
Use Polar H10 with Garmin Watches
The Polar H10 is not a Garmin product but pairs flawlessly via ANT+ or BLE. It offers one key advantage: 120 hours of onboard storage. If you train without your watch (e.g., lifting weights), the H10 stores heart rate data and syncs later.
Ideal For: Users who remove their watch mid-workout but still want full HR tracking.
Optimize Signal for Reliable Readings

Even a successfully paired strap can deliver spotty data if setup isn’t right. Follow these steps to maintain a strong, uninterrupted signal.
Fit Strap Snugly Against Skin
Too loose? The strap bounces, causing signal drops. Too tight? Uncomfortable and may restrict breathing.
Aim for firm contact like a snug T-shirt without digging into the ribs. Adjust after putting it on. Movement during exercise can loosen it.
Avoid Wearing Over Clothing
Fabric blocks conductivity. Always wear the strap directly against the skin. Moisture-wicking athletic shirts are fine over the strap, but never between the sensors and skin.
Clean After Each Use
Sweat buildup corrodes electrodes over time. Rinse the sensor module with fresh water after intense sessions. Let it air dry before storage.
Warning: Never machine wash the strap. Hand wash only.
Replace Battery and Maintain Longevity
A failing battery causes pairing issues and random disconnects. Most Garmin HRMs use a CR2032 coin cell that lasts 300 to 400 hours.
Recognize Low Battery Signs
Watch for these indicators of a dying battery:
• Delayed or failed pairing
• Intermittent heart rate display
• Watch shows “Sensor Not Found” despite proper wear
If you notice these, replace the battery.
Remove and Replace CR2032
- Slide the sensor module out of the strap.
- Use a coin or flat tool to open the back cover.
- Remove old battery and insert new one (positive side up).
- Reassemble and test.
Pro Tip: Label spares with purchase date. CR2032 cells last 5 to 10 years unopened.
Troubleshoot Common Pairing Issues
Even with perfect prep, problems happen. Use this checklist to fix them fast.
Chest Strap Not Detected
Cause: Strap not powered on.
Fix: Wear it with moistened pads. Wait 10 seconds. Try again.
Cause: Interference from nearby electronics.
Fix: Move away from TVs, treadmills, or Bluetooth speakers.
Pairing Fails Repeatedly
Cause: Outdated firmware.
Fix: Connect watch to Garmin Express (PC/Mac) or Garmin Connect app (mobile) and install updates.
Cause: Sensor already paired to another device.
Fix: Reset the chest strap by removing and reinserting the battery. Then retry pairing.
Inconsistent Heart Rate Readings
Cause: Dry or dirty electrodes.
Fix: Remoisten pads and clean with damp cloth.
Cause: Poor fit or movement.
Fix: Retighten and reposition. Avoid loose-fitting shirts.
Watch Shows “Searching…” Indefinitely
Cause: Watch stuck in scan mode.
Fix: Exit sensor menu and restart pairing.
Cause: Full sensor list.
Fix: Delete unused sensors under Sensors & Accessories to free memory.
Choose the Right Strap for Your Workouts
Different activities benefit from different features. Pick the best chest strap for your training style.
HIIT and Weight Training
Opt for Polar H10 if you set your watch aside during lifts. Its onboard memory captures every beat, syncing later.
Garmin HRMs transmit only in real time. So if the watch is out of range, data is lost.
Running and Cycling
Use HRM-Pro or HRM-Dual for accurate zone tracking and VO2 max estimates. These also support running dynamics when paired with compatible watches.
Triathletes and Multisport Athletes
HRM-Tri is built for transitions. It pairs quickly, survives swim sessions, and connects via both ANT+ and Bluetooth. This is ideal for syncing with bike computers and watches simultaneously.
Frequently Asked Questions About Pairing Garmin Chest Straps
Why won’t my Garmin watch detect the chest strap?
The most common reason is that the strap isn’t powered on. Garmin chest straps activate automatically when worn against moist skin. Ensure you’re wearing the strap correctly and that the electrode pads are lightly wet. If the problem persists, check for interference from nearby electronics or try moving away from other wireless devices.
Can I use a Polar H10 with my Garmin watch?
Yes, the Polar H10 is fully compatible with Garmin watches via ANT+ or Bluetooth. It pairs just like a Garmin-branded chest strap and offers the added benefit of 120 hours of onboard memory for recording heart rate data when your watch is out of range.
How do I know if my chest strap is paired successfully?
Your Garmin watch will display a confirmation message when pairing completes. The sensor will also appear in the Sensors & Accessories menu under Connected Sensors. During workouts, you should see live heart rate data displayed on your watch face.
Why does my heart rate reading disappear during workouts?
This usually happens due to poor strap fit, dry electrodes, or the watch being out of range. Tighten the strap, remoisten the sensor pads, and ensure your watch remains within 10 meters (33 feet) of the chest strap during activity.
Do I need to pair my chest strap before every workout?
Not necessarily. If Auto Discover is enabled in your watch settings, the chest strap will reconnect automatically when you start an activity. However, it’s good practice to verify the connection before beginning your workout to ensure data capture from the start.
How long does the battery last in a Garmin chest strap?
Most Garmin HRMs use a CR2032 coin cell that provides approximately 300 to 400 hours of use. Actual lifespan depends on usage frequency and conditions. Signs of low battery include delayed pairing, intermittent connection, and random disconnects.
Key Takeaways for Pairing Your Garmin Chest Strap
Pairing a Garmin chest strap with your watch takes less than two minutes when done right. Activate the strap with skin contact and moisture, navigate to Sensors & Accessories, and select your device. Enable Auto Discover for hassle-free future use.
Remember to position the strap just above the rib cage, centered on the sternum, and keep the electrode pads moistened for consistent signal quality. Clean the strap after each use and replace the CR2032 battery when needed to prevent connection issues.
With proper care and troubleshooting, your chest strap delivers accurate heart rate data across every training session. No guesswork, no gaps. Just reliable performance when you need it most.


