You just unboxed your new Rolex, but the bracelet doesn’t fit quite right. Too loose, and it wobbles with every movement. Too tight, and it leaves marks after hours of wear. The good news? Rolex engineered its bracelets for precise, long-term comfort, and you can adjust them safely at home. Whether you’re dealing with a Submariner, Datejust, or Day-Date, this guide shows you exactly how to adjust a rolex watch band using built-in systems like Easylink and Glidelock, or through permanent link removal.
You’ll learn the right tools, model-specific details, and pro techniques to achieve a perfect fit without damaging your investment. No guesswork, no vague advice. Just actionable, step-by-step methods backed by Rolex engineering standards.
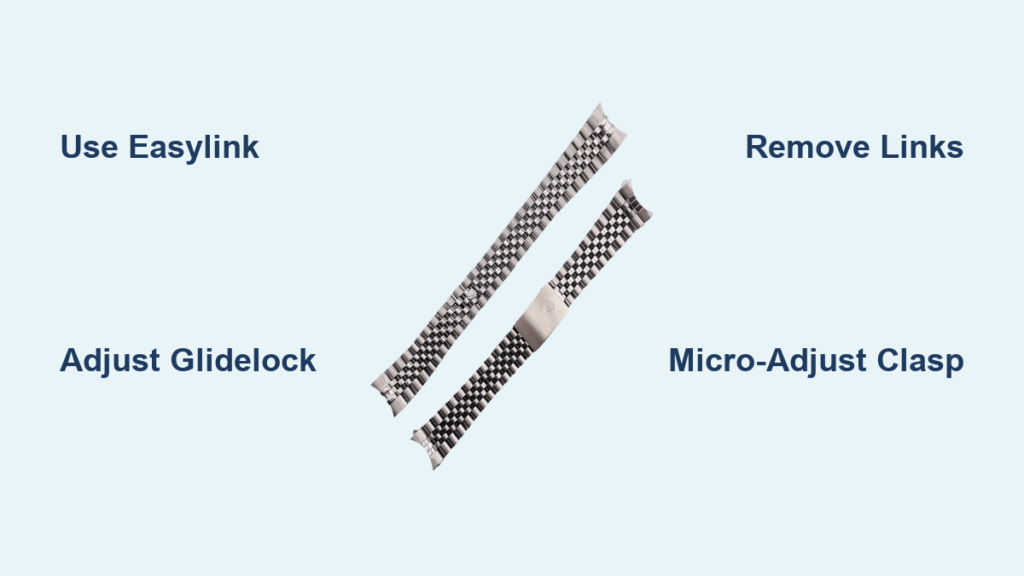
Use Built-In Micro-Adjustment Systems
Rolex includes tool-free mechanisms that let you fine-tune your bracelet on the fly. These systems are designed for daily use and do not void warranty when operated correctly. Mastering them is the first step to all-day comfort.
Activate the Easylink 5 mm Extension
The Easylink system adds or removes 5 mm of length with a single motion. Ideal for temperature changes or wearing the watch over clothing. It’s available on models like the GMT-Master II, Datejust, Sky-Dweller, and newer Daytonas.
To extend (loosen):
- Fully open the deployment clasp.
- Hold the watch case steady and gently pull the bracelet away from the clasp.
- The internal latch releases, extending the final link by 5 mm.
- Close the clasp.
To retract (tighten):
- Open the clasp and rotate the extended link so it lies flat on its back.
- Fold it over the central bar until you hear a distinct click.
- Close the clasp securely.
Pro Tip: On hot days, use your middle finger to hook the bracelet while holding the clasp sides with your thumb and index. This one-motion technique lets you release or re-engage in seconds.
Note: Easylink is not available on Submariner models. Those use Glidelock or Glide Clasp instead.
Adjust with the Glidelock System
Found on pre-2020 Submariners, Sea-Dwellers, and Deepsea models, the Glidelock clasp allows tool-free adjustments from 2 mm to 20 mm in 2 mm increments. Perfect for wearing over a wetsuit.
Steps:
- Open the clasp fully to expose the toothed track.
- Pull the bracelet downward to unlock the mechanism (you’ll feel a click).
- Slide the bracelet forward to shorten or backward to lengthen. Each tooth equals 2 mm.
- Pull the bracelet upward until it clicks, locking it in place.
- Fold and secure the clasp.
Key Benefit: Maintains water resistance and allows precise, granular fit changes without tools.
Operate the Glide Clasp (2020+ Submariner)
Newer Submariner models like the 126610LV “Starbucks” replaced Glidelock with the Glide Clasp. A simpler sliding mechanism for quick fit changes over swimwear or sleeves.
How to use:
- Press the side of the clasp to release the latch.
- Slide the clasp up or down to adjust fit.
- Release the latch and fold the clasp shut.
Note: Unlike Glidelock, Glide Clasp doesn’t offer measurable increments. Fit is adjusted by feel.
Open the Half-Link Mechanism
Some Oyster bracelets include a half-link feature near the clasp, providing 2 to 3 mm of extra space. It’s distinct from Easylink and often overlooked.
To open:
- Grip the clasp and pull the lower portion of the clasp toward you.
- It will disengage and extend slightly.
To close:
- Fold the extended section back into alignment.
- Press firmly until you hear a click.
- Ensure the clasp latches completely.
Best Use Case: Fine-tuning fit after permanent resizing.
Adjust the Micro-Adjustment Clasp
Newer Datejust 41 and some Jubilee models feature a micro-adjustment system inside the clasp. A movable center pin shifts laterally to fine-tune fit in 1 to 2 mm clicks.
Steps:
- Locate the tiny indentations on the sides of the clasp.
- Insert a spring bar tool or thin screwdriver.
- Push the center pin toward the center for tighter fit, toward the edge for looser fit.
- Listen for audible clicks confirming lock position.
Pro Strategy: Combine with Easylink. Use Easylink for major changes, then micro-adjust for final precision.
Fine-Tune with Clasp Groove Adjustment
All major Rolex bracelets allow minor fit tuning by repositioning the spring bar within internal grooves on the clasp arm.
How to adjust:
- Open the clasp fully.
- Use a spring bar tool to push the spring bar out of its current groove.
- Reinsert into a new position. Forward (toward buckle) equals tighter, backward equals looser.
- Test the closure and ensure secure latch.
Ideal For: Final tweaks after permanent link removal.
Remove or Add Links Permanently

When dynamic adjustments aren’t enough, you’ll need to remove or add links to achieve the correct baseline fit. This is necessary if the bracelet is significantly too large or small.
Determine How Many Links to Remove
Most owners remove 1 to 3 links. To decide, try on the watch and note where the clasp sits. If it’s on the last hole, you likely need to shorten. Remove links symmetrically when possible, such as removing 2 from one side and 1 from the other.
Note: Removing too many links can unbalance the bracelet. Never remove more than 3 to 4 unless professionally advised.
Gather the Right Tools
Using improper tools risks stripped screws or scratched finishes. Here’s what you need:
• Precision screwdriver: Remove link screws with hollow-ground tip. Oyster uses 1.5 to 1.6 mm, Jubilee uses 1.2 to 1.3 mm.
• Tweezers (non-magnetic): Handle tiny screws. Bergeon 7825 recommended.
• Spring bar tool: Remove bracelet from case. 1.8 mm or adjustable.
• Magnifying loupe (5x to 10x): Inspect screw alignment. Essential for precision.
• Soft work mat: Prevent scratches. Felt or rubberized surface.
Critical Tip: Use hollow-ground screwdriver tips. They seat securely in the screw slot and prevent cam-out.
Remove Links Step by Step
Follow this sequence for screw-type links:
- Prepare the watch: Place face-down on a soft mat. Optional: Remove bracelet using a spring bar tool for better access.
- Identify target links: Start with outer links for symmetry. Mark which side has more links to maintain balance.
- Unscrew the link bolts: Insert the correct-sized screwdriver. Turn counterclockwise. Do not force. If screws are tight, warm the bracelet with a hairdryer for 10 to 15 seconds to soften factory threadlocker.
- Extract and store screws: Use tweezers to remove screws. Place in a labeled container. Don’t lose them.
- Separate the links: Slide the link out once screws are removed. Repeat as needed.
- Reassemble the bracelet: Reconnect remaining links. Insert screws and tighten just enough to secure. Do not over-tighten.
- Verify security: Check all screws are flush. Ensure bracelet moves smoothly and clasp functions properly.
Warning: Over-tightening can strip threads or damage link shoulders.
Reapply Threadlocker (Recommended)
Factory-assembled Rolexes use threadlocker to prevent loosening. Reapply to maintain integrity.
Steps:
- Dip the screw tip into Loctite 248 (medium strength, removable).
- Insert and tighten.
- Wipe off excess with a lint-free cloth.
Avoid: High-strength adhesives. They can make future adjustments difficult.
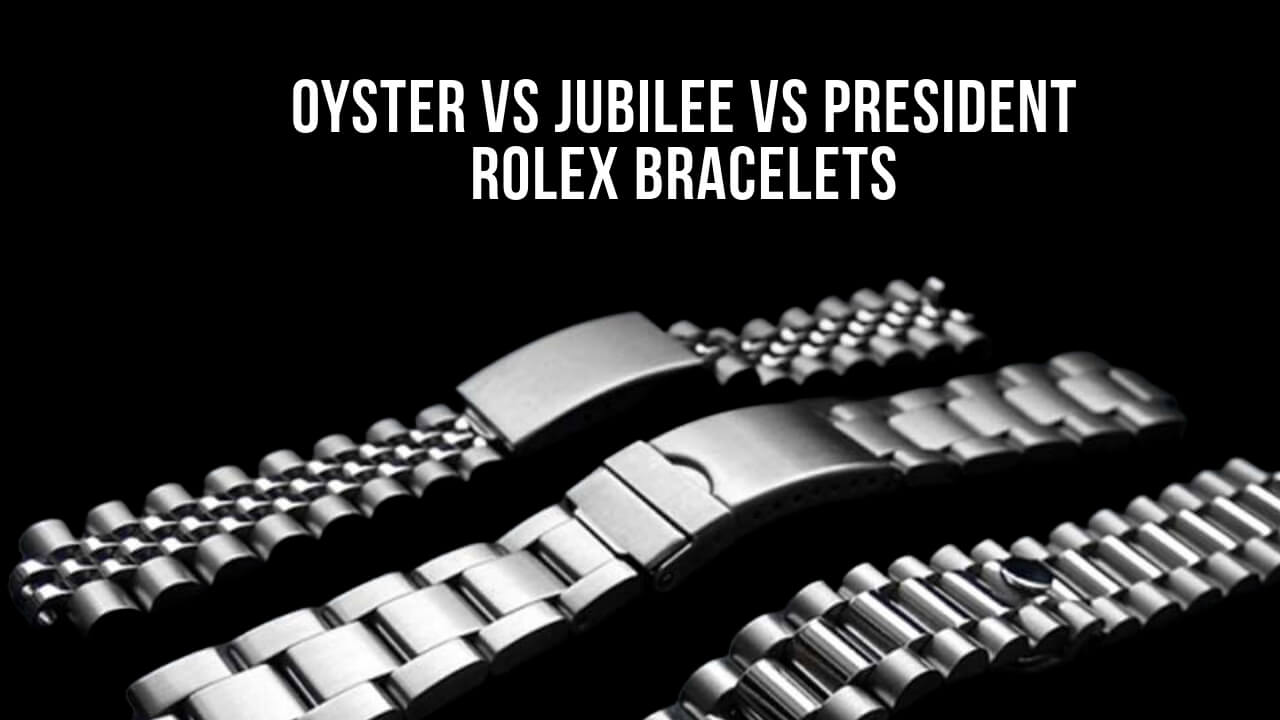
Know Your Bracelet Type and Model Rules
Not all Rolex bracelets adjust the same way. Here’s how the main types differ.
Oyster Bracelet Adjustments
Used on Submariner, Daytona, GMT-Master II, and Explorer.
• Features: Three-piece flat solid links
• Adjustment options: Easylink (most models), Glidelock (pre-2020 Submariner), Glide Clasp (2020+ Submariner), half-link or clasp groove, screw resizing
• Screw size: 1.6 mm
• Durability: High. Tolerates frequent adjustments.
Best For: Tool use and regular resizing.
Jubilee Bracelet Adjustments
Found on Datejust, Day-Date, Sky-Dweller.
• Features: Five-piece semi-circular links
• Adjustment options: Micro-adjustment (newer models), clasp groove, screw resizing
• Screw size: 1.2 to 1.3 mm
• Durability: Moderate. More delicate than Oyster.
Caution: Requires extra care. Links are smaller and more prone to scratches.
President Bracelet Adjustments
Exclusive to Day-Date and Pearlmaster.
• Features: Three-piece semi-circular, closed-end
• Adjustment options: Clasp groove, screw resizing
• Screw size: 1.5 to 1.6 mm
• Durability: High, but finish scratches easily.
Tip: Avoid tool marks. Use soft mats and precise tools.
Handle Oysterquartz Models Differently
Vintage Oysterquartz models like reference 17014 use pin-based links, not screws.
• Adjustment: Requires a pin remover or drift punch.
• Not compatible with standard spring bar tools.
• Risk: Pins can bend or snap if forced.
Recommendation: Seek professional help unless experienced.
Avoid Common DIY Mistakes
Even experienced owners make errors. Here’s how to avoid them.
Prevent Stripped Screws
The number one DIY failure is using the wrong screwdriver.
• Cause: Ill-fitting tips cam out and damage screw slots.
• Fix: Use hollow-ground precision screwdrivers. They lock into the screw head.
Pro Tip: Test fit the screwdriver before applying pressure.
Don’t Lose Small Parts
Screws and pins are tiny and easily lost.
• Solution: Work over a tray or soft mat with edges.
• Store screws in a labeled pouch for future use or resale.
Avoid Asymmetrical Resizing
Removing all links from one side unbalances the bracelet.
• Best practice: Remove symmetrically. For example, 2 from one side, 1 from the other.
Prevent Scratches
Delicate finishes (especially on President and Jubilee) show tool marks.
• Use non-marring tools.
• Work slowly and apply even pressure.
When to See a Professional
Some situations call for expert hands.
Visit a Rolex Service Center If:
• You lack proper tools or experience.
• Adjusting vintage, gold, or high-value models.
• Screws appear glued or excessively tight.
• You’re unsure about pin-based systems.
Good News: Many authorized dealers resize bracelets free of charge at time of purchase.
Preserve Warranty and Value
Your adjustment choices affect long-term service eligibility.
Built-In Systems Are Safe
Easylink, Glidelock, Glide Clasp, and micro-adjustment systems do not void warranty. They are designed for owner use.
Permanent Resizing Risks
Stripped screws or damaged links may affect service eligibility. Always store removed links and screws. They add value when reselling.
Clean Before and After
Wipe down the bracelet with a soft cloth. Use mild soapy water if needed, then dry thoroughly.
Final Fit Checklist
Before wearing your Rolex, verify:
• All screws are secure and flush
• Clasp opens and closes smoothly
• No loose links or rattling
• Fit is comfortable after 10 minutes of wear
• Removed components are stored safely
Pro Tip: Combine systems. Use permanent resizing for baseline fit, Easylink for daily changes, and micro-adjust for final tweaks.
Frequently Asked Questions About Adjusting a Rolex Watch Band
Can I adjust my Rolex watch band myself at home?
Yes, you can adjust your Rolex at home using the built-in adjustment systems like Easylink, Glidelock, or Glide Clasp. These mechanisms are designed for owner use and do not void warranty. For permanent resizing, use proper tools and follow careful procedures.
Does adjusting a Rolex void the warranty?
Using built-in micro-adjustment systems like Easylink, Glidelock, Glide Clasp, or micro-adjustment does not void warranty. However, improper permanent resizing that results in stripped screws or damaged links may affect service eligibility.
What tools do I need to resize a Rolex bracelet?
You’ll need a precision screwdriver with hollow-ground tip, non-magnetic tweezers, a spring bar tool, a magnifying loupe, and a soft work mat. Screw sizes vary by bracelet type. Oyster uses 1.5 to 1.6 mm, Jubilee uses 1.2 to 1.3 mm, and President uses 1.5 to 1.6 mm.
How many links can I remove from my Rolex bracelet?
Most owners remove 1 to 3 links for a proper fit. Remove links symmetrically when possible to maintain bracelet balance. Never remove more than 3 to 4 links unless advised by a professional.
What’s the difference between Easylink and Glidelock?
Easylink provides a fixed 5 mm adjustment and is available on GMT-Master II, Datejust, Sky-Dweller, and newer Daytonas. Glidelock offers 2 to 20 mm adjustment in 2 mm increments and is found on pre-2020 Submariner, Sea-Dweller, and Deepsea models.
Can I adjust a Submariner bracelet?
Yes. Pre-2020 Submariners use the Glidelock system with 2 to 20 mm adjustment range. 2020+ Submariners use the simpler Glide Clasp mechanism. Neither Submariner model has Easylink.
Key Takeaways for Adjusting Your Rolex Band
A perfectly adjusted Rolex feels like an extension of your wrist. Secure, balanced, and effortless. Whether you’re using the Glide Clasp on a Submariner or removing links from a Jubilee bracelet, precision and care are non-negotiable.
Start with built-in systems like Easylink or Glidelock for tool-free adjustments. These preserve warranty and work for daily fine-tuning. When you need permanent changes, gather proper tools, work slowly, and always store removed links. Combine systems for the best results. Use permanent resizing for baseline fit, Easylink for daily changes, and micro-adjustment for final precision.
With the right tools and knowledge, you can achieve a custom fit that honors the craftsmanship of one of the world’s most iconic watches.


