You just got your G-SHOCK watch, or maybe you have had it for years and finally need to reset the time after a battery change or travel. Whether you are in the field, on a flight, or syncing via smartphone, knowing how to adjust time in G-SHOCK watch models is essential for accuracy and functionality. With multiple methods available, G-SHOCK offers precision across generations of rugged timepieces.
This guide walks you through every method based on your model type. From pressing the right buttons in sequence to automating time updates using the CASIO Watches app or Multiband 6 signals, we will ensure your G-SHOCK displays the correct time, date, and DST settings.
Enter Time Setting Mode on Your G-SHOCK
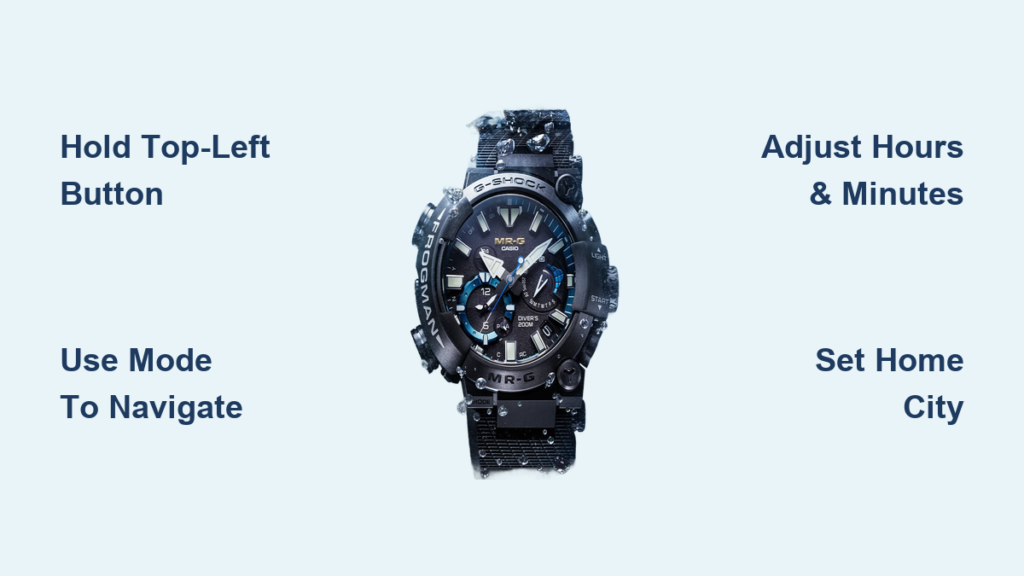
To begin adjusting the time, press and hold the top-left button for 3-5 seconds. This button may be labeled Adjust, Lap, or Split depending on your specific model.
Press and Hold the Top-Left Button
The display will respond by flashing the city code, showing a SET indicator, or producing a beep. This signals successful entry into configuration mode. When the hour digits or city code start blinking, you have entered settings mode correctly.
On older or analog-digital models, the second hand may move to a setting position pointing at SET on the dial. Always start here before making any changes to ensure you are in the correct mode.
Navigate Through Time Settings
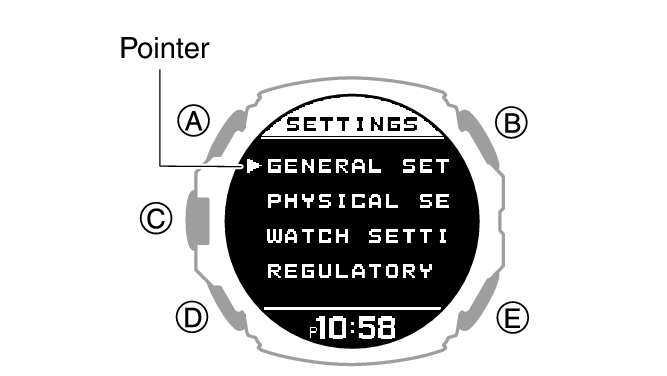
Once in settings mode, you need to cycle through the different adjustable fields to reach the one you want to change.
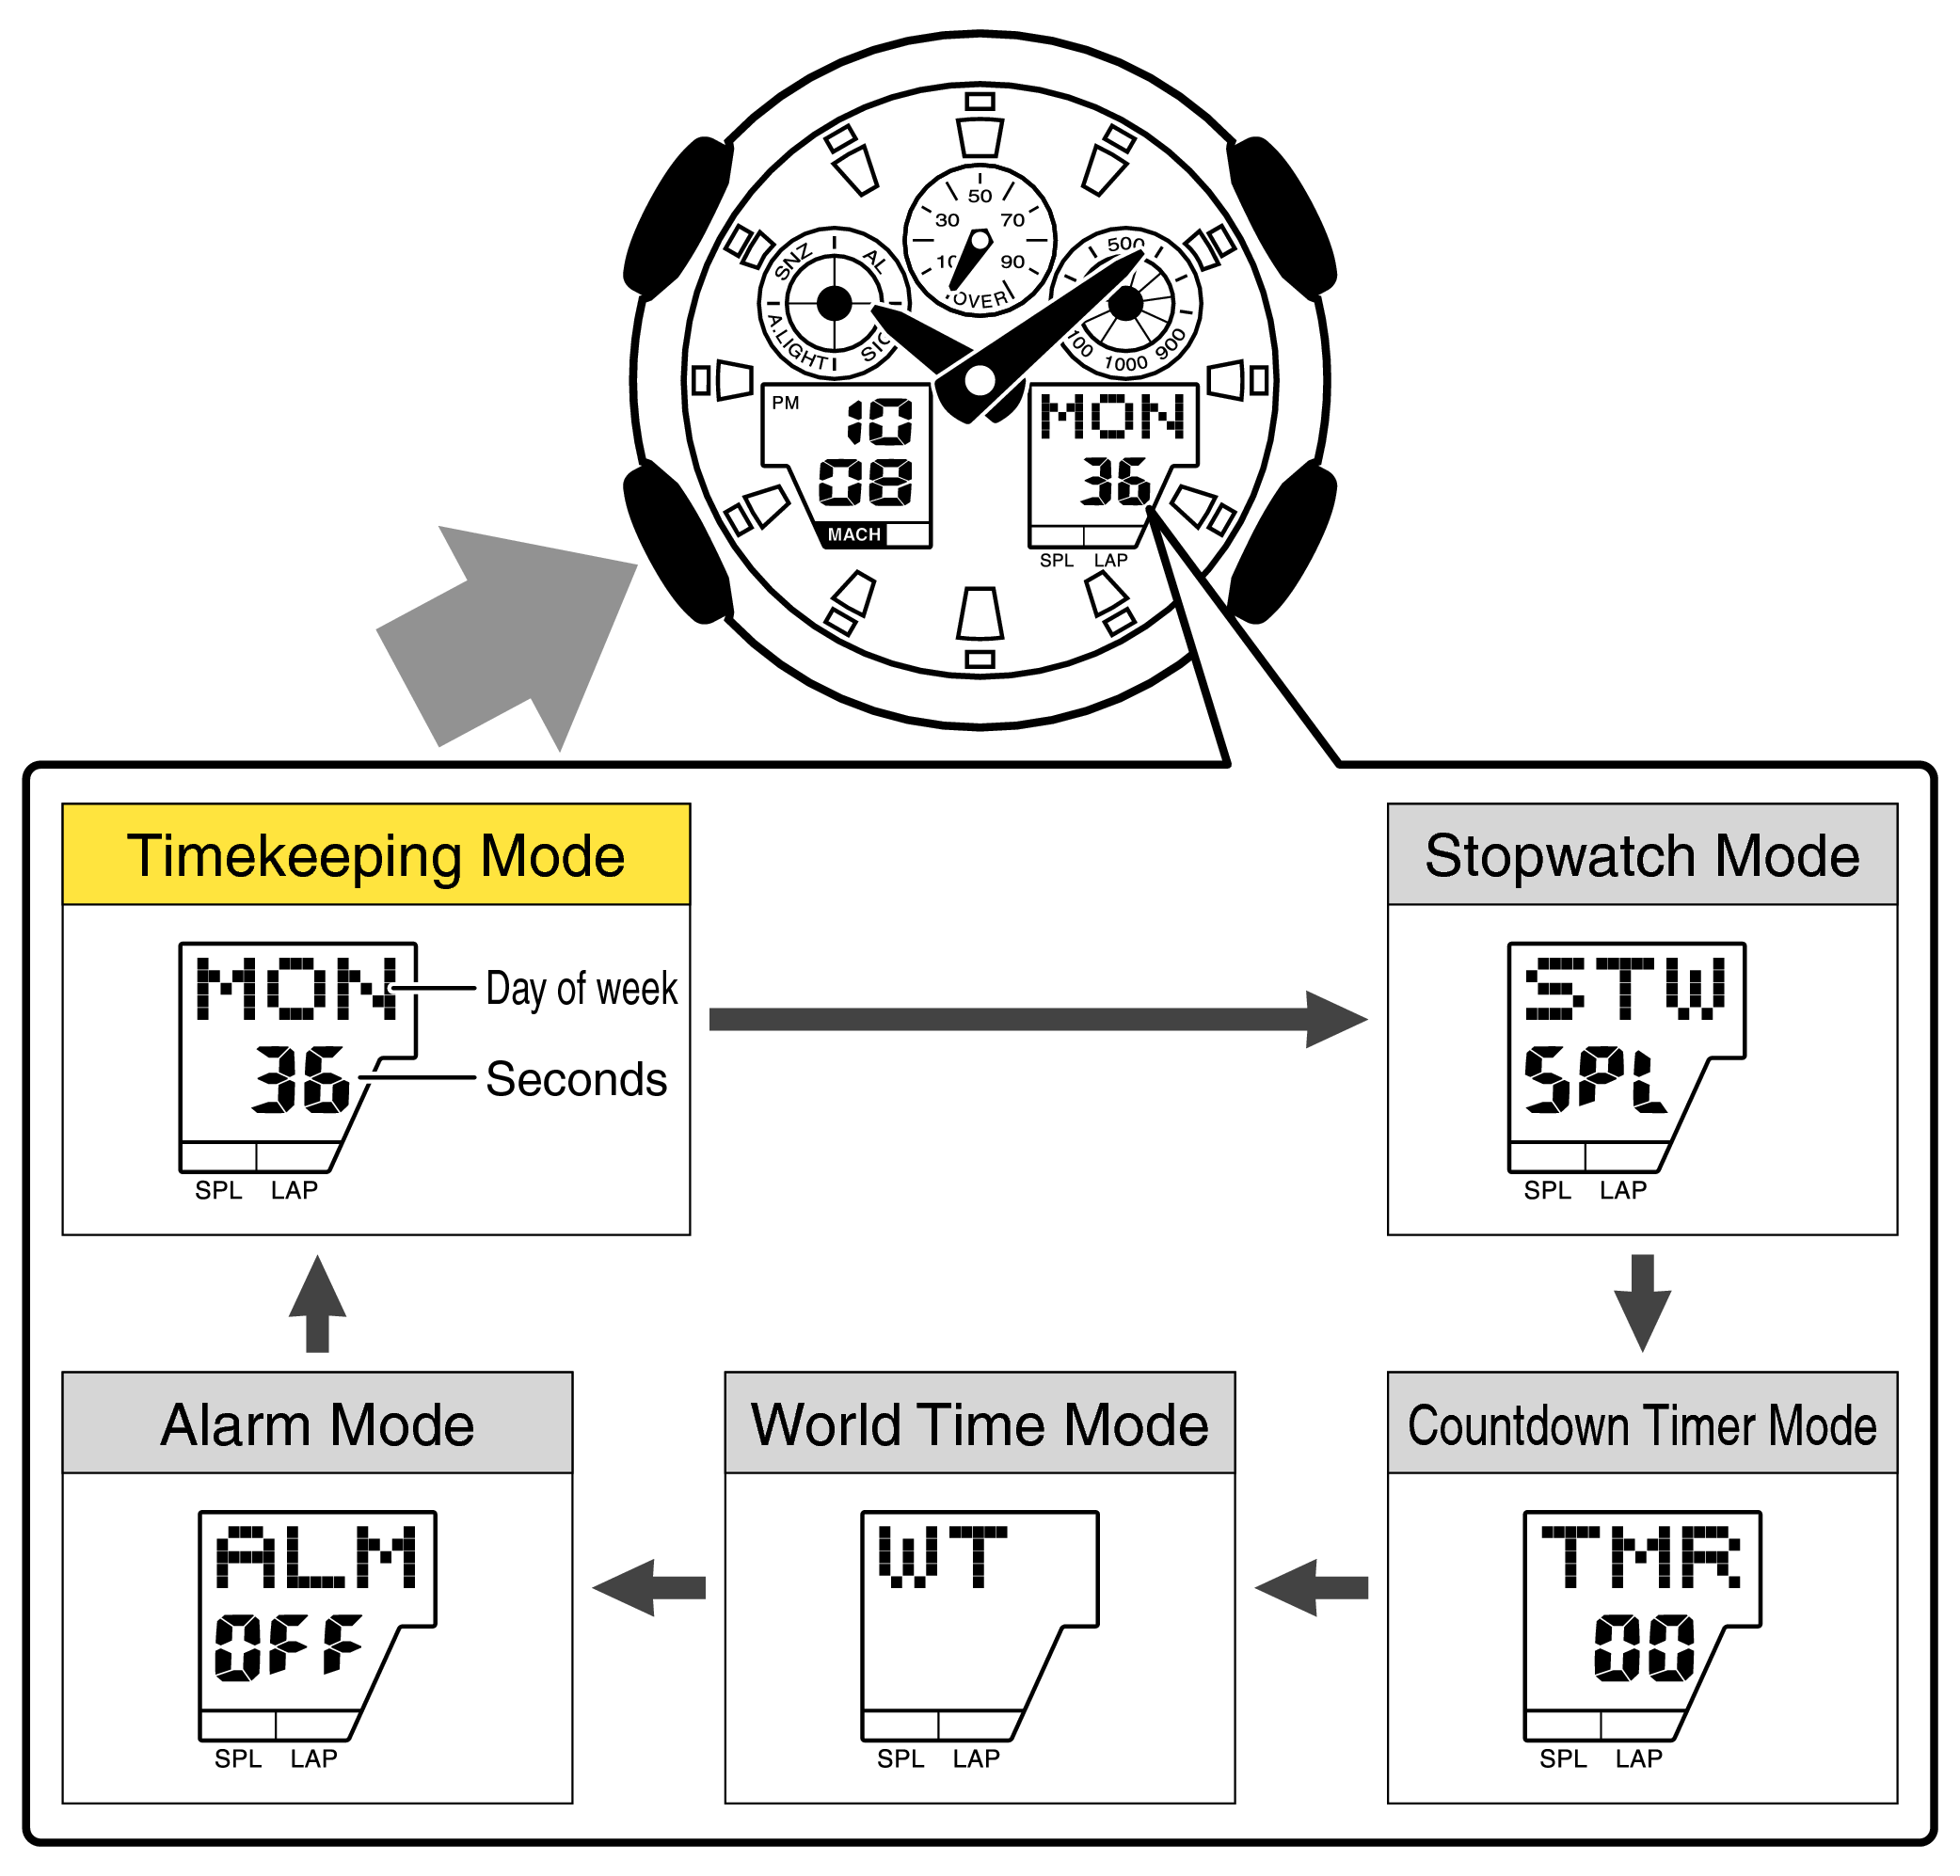
Use the Mode Button to Cycle Fields
Press the Mode button to move between adjustable fields. Each press advances to the next field, which will begin flashing.
The fields you can adjust include:
– Hours
– Minutes
– Month, Day, and Year
– 12H/24H format
– DST (Daylight Saving Time)
– Home City
The order of fields varies slightly by model. Some skip year and month unless you explicitly choose to edit them. Take note of which field is currently flashing before making changes.
Set Hours and Minutes Correctly
When the hour field flashes, use the Forward and Reverse buttons to adjust the value. Hold Forward for rapid scrolling through values quickly.
Adjust Using Forward and Reverse Buttons
When the hour field flashes, press Forward to increase the hour and Reverse to decrease it. Hold Forward for rapid scrolling through values.
After setting hours, press Mode to advance to minutes, then adjust similarly. If using 12-hour format, AM is typically indicated by a blank or A, while PM shows P. Ensure you have the correct designation after setting.
Once minutes are correct, press Mode again to proceed to other settings, or press Adjust to exit and save if done.
Change Date and Display Format
Continue pressing Mode to reach additional settings for date and time format preferences.
Edit Year, Month, and Day
Press Mode until you reach Year, Month, and Day fields. Use Forward and Reverse to set each value. Some models display date as MM/DD or DD/MM depending on regional settings.
Switch Between 12H and 24H Format
Press Mode until the 12H/24H indicator flashes. Tap Forward to toggle between formats.
In 24H format, times go from 00:00 to 23:59 with no AM/PM indicator. In 12H format, hours cycle 1-12 with AM/PM designation. The 24-hour format is ideal for military, aviation, or avoiding confusion during travel.
Press Adjust to save and exit once all settings are correct.
Set Home City for Accurate Time Zones
The Home City determines your local time reference, which is especially important for atomic time reception, DST auto-adjustment, and World Time tracking.
Select Your Time Zone Code
Enter settings mode by holding Adjust. Press Mode until Home City flashes. Use Forward and Reverse to scroll through city codes.
Common city codes include:
– TYO for Tokyo
– SYD for Sydney
– LAX for Los Angeles
– NYC for New York
– LON for London
– PAR for Paris
– DXB for Dubai
Stop on the code matching your current time zone. Press Adjust to confirm.
Change the Home City when traveling long-term. Use World Time mode to view a second time zone without changing your primary setting.
Configure Daylight Saving Time Settings
G-SHOCK allows flexible DST control through three options that determine how your watch handles seasonal time changes.
Choose AUTO, ON, or OFF Settings
In settings mode, press Mode until Summer Time or DST flashes. Press Forward to cycle through options.
AUTO automatically adjusts for daylight saving based on your Home City rules. ON adds +1 hour manually, useful when you want to override automatic settings. OFF keeps the watch on standard time regardless of DST changes.
Set to AUTO for hassle-free seasonal changes unless you are in a region that does not observe DST, such as Arizona, Hawaii, or most of Asia. Even atomic-synced watches rely on this setting, so incorrect DST mode can cause a one-hour error despite perfect signal reception.
Adjust Time on Models Without an Adjust Button
Some models like the GBA-900, GWM5610, or GMW-B5000 label the top-left button as Lap or Split instead of Adjust. Despite the different name, the function is identical.
Use Lap or Split as Substitute
Press and hold Lap or Split for 3-5 seconds to enter settings. Use Mode to navigate and Forward and Reverse to adjust values. Press Lap or Split again to exit and save.
On digital-analog hybrids like the GA-2100, the second hand may point to SET when mode is active. Confirm visually before adjusting.
Always refer to your model manual if unsure. Casio support site provides downloadable PDFs for every G-SHOCK variant.
Sync Time Using CASIO Watches App
If you own a Bluetooth-enabled G-SHOCK like the GBD-H2000, GMW-B5000, or GAW-4000, use the CASIO Watches app to sync time instantly.
Connect and Update Automatically
Install CASIO Watches from the App Store or Google Play. Enable Bluetooth on your phone and press Adjust on the watch to initiate pairing mode. Follow in-app prompts to connect.
Once paired, open the World Time tab. Tap the time zone box or long-press the world map to drop a pin. Select your city and tap Set this city.
The watch receives updated time, date, DST, and time zone automatically. No manual input is needed. DST adjusts dynamically, making this perfect for frequent travelers.
If connection fails, restart Bluetooth on both devices and ensure the watch has sufficient charge.
Enable Atomic Time Sync on Multiband 6 Models
Watches with Radio Controlled or Multiband 6 technology receive official time signals from atomic clocks for extreme accuracy.
Let Your Watch Self-Correct
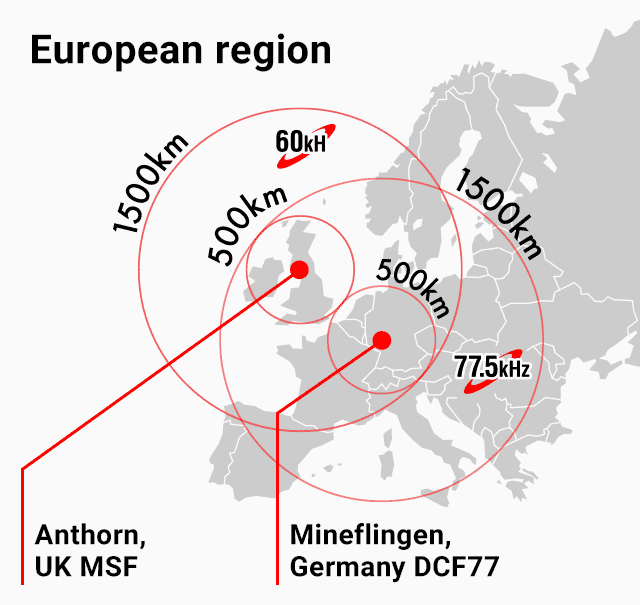
Supported signal regions include WWVB from Fort Collins, USA covering North America, DCF77 from Germany, MSF from the UK, JJY from Japan with two transmitters, and BPC from China.
Your watch uses your Home City to determine which signal to receive. Auto-reception occurs nightly between 12 AM and 6 AM. The signal icon flashes during reception, and success is confirmed by time update and indicator stabilization.
Place the watch near a window facing the transmitter region. Avoid metal surfaces or electronic interference. If outside range, the watch continues using last synced data but will not auto-update DST or leap seconds.
Compare Time Adjustment Methods by Model Type
Different G-SHOCK models offer varying levels of time adjustment capability.
| Feature | Manual-Only Models | Atomic Multiband 6 | Bluetooth + Atomic |
|---|---|---|---|
| Manual Time Setting | Yes | Yes | Yes |
| Auto Time Sync | No | Yes via radio | Yes via radio + app |
| DST Auto-Adjust | Yes with AUTO setting | Yes | Yes |
| App Control | No | No | Yes |
| World Time Tracking | Yes | Yes | Yes |
| 12H/24H Toggle | Yes | Yes | Yes |
Manual models like the DW-5600 are ideal for simplicity and durability. Atomic models are best for precision without smartphone dependency. Bluetooth plus Atomic models offer ultimate convenience for tech-savvy users and global travelers.
Fix Common Time Setting Issues
Several issues can arise when adjusting time on your G-SHOCK. Here are solutions for the most frequent problems.
Time Does Not Save After Adjustment
The cause is typically changing values without exiting properly. Always press the Adjust button to confirm and exit. Simply turning the crown or leaving the watch idle will not save changes.
No Atomic Signal Received
This issue occurs when out of range or in poor reception conditions. Try syncing at night. Place the watch facing the nearest transmitter, such as a west-facing window in Europe for DCF77. Avoid concrete walls, elevators, or electronic devices nearby.
DST Is Incorrect
Incorrect DST usually stems from wrong Summer Time setting or wrong Home City. Set Summer Time to AUTO and confirm your Home City matches your actual time zone, such as NYC instead of LON.
App Will Not Connect
Bluetooth interference or low battery often causes connection failures. Restart phone Bluetooth and re-pair the watch. Ensure the watch has at least partial charge, especially solar models in low light conditions.
Frequently Asked Questions About G-SHOCK Time Adjustment
How do I enter time setting mode on my G-SHOCK?
Press and hold the top-left button for 3-5 seconds until the display flashes SET or the city code begins blinking. The button may be labeled Adjust, Lap, or Split depending on your model.
Why is my G-SHOCK time wrong after battery replacement?
Even atomic models lose settings when power drops completely. You must update the time manually after battery replacement. Set your Home City first, then adjust hours, minutes, and date.
Can I change time zones on my G-SHOCK without resetting the time?
Yes. Use World Time mode to view a second time zone without changing your primary Home City setting. Access this through the Mode button by cycling to World Time.
Does G-SHOCK automatically adjust for daylight saving?
G-SHOCK watches can automatically adjust for DST when set to AUTO mode. Ensure your Home City is set correctly, as the watch uses this information to determine DST rules for your region.
How do I sync my G-SHOCK with atomic time signals?
Place your watch near a window facing your nearest transmitter. The watch automatically attempts reception between midnight and 6 AM. Look for the signal icon during this period to confirm successful sync.
What should I do if my G-SHOCK does not have an Adjust button?
On models like the GBA-900 or GMW-B5000, the top-left button may be labeled Lap or Split instead. Press and hold this button for 3-5 seconds to enter settings mode.
Key Takeaways for Adjusting Your G-SHOCK Time
Setting the correct Home City first is critical because it governs atomic sync, DST behavior, and app functionality across all G-SHOCK models. Use AUTO for DST unless you have a specific reason to override it, as this ensures seamless seasonal adjustments without manual intervention.
For manual adjustment, remember the simple sequence: hold Adjust to enter settings, use Mode to navigate fields, and use Forward and Reverse to change values. Always press Adjust to save and exit rather than waiting for the watch to timeout.
Whether you are syncing with atomic satellites or pressing buttons in the dark, mastering how to adjust time in G-SHOCK watch ensures your timepiece remains as tough and reliable as you are. With the right steps, your G-SHOCK will always show the exact second no matter where life takes you.


