
You’re glancing at your Casio watch, but the time is off—maybe after a battery change or daylight saving shift. No manual? No problem. Whether you own the iconic F91W, the sleek A168, or a newer model like the AEQ110W, changing the time follows a simple, repeatable pattern across nearly all Casio digital watches. The secret lies in one flashing digit: the seconds. Once you know how to trigger that flash and navigate from there, you can confidently set any Casio watch fast and accurately.
This guide breaks down universal steps, model-specific instructions, and pro troubleshooting tips so you will never wonder “how do I fix this?” again.
Activate Time-Setting Mode
Press the upper-left button to enter time-setting mode on almost every Casio digital model. On some watches, you may need to press it three times (like the F91W) or press and hold (as with the AEQ110W) until the seconds start flashing. This blinking signal means you have successfully entered time-setting mode.
Press the Correct Button to Start
Look for the recessed upper-left button on your Casio watch. This is your entry point for time adjustment. Press it until you see the seconds begin to flash on the display.
If nothing happens, double-check that you are on the main time screen, not in stopwatch, alarm, or world time mode. Use the Mode button to cycle back to the standard display showing hours, minutes, date, and day of the week.
Visual cue: When seconds flash, you are in control. If they do not, keep trying the upper-left button from the home screen.
Navigate Through Time Fields
Once seconds are flashing, use the lower-left button to move forward through editable fields. The sequence typically follows this order: seconds, minutes, hours, day, date, month, and year.
Cycle Using the Lower-left Button
Each press advances the flashing indicator to the next field. On some models like the A168, pressing the bottom-left button three times enters calendar mode directly.
Pro tip: Do not rush. Wait for one field to stop flashing before pressing again to avoid skipping settings.
Skip Unneeded Adjustments
You do not have to adjust every value. If the date is correct, simply cycle through until you reach the field you want to change, like hours or minutes, then make your adjustment.
Adjust Flashing Values
When a value flashes, use the right-side buttons to change it. The button layout depends on whether you have a 3-button or 4-button model.
Right-Side Button Functions
On 3-button models (e.g., F91W), only the lower-right button adjusts values. It increases the number only, and values loop continuously (e.g., 12 to 1 or 59 to 00). Hold it down to speed up the change.
On 4-button models (e.g., AEQ110W, A168), the upper-right button (Set Plus) increases the value while the lower-right button (Set Minus) decreases the value. This full control allows faster, more precise adjustments without looping.
Example: Setting 3:45 PM? When hours flash, increase from 2 to 3 to 4 or decrease from 5 to 4 to 3 depending on current display.
Set Hours and Minutes Correctly
Before setting the hour, check whether your watch is in 12-hour or 24-hour mode. The PM indicator appears only in 12-hour format.
Check Hour Format First
To toggle between formats on AEQ110W, press Set Plus while in setting mode. On other models, consult the manual or cycle through options during setup.
Note: Military time users should confirm 14:00 shows instead of 2:00 PM.
Set Minutes with Precision
When minutes flash, adjust using the appropriate right-side button. If you advance past 59, the minute resets to 00 and the hour increments. Some models (like AEQ110W) allow you to set seconds to zero, which can also bump the minute if above 29 seconds.
Best practice: Always set seconds to 00 when entering mode for clean synchronization.
Update Date and Day of Week
After hours and minutes, continue cycling to adjust month, date, and day of the week. Make sure the day matches the actual date to avoid confusion later.
Change Month and Date in Order
Adjust each using right-side buttons. Make sure the day matches the actual date. This avoids confusion later.
Warning: Incorrect day/date linkage can persist until manually corrected.
Handle February Manually
Casio watches use annual calendars, not perpetual ones. That means no automatic leap year adjustment. In non-leap years, you must manually advance from February 28 to March 1.
Pro tip: Mark your calendar to do this every four years or set a phone reminder.
Exit and Save Settings
Once all settings are correct, press the upper-left button repeatedly until the display returns to normal. When no digits flash, the time is automatically saved.
Confirm and Return to Normal Mode
There is no save button. Exiting the mode locks in your changes.
Troubleshooting: If settings revert, you may have exited too early. Ensure flashing stops completely before resuming use.
Model-Specific Instructions
Fix Time on Casio F91W
The F91W uses a classic 3-button layout where the lower-left button (B) cycles through fields and the lower-right button (C) adjusts values.
Enter with Three Presses
Press B (lower-left) three times until seconds flash.
Reset Seconds to Zero
Press C (lower-right) to set seconds to 00.
Set Hour and Minute
Press A (upper-right) so hours flash, then adjust with C. Press A again so minutes flash, then adjust with C.
Advance Date and Day
Continue pressing A to reach month, date, then day. Use C to increase each.
Exit Properly
Press A until seconds flash at 00. Press C to confirm. Press B to exit.
Speed hack: Hold C to fast-scan through values.
Sync Time on Casio AEQ110W
This model features both digital display and analog hands, requiring additional synchronization steps.
Enter Timekeeping Mode
Press and hold Mode (upper-left) until a beep sounds.
Start Setting
Press and hold Set (HS) so seconds flash. Use Set Plus to set seconds to 00.
Move Through Fields
Press Mode to advance through seconds, minutes, hours, month, date, and year.
Toggle DST and Format
Press Set to turn Daylight Saving Time (DST) on or off. Press Set Plus to switch between 12H and 24H mode.
Align Analog Hands
Press Mode until HS appears. Press and hold Adjust (CH) so digital time flashes. Use Set Plus to move hands clockwise to match digital time. To go back 1 hour, move forward 11 hours (only clockwise movement allowed).
Exit Hand Mode
Press Adjust to exit once aligned.
Key insight: Always sync hands last, after digital time is correct.
Program Casio A168 Calendar and Alarm
The A168 offers full functionality including alarm, chime, chronograph, and calendar features.
Enter Calendar Mode
Press bottom-left button three times so seconds flash.
Reset and Adjust
Press lower-right button to set seconds to nearest minute. Press upper-left button so hours flash, then adjust with lower-right. Repeat for minutes, month, date, and day.
Save and Exit
Press bottom-left button to return to normal display.
Set Alarm Time
Press upper-left button so alarm time blinks. Use lower-right button to set hours. Press upper-left again to switch to minutes, then adjust. Press upper-left again to confirm.
Enable Chime or Alarm
Press bottom-left once to cycle through options: alarm on (radar icon), chime only (bell), both, or off.
Battery note: Uses CR2016 and lasts up to 7 years with light use.
Troubleshoot Common Issues
No Flashing Seconds
Check your screen first. You must be on the main time screen, not in stopwatch or world time. Press Mode repeatedly to return to home display.
Try alternate entry methods: F91W requires pressing B three times. AEQ110W requires pressing and holding Mode. A168 requires pressing bottom-left three times.
Still stuck? Clean around the buttons. Dirt can block contact.
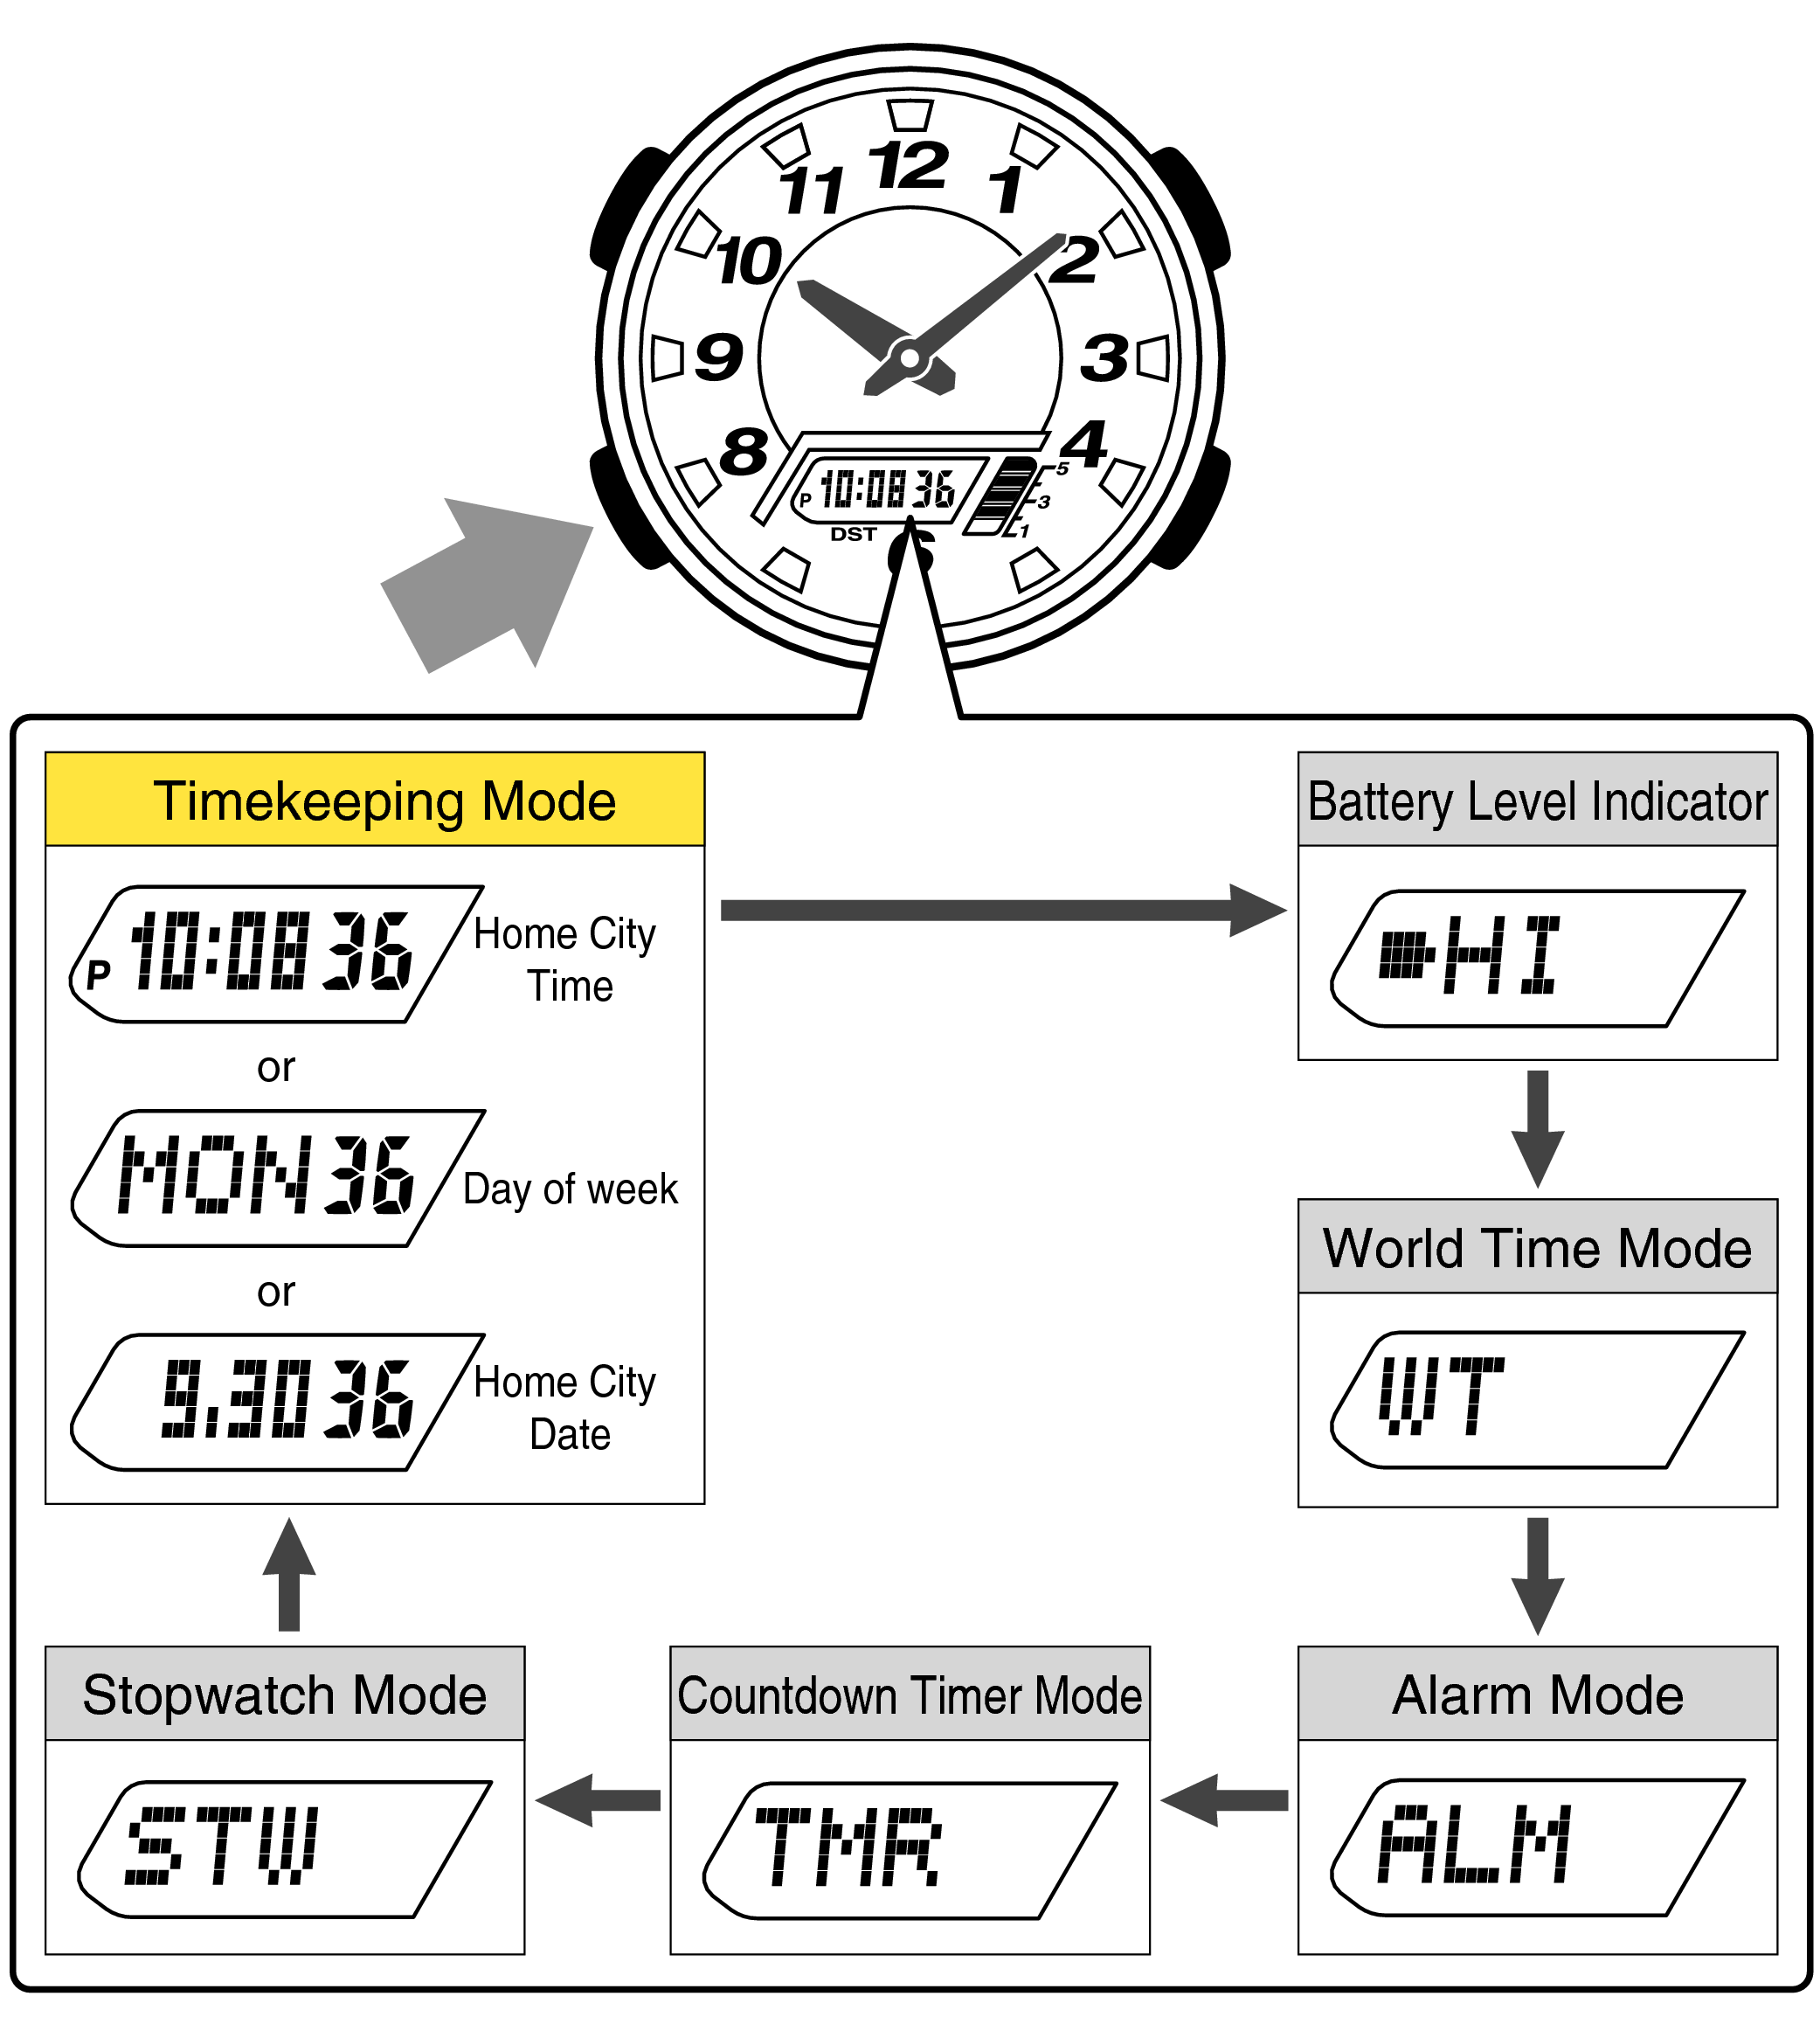
Watch Shows City Name Instead of Time
You are in World Time Mode. Press Mode to cycle back to home time. Look for weekday (e.g., Thursday) and current time. Then try entering setting mode again.
Tip: Some models default to world time after battery replacement.
Cannot Decrease Values
You are using a 3-button model. Watches like the F91W only allow incrementing via the C button. To decrease from 3 to 2, loop through: 3 to 4 to 5 to 12 to 1 to 2.
Workaround: Count how many presses it takes to reach your target. Usually faster than you think.
Settings Not Saving
Exit fully before checking. Press the upper-left button until all flashing stops. If changes vanish, you likely exited too soon.
Replace weak battery. A dying battery may prevent memory retention. Replace with correct type: CR2016 (A168), CR2025 (some G-Shocks).
Warning: Avoid mixing battery brands or using expired cells.
Universal Time-Setting Workflow
Regardless of model, follow this universal sequence to change time on any Casio digital watch.
One Method for All Models
Start on the main time screen. Press upper-left button until seconds flash. Cycle fields with lower-left button. Adjust with right-side buttons. Exit with upper-left button. Settings auto-save.
Master this, and you can set any digital Casio watch ever made.
Pro Tips and Maintenance
Find Manuals Using Module Numbers
Every Casio watch has a module number (e.g., 3298 on A168) engraved on the back. Search using the module number plus “Casio manual.” Visit trusted archives like digital-watch.com or CasioRestore.com.
Pro move: Take a photo of the case back for future reference.
Maintain Accuracy and Longevity
Battery: Use only specified type (e.g., CR2016). Cheap imitations fail early.
Water: Most models are splash-resistant only. Avoid showers or swimming unless rated.
Cleaning: Wipe with soft, dry cloth. No alcohol or cleaners.
RTFM Rule: In Casio communities, “Read The Manual” is golden advice. Manuals solve 95% of issues.
Upgrade Your Skills
Beginners: Practice on an F91W. It is the easiest to learn on.
Collectors: Archive original boxes and manuals. They increase resale value.
Advanced Users: Learn stopwatch split timing and alarm chaining on A168.
Final note: Casio builds watches to last. With proper care, yours could keep perfect time for decades.
Frequently Asked Questions About Changing Time in Casio Watches
Why do the seconds not flash when I try to set the time?
You are likely not on the main time screen. Press Mode to return to the home display showing weekday and current time, then try pressing the upper-left button again.
Do all Casio digital watches use the same time-setting method?
Yes, all digital Casio watches follow the same core logic. The upper-left button starts setting mode, the lower-left button cycles through fields, and right-side buttons adjust values. Button layouts differ, but the workflow stays consistent.
What is the difference between 3-button and 4-button Casio watches?
Three-button models (like F91W) only allow increasing values via one button. Four-button models (like AEQ110W, A168) offer both increase and decrease functions for more precise adjustment.
How do I save the time after changing it?
Simply press the upper-left button to exit setting mode. When the display returns to normal and nothing flashes, the time is automatically saved.
Can I decrease values on a 3-button Casio watch?
No. Three-button models only allow incrementing. To “decrease,” you must loop around (e.g., to go from 3 to 2, press through 4, 5, 6… to 12, 1, 2).
What should I do if these steps do not match my watch?
Check the model name and module number engraved on the case back. Search online for your specific model manual at digital-watch.com or CasioRestore.com.
Key Takeaways for Changing Time in Your Casio Watch
From the F91W to modern hybrids, changing the time in a Casio watch is quick and logical once you know the pattern. Focus on the flashing seconds as your entry point, navigate with the lower-left button, adjust values with the right-side buttons, and exit cleanly to auto-save your settings.
Remember these core points: always start from the main time screen, use the flashing seconds as your signal that you are in setting mode, and exit only when all flashing stops to ensure your changes save properly. For model-specific quirks like the AEQ110W analog hand synchronization or the A168 alarm programming, refer to the dedicated sections above.
Now you are ready to set any Casio digital watch with confidence, no manual required.


