
You just unboxed your Zwift Run Pod and want to start running in Watopia, but the setup feels confusing. One small mistake, like placing the pod on the wrong eyelet or skipping calibration, can leave your avatar frozen on screen while your treadmill keeps moving. Many runners quit before their first run because of avoidable Bluetooth conflicts and unit mismatches. This guide walks you through every step to set up Zwift Run Pod correctly, so your avatar matches your pace from the very first session.
You’ll learn how to install the pod on your shoe, pair it to Zwift without conflicts, and calibrate for accurate speed tracking. We’ll also cover firmware updates, battery care, and quick fixes for the most common errors. By the end, you’ll be ready to join group runs and explore virtual trails with confidence.
Install the Zwift Run Pod on Your Shoe

Proper placement is the foundation of accurate speed and cadence tracking. A poorly mounted pod causes data dropouts, erratic avatar movement, and frustrating signal loss.
Choose the Right Shoe and Position
Use a dedicated running shoe with a firm sole. Trail shoes like the New Balance Leadville BE 93s work well because they provide a stable platform. Attach the pod to your right shoe for optimal consistency. Right-foot data is less sensitive to minor placement errors than left-foot data.
Position the pod based on your shoe’s heel-to-toe drop:
– Low-drop shoes (0–6mm): Place at the 3rd eyelet.
– High-drop shoes (8–12mm): Use the 2nd eyelet.
This placement aligns the sensor with your foot’s natural pivot point during toe-off.
Orient and Lock the Pod Correctly
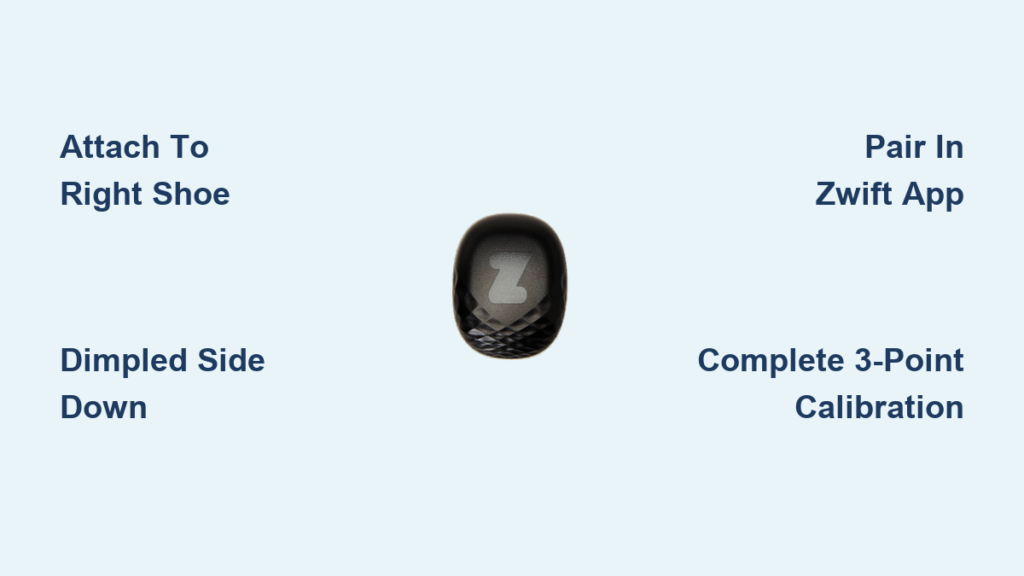
Incorrect orientation is a leading cause of signal loss, especially at higher speeds. The dimpled, textured side must face down toward the ground. The pointy tip of the “Z” logo must face up toward your shin.
To attach the pod:
1. Slide the pod under the laces near the ball of your foot.
2. Insert from below, then twist clockwise until you hear a distinct click.
3. Confirm it’s snug but not pressing into your foot.
To remove, twist counterclockwise. No force is needed if unlocked properly.
Pair the Zwift Run Pod to the App

Bluetooth connectivity issues are common but easy to avoid. Zwift must connect directly to the pod with no intermediaries.
Prepare for Pairing
Before launching Zwift, complete these steps:
– Unpair from phone settings if the pod appears in your Bluetooth list.
– Close conflicting apps like the MilestonePod app or any fitness apps scanning for sensors.
– Stay close to the treadmill, placing your device within 1–2 meters to minimize interference.
Search and Connect in Zwift
- Open Zwift and log in.
- On the pairing screen, select “Run” as your activity.
- Tap “Search” under Run Speed and Cadence.
- From the list, select your pod (e.g., “Run Pod 71”). The number matches the ID on the back.
- For best results, pair the same pod for both Speed and Cadence if prompted.
Zwift remembers your device for future sessions. You only need to repeat pairing if you switch devices.
Calibrate for Accurate Speed
Without calibration, your avatar may lag behind or sprint ahead of your treadmill. This step ensures in-game speed matches your real-world pace.
Match Units Before Calibrating
A mismatch between treadmill units (mph) and Zwift units (km/h) causes major discrepancies. Check both before starting:
– Go to Zwift Settings > Units and confirm it matches your treadmill.
– Most treadmills default to mph while Zwift may default to km/h. Adjust accordingly.
Perform the 3-Point Calibration
- On the pairing screen, tap the wrench icon next to Run Speed.
- Start Calibration Mode.
- Run at three speeds:
– Slow: ~6 km/h (4 mph) for ~30 seconds.
– Moderate: ~9 km/h (6 mph), matching treadmill speed exactly.
– Fast: ~12 km/h (7.5 mph), maintaining a steady pace. - Click “OK” after the final step.
Your calibration is now saved. The avatar should move in sync with your treadmill.
Calibration Tips and Warnings
Calibration is a one-time setup. Only recalibrate if you change shoes, switch treadmills, or remove the battery. Accuracy drops outside the calibrated range, so avoid sprinting at 15 km/h if you only calibrated up to 12. If you skip full calibration, at least calibrate at your typical running pace.
Update Firmware and Check Battery
Outdated firmware or low power causes dropouts and connection failures. Stay ahead with proactive maintenance.
Use the MilestonePod App for Updates
While Zwift handles basic connection, the MilestonePod app (iOS and Android) is essential for firmware updates, battery level checks, and optional gait analysis.
Steps to update:
1. Download the app.
2. Pair the pod directly.
3. Check for firmware alerts and update if available.
4. Close the app before opening Zwift. Bluetooth can’t serve two apps at once.
Monitor and Replace the Battery
The pod uses a CR2032 coin cell battery. To extend life, remove the pod after each run. Leaving it attached drains the battery during daily movement.
Replace the battery when:
– The red light flashes on tap.
– The green light fails to illuminate.
– Zwift fails to detect the pod.
Pro Tip: Buy a 20-pack of Panasonic CR2032 batteries (~$5). Cheap alternatives often fail prematurely.
Prevent Signal Dropouts and Errors
Even with correct setup, issues can arise. Here’s how to fix the most common problems.
Fix Data Dropouts During Runs
If your avatar stops or stutters mid-run:
– Check orientation. Dimpled side down, Z-point to shin.
– Replace the battery. Low power causes intermittent signals.
– Reduce interference by moving away from microwaves, routers, or crowded gym Wi-Fi.
Resolve “Device Not Found” Errors
When Zwift won’t detect the pod:
1. Remove it from your phone’s Bluetooth settings.
2. Close all background fitness apps.
3. Reset the pod by removing and reinserting the battery.
4. Restart Zwift and try pairing again.
Avoid Black Screen or Lag
In gyms or hotels, poor bandwidth causes freezes:
– Use a 4G/5G hotspot instead of shared Wi-Fi.
– Request Low-Bandwidth Mode from Zwift support if available.
– Keep your device close to the treadmill, within arm’s reach.
Optimize for Workouts and Events
Now that your pod is set up, use it effectively in Zwift’s training ecosystem.
Best Use Cases for the Zwift Run Pod
The pod excels at:
– Steady-state runs (e.g., 8 km/h endurance pace).
– Group runs with friends.
– Virtual trail adventures like Tiger Mountain or Watopia Flats.
– Beginner workouts and structured plans.
It’s less ideal for high-speed intervals, precise VO2 max tracking, or advanced gait analysis. For elite training, consider Stryd or Garmin pods. For gamified motivation and consistent pacing, the Zwift Run Pod delivers.
Join Events and Explore Worlds
Once paired and calibrated:
1. Select “Run” from the main menu.
2. Choose Free Run, Workout, or Event.
3. Pick a world: Redline Gorge, Makuri Islands, or New York.
4. Start running. Your avatar begins moving after 2–3 seconds.
Cadence drives leg animation, so your in-game stride matches your real-world turnover.
Compare and Upgrade When Needed
The Zwift Run Pod is a smart starting point, but know when to upgrade.
Zwift vs. Adidas Run Pod
The Adidas Run Pod is discontinued due to legal disputes over sensor technology. The Zwift Run Pod is its modern successor:
– Larger and heavier, but more durable.
– Fully supported with firmware updates.
– Compatible with all current Zwift features.
Don’t waste time hunting for an Adidas pod. Zwift’s version is the only viable option now.
When to Consider Premium Sensors
If you’re serious about performance, compare your options:
| Feature | Zwift Run Pod | Stryd/Garmin/Polar |
|---|---|---|
| Price | $39.99 | $100+ |
| Accuracy | Good for gamification | Elite-level precision |
| Use Case | Fun, motivation | Race training, analytics |
| Interval Ready | Limited | Excellent |
Upgrade only if you need lab-grade data. For most home runners, the Zwift pod is more than enough.
Final Setup Checklist
Before your first run, verify these steps:
– Pod attached to right shoe, 2nd or 3rd eyelet.
– Dimpled side down, Z-point toward shin.
– Twisted clockwise until clicked.
– Not paired in phone’s Bluetooth settings.
– MilestonePod app closed before launching Zwift.
– Units matched (mph/km/h) on treadmill and app.
– Completed 3-point calibration.
– Device within 2 meters of treadmill.
– Battery fresh and showing green light.
Frequently Asked Questions About Zwift Run Pod Setup
How do I pair my Zwift Run Pod for the first time?
Open Zwift, select “Run” on the pairing screen, and tap “Search” under Run Speed and Cadence. Select your pod from the list (the number matches the ID on the back). Make sure the pod is not paired in your phone’s Bluetooth settings and no other apps are scanning for it.
Why is my Zwift Run Pod not connecting?
The most common causes are phone Bluetooth pairing conflicts, active MilestonePod app sessions, or low battery. Remove the pod from your phone’s Bluetooth list, close all fitness apps, and reset the pod by removing and reinserting the CR2032 battery.
Do I need to calibrate the Zwift Run Pod every time?
No. Calibration is a one-time setup unless you change shoes, switch treadmills, or remove the battery. Run the 3-point calibration once at slow, moderate, and fast speeds, and your avatar will stay in sync.
How long does the Zwift Run Pod battery last?
The CR2032 coin cell typically lasts several weeks with regular use. Battery life drops significantly if you leave the pod attached to your shoe during non-running activities. Remove it after each run to maximize lifespan.
Can I use the Zwift Run Pod on a trail shoe?
Yes. Trail shoes with firm soles, like the New Balance Leadville BE 93s, actually work well because they provide a stable platform. Just follow the eyelet guidelines based on your shoe’s heel-to-toe drop.
Is the Zwift Run Pod accurate enough for serious training?
For gamified motivation and steady-state runs, yes. For high-speed intervals, VO2 max testing, or race-specific analytics, premium pods like Stryd or Garmin offer better precision. The Zwift Run Pod is designed for engagement, not laboratory-grade data.
Key Takeaways for Setting Up Your Zwift Run Pod
Setting up the Zwift Run Pod correctly takes about 10 minutes and saves hours of frustration. Focus on three critical steps: install the pod on your right shoe with the dimpled side down and Z-point toward your shin, pair it directly through Zwift without phone Bluetooth interference, and complete the 3-point calibration with matching units.
Once configured, the pod delivers reliable performance for steady-state runs, group events, and virtual exploration. Keep the firmware updated through the MilestonePod app, replace the CR2032 battery when the red light appears, and remove the pod after each run to preserve battery life.
Your next step is simple: complete the setup checklist, launch Zwift, and start your first run. The virtual roads of Watopia are waiting. For additional support, visit support.zwift.com or join the conversation at community.zwift.com.



