
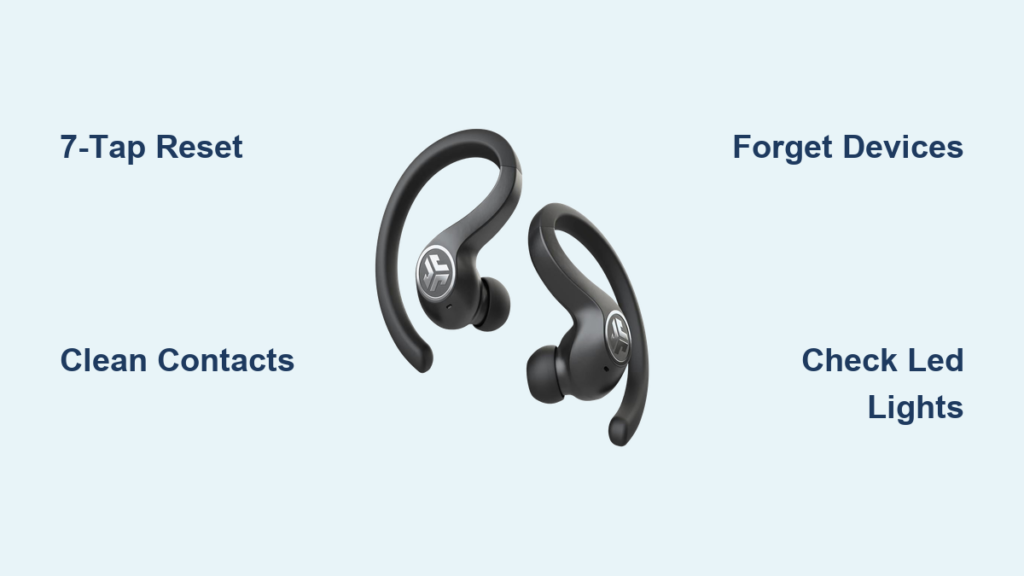
If your JLab Sport earbuds are not pairing together, you’re not alone. This frustrating issue affects users across models like the GO Air Sport, Epic Air Sport ANC 2nd Gen, and JBuds Air. Instead of syncing as a stereo pair, the earbuds appear as two separate Bluetooth devices or fail to connect entirely.
The root cause is usually a TWS sync failure between the left and right earbuds. The good news: this is rarely permanent hardware damage. With the correct factory reset, cleaning, and re-pairing steps, you can restore full functionality in under 5 minutes. This guide walks you through a precise, step-by-step fix using verified methods from JLab support data and user reports.
Perform the 7-Tap Factory Reset

The 7-tap reset is the most effective fix for JLab Sport earbuds that won’t sync. It clears corrupted pairing data and forces the earbuds to re-establish their internal TWS link.
Why the 7-Tap Method Works
When earbuds lose sync, they often retain outdated Bluetooth profiles or fail to designate a primary and secondary bud. The 7-tap sequence triggers a hard reset of the internal pairing memory. Afterward, the earbuds reboot and attempt to reconnect to each other before linking to your phone.
Works on: GO Air Sport, Epic Air, JBuds Air, and most JLab true wireless models
Critical: Keep the charging case open during the reset
Step-by-Step Reset Instructions
-
Charge First
Place both earbuds in the case and charge for at least 30 minutes if LEDs don’t light up. Dead batteries prevent reset success. -
Open Case, Tap Right Bud
With the case open, locate the touch sensor on the right earbud. Tap it seven times rapidly within 2 seconds.
– Success sign: The LED blinks blue four times. -
Tap Left Bud Immediately
Repeat the seven rapid taps on the left earbud.
– Success sign: The LED blinks blue four times. -
Wait 1 Minute
Leave both earbuds in the open case for 60 seconds. This lets the system clear old connections. -
Remove Both Buds
Take them out at the same time. They should now enter pairing mode with correct LED behavior.
If no lights appear, repeat after charging for 30+ minutes. No response means low battery or a hardware issue.
Check LED Signals for Sync Status

After resetting, LED behavior tells you whether the earbuds are syncing with each other, not just turning on.
Correct Pairing Mode Lights
- Primary Earbud: Blinking blue and white. This bud will connect to your phone.
- Secondary Earbud: Solid white light. This means it’s synced to the primary and ready.
A good sign is one blinking blue/white and one solid white. A problem occurs when both blink blue/white, indicating failed TWS sync.
Common LED Errors and Fixes
| Light Pattern | Meaning | Solution |
|---|---|---|
| No light | Dead battery or charging fault | Charge for 30+ mins; clean contacts |
| Red light in case | Case charging | Wait for solid white (full) |
| Both blink blue/white | TWS sync failed | Repeat 7-tap reset |
| One bud unresponsive | Faulty bud or low charge | Test individually; clean contacts |
Pro Tip: Keep the earbuds within 2 inches of your phone during pairing. Distance can break weak initial connections.
Clean Charging Contacts Thoroughly

Dirt, sweat, or oxidation on the gold charging pins is a hidden cause of pairing failure. Even if the earbuds seem charged, poor contact prevents them from entering reset mode.
How to Clean Properly
- Power off the earbuds and remove them from the case.
- Use a dry cotton swab. Do not use alcohol or liquids.
- Gently wipe the metal contacts on:
– The base of each earbud
– The contact points inside the case - Inspect for visible debris or corrosion.
- Reinsert and charge for 15–30 minutes before retrying the reset.
Frequency: Clean every 2–3 weeks if used during workouts
Never use metal objects or moisture, as they can damage circuitry.
Reset Your Phone’s Bluetooth Cache
Even after resetting the earbuds, your phone may try to reconnect to old, broken profiles, especially if it sees two separate JLab entries.
How to Forget Devices Correctly
iPhone
- Go to Settings > Bluetooth
- Tap the “i” next to any JLab device
- Select “Forget This Device”
- Repeat for all JLab entries
- Turn Bluetooth off, wait 10 seconds, then turn it on
Android
- Open Settings > Connected Devices > Bluetooth
- Tap the gear icon next to the JLab device
- Select “Unpair” or “Forget”
- Clear Bluetooth cache in App Settings > Bluetooth > Storage > Clear Cache if available
- Restart the phone if issues persist
Now try pairing again after the earbud reset.
Try Model-Specific Reset Methods
Some JLab models need different steps if the 7-tap method fails.
Epic Air Sport ANC 2nd Gen: 10-Second Button Hold
This model uses physical buttons rather than touch sensors.
- Place earbuds in the case with the lid open.
- Press and hold the multifunction button on the right earbud for 10 seconds until the LED flashes.
- Repeat on the left earbud.
- Wait 1 minute, then remove both.
Use the JLab App to check for firmware updates. ANC models often need updates to fix sync bugs.
JBuds Air: 3-Second Button Hold
Some older batches require a shorter press:
- Hold the button on the left earbud for 3 seconds.
- Hold the button on the right earbud for 3 seconds.
- Both should flash blue and white.
- Remove and pair as usual.
If this fails, try the 7-tap method. It often works even on older models.
Test with Another Device

If your earbuds still won’t pair, isolate the problem. Is it the earbuds or your phone?
Cross-Device Testing Steps
- Reset the earbuds using the 7-tap method.
- Turn on Bluetooth on a different phone, tablet, or laptop.
- Forget any old JLab entries on that device.
- Try pairing.
Success on a second device means your original phone’s Bluetooth is the problem. Failure means the earbuds have a deeper issue, such as firmware or hardware.
Android phones sometimes hold stubborn Bluetooth caches. An iPhone test can confirm earbud health.
Update Firmware via JLab App

Outdated firmware causes random disconnects, audio distortion, or sync loss, especially on ANC models.
How to Update
- Download the JLab App (iOS/Android).
- Pair your earbuds if possible in mono mode.
- Open the app and check for firmware updates.
- Follow on-screen prompts to install.
Updates can take 5–10 minutes. Keep the earbuds charged and close to the phone.
Not all models are app-compatible. Check JLab’s website for your specific model.
Use the Physical Sync Trick
Some users report success by tapping the earbuds together to force a TWS handshake.
How to Do It
- After the 7-tap reset, remove both earbuds.
- Hold them close and gently tap the touch sensors together.
- Wait 5–10 seconds for lights to stabilize.
- Look for one solid white and one blinking blue/white.
- Now pair to your phone.
This mimics the magnetic sync signal used in some wireless systems.
Try Sequential Pairing (Advanced)
If standard pairing fails, this method rebuilds the connection step by step.
Step-by-Step Process
- Reset earbuds using the 7-tap method.
- Turn off Bluetooth on the phone.
- Turn on Bluetooth and go to the pairing screen.
- Pair only the right earbud. It may appear as “JLab Right” or similar.
- Once connected, disconnect it but don’t forget it.
- Now pair the left earbud.
- Disconnect and forget both devices.
- Remove earbuds from the case again. This time, they may pair as a single unit.
This clears fragmented device memory on the phone.
When to Contact JLab Support
If all steps fail and you notice any of the following:
- No LED lights after 30+ minutes of charging
- One earbud never powers on
- Reset doesn’t produce 4x blue blink
- Cross-device tests also fail
It’s likely a hardware defect.
Final Resolution Steps
- Contact JLab Customer Support at support@jlab.com or via the website.
- Provide proof of purchase and describe all steps tried.
- Request a warranty replacement. Most JLab earbuds have a 1-year warranty.
- If out of warranty, ask about repair options or replacement pricing.
Many users report successful replacements, even for units that never worked out of the box.
Prevent Future Pairing Issues
Once fixed, avoid repeat problems with these habits:
- Clean contacts every 2 weeks, especially after workouts.
- Store in the case when not in use to keep them charged and protected.
- Update firmware whenever prompted.
- Reset monthly if you notice audio drops or lag.
- Avoid Bluetooth overload by turning off unused devices nearby.
Keep the case charged. A dead case means no reset capability.
Frequently Asked Questions About JLab Sport Earbuds Not Pairing Together
Why are my JLab Sport earbuds showing up as two separate devices?
This happens when the TWS sync between the left and right earbuds fails. The earbuds default to acting as independent units instead of a stereo pair. A factory reset using the 7-tap method typically resolves this.
How long should I charge JLab earbuds before resetting them?
If the LEDs don’t respond, charge the earbuds in the case for at least 30 minutes. Low battery can prevent the reset from registering or cause erratic LED behavior during the process.
What does 4 blue blinks mean on JLab earbuds?
Four blue blinks confirm that the 7-tap reset was successful on that earbud. You should see this on both the left and right buds after tapping each one seven times rapidly.
Can I fix JLab earbuds that won’t pair without the charging case?
The reset process requires the charging case for most models. The case provides the connection logic needed to re-establish the TWS link. If your case is lost or broken, contact JLab support for a replacement.
Do JLab Sport earbuds have a warranty for pairing issues?
Yes, most JLab earbuds come with a 1-year warranty. If troubleshooting steps fail and cross-device testing confirms a hardware defect, JLab typically offers a replacement. Keep your proof of purchase ready.
Why do my JLab earbuds keep losing sync after fixing them?
Some users report recurring sync loss even after successful resets. This may indicate a firmware bug or hardware reliability issue. Updating firmware via the JLab App and cleaning contacts regularly can help minimize the problem.
Key Takeaways for Fixing JLab Sport Earbuds That Won’t Pair

Most JLab Sport earbuds not pairing together can be fixed with the 7-tap reset, contact cleaning, and Bluetooth cache clearing. The process takes under 10 minutes and resolves the issue in most cases. Start by charging the earbuds for 30 minutes, then perform the reset while the case remains open.
If the standard reset fails, try model-specific methods like the 10-second button hold for ANC models. Test with a second device to rule out phone-side Bluetooth issues. When all troubleshooting fails, JLab’s warranty support is responsive and often issues replacements for defective units.
Your next step: perform the 7-tap reset right now and watch for the 4 blue blinks on each earbud. With proper care, your earbuds should deliver reliable stereo performance for months to come.



