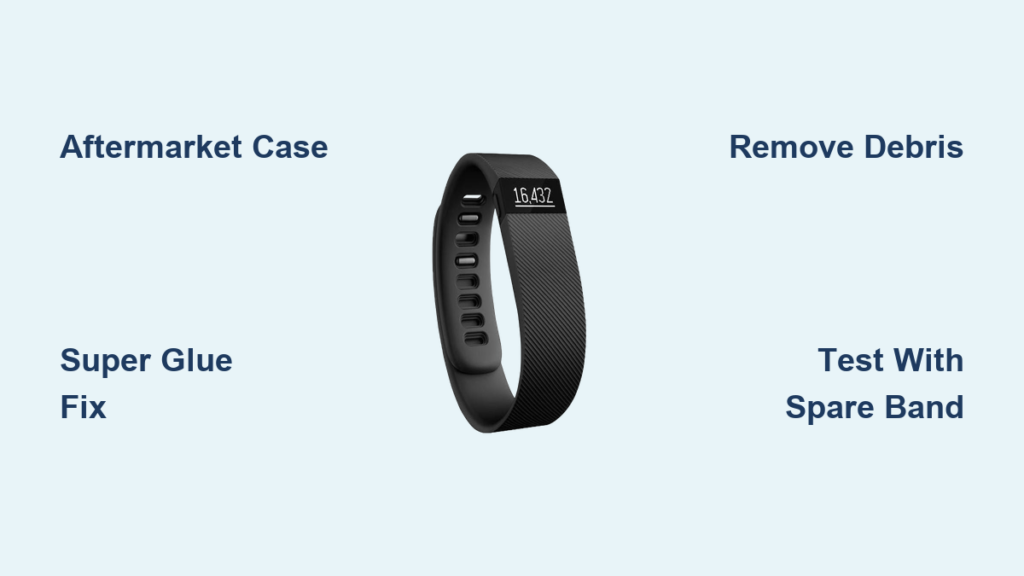
If your Fitbit band won’t stay attached or the connection feels loose, you’re not alone. A broken Fitbit band is a widespread issue affecting Charge 3, 4, and 5 models, where fragile plastic mounting studs and weak coupling mechanisms fail under regular wear. The problem often isn’t just a snapped strap. It’s structural failure at the attachment point, where screws pull out or plastic housings crack. This guide delivers proven, step-by-step fixes from quick workarounds to permanent solutions. Whether you’re dealing with stuck debris, sheared screws, or a loose connector, you’ll find a reliable fix here that restores your Fitbit’s functionality without requiring advanced tools.
Identify the Failure Type
Before attempting any repair, determine exactly what’s broken. The wrong fix can worsen the damage or risk internal harm to your device.
Check for Broken Mounting Studs
Inspect the sides of your Fitbit where the band attaches. If the small plastic sleeves (mounting studs) are cracked, ripped off, or missing, you’re dealing with structural failure. This is common on Fitbit Charge 3, 4, and 5 models and means the original screw mechanism can no longer hold. Even if a screw fragment remains, the plastic housing may be too damaged to support reattachment. This isn’t a band issue. It’s a device flaw that requires a solution beyond simple band replacement.
Test for Coupler Damage
Examine the metal or plastic tabs on both the band and the watch module. Are they bent, misaligned, or cracked? Insert a known working band to see if it clicks securely. If not, the coupler on the device side may be damaged. A working band that detaches easily suggests internal wear or a manufacturing defect in the locking mechanism. This test takes seconds but saves hours of wasted effort on the wrong repair approach.
Look for Stuck Debris
If a new band won’t seat fully, a piece of an old strap might be lodged inside the slot. Shine a flashlight into the connector. If you see a small plastic fragment, it’s blocking proper attachment. This is common when bands snap during removal. Leaving it in place prevents future bands from locking, creating a frustrating cycle of failed installations.
Fix Broken Mounting Studs Permanently

When the plastic studs rip off, standard band replacement won’t work. You need a solution that bypasses the damaged attachment points entirely.
Use an Aftermarket Protective Case
The most reliable fix is an aftermarket case that slides your Fitbit module into a durable silicone or TPU shell. These cases have built-in band connectors, eliminating reliance on the broken plastic studs.
• How It Works: Remove your Fitbit from the original frame and insert it into the new case. The band attaches to the case, not the device.
• Best For: Fitbit Charge 4 and Charge 5 users with completely failed studs.
• Where to Buy: Search for “Fitbit Charge 4 case with band” or “aftermarket band housing.”
• Benefits: Adds drop protection, restores full function, and costs less than replacing the entire device.
• User Feedback: Many report success after years of non-use due to breakage. Users describe it as working “a treat” with no loss of functionality.
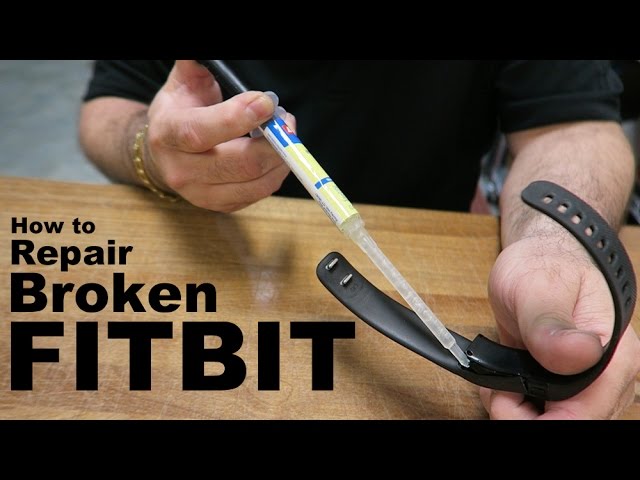
Try Super Glue (Temporary Fix)
If you need a fast, low-cost solution, cyanoacrylate (super glue) can re-secure remnants, but it’s not long-term.
- Remove all loose fragments from the device.
- Clean the area with isopropyl alcohol.
- Apply a small drop of Gorilla Super Glue to the broken stud base.
- Press the band holder into place and hold for 30 seconds.
- Wait 24 hours before wearing.
Limitations: The quick-release button usually stops working. The bond may fail again in days or weeks, especially with active use. This method works best for short-term use or testing before investing in a permanent case.
Avoid Drilling and Extended Screws
Some users attempt to drill deeper and use longer screws to anchor the band. This is high-risk and not recommended.
• Dangers: Drilling too deep can puncture the battery, screen, or circuit board.
• No Safe Depth Data: There’s no documented safe drilling depth, making this method unreliable.
• Recommendation: Only attempt if you accept the risk of destroying the device entirely.
Repair Damaged Couplers Safely
If the band clicks but pops out easily, the issue may lie with bent or worn couplers on either the band or device side.
Inspect Metal Tabs for Bends
Use a magnifying glass and flashlight to examine the metal locking tabs on both the band and device. If they’re bent inward or outward, they won’t engage properly.
• Fix: Gently realign with tweezers or a plastic pick. Avoid metal tools to prevent scratching the finish.
• Test: Insert a spare band to confirm the click is secure before relying on the repair.
Replace the Coupler or Band
On most modern Fitbits, the coupler is part of the band. You can’t replace just the tab, so buying a new band becomes necessary.
• OEM Bands: Available from Fitbit. Reliable but expensive.
• Third-Party Options: Often cheaper and sometimes more durable. Look for reinforced connectors or flexible designs.
• Pro Tip: Some aftermarket bands use spring-loaded mechanisms that tolerate minor misalignment better than original parts.
Use Rubber Bands as Emergency Backup
If your band detaches frequently and you need a temporary hold while waiting for replacement parts:
• Wrap a small rubber band around the connection point.
• Or use a silicone watch band clip to secure the ends.
• Warning: This doesn’t fix the lock. It just prevents loss. Remove promptly to avoid skin irritation from prolonged use.
Remove Stuck Strap Pieces Fast
A broken fragment inside the slot can block new bands from locking properly, creating confusion about whether the device or band is faulty.
Power Down First
Turn off your Fitbit before attempting any extraction. This prevents accidental button presses or electrical issues during the repair process.
Extract with Non-Metal Tools
Use tools that won’t scratch the casing or push debris deeper into the mechanism.
• Tweezers: For pieces sticking out. Grip gently to avoid snapping the fragment further.
• Plastic Pick or Toothpick: Nudge deeply lodged fragments from the side, not downward.
• Taped Screwdriver: Wrap a flathead screwdriver in electrical tape. Use the edge to pry without damaging the housing.
• Mini Vacuum: Gently suction loose pieces. Use low power to avoid affecting internal seals.
When to Stop and Seek Help
If the fragment is fused or unreachable, stop immediately to avoid causing more damage.
• Do Not Force It: You may push it deeper or damage internal parts.
• Leave It: On Versa and Sense models, small non-interfering pieces can stay without affecting function.
• Professional Repair: Visit an electronics shop for safe removal, especially if your device is under warranty.
Diagnose Loose Band Connections

If your band clicks in but detaches without pressing the release button, the locking mechanism is faulty and needs proper diagnosis.
Test with a Second Band
Use the spare band that came with your Fitbit. If it also detaches easily, the problem is in the device, not the strap. This simple test eliminates the band as the culprit and focuses your efforts on the device hardware.
Check for Manufacturing Defects
Compare the release buttons on both sides of your device.
• If one is more recessed than the other, it may indicate a flaw in the retention mechanism.
• A band that detaches during normal movement (not impact) suggests internal failure of the locking tabs.
• These symptoms indicate hardware defects, not repairable issues.
Contact Fitbit Support
This type of failure is often covered under warranty, so don’t assume you’re stuck with a broken device.
• US/Canada: 1-year limited warranty covers manufacturing defects.
• UK: 2-year coverage, including normal wear and tear.
• Process: Go to fitbit.com/support, log in, and submit a claim. Fitbit may replace the entire module at no cost.
• Post-Warranty: No free replacements exist. You’ll need to buy a new device or use an aftermarket case solution.
Prevent Future Band Failures
Even the best fix won’t last if the root causes aren’t addressed through proper care and material selection.
Choose Durable Replacement Materials
Not all bands are equal. Pick one that matches your lifestyle and usage patterns.
• Silicone: Best for fitness. Sweat-resistant but can degrade over time with heavy use.
• Nylon: Lightweight and breathable. Ideal for daily wear but prone to fraying.
• Stainless Steel: Long-lasting but heavier. May loosen with movement during exercise.
• Avoid Leather: Looks nice but cracks quickly with sweat and frequent use.
Handle Bands with Care
• Align Before Inserting: Don’t force the band. Slide it straight in until it clicks.
• Don’t Yank Off: Press the release button fully before removing to avoid stress on the mechanism.
• Clean Regularly: Wash with mild soap and water. Dry completely before reattaching to prevent moisture damage.
Monitor for Early Wear
Inspect the couplers and studs monthly to catch problems before they become catastrophic.
• Look for hairline cracks or discoloration around the attachment points.
• Replace bands at the first sign of fraying, stiffness, or cracking.
• Rotate between multiple bands to reduce wear on a single unit.
Know When to Replace vs. Repair

Not every broken Fitbit band is worth fixing. Sometimes replacement makes more financial sense than repair.
Repair If:
• The device is out of warranty and no free replacement is available.
• You’re attached to the model (e.g., prefer its size, features, or ecosystem).
• You’ve already bought an aftermarket case or spare bands that work with your current unit.
Replace If:
• The screen is cracked or the battery is failing, indicating broader device problems.
• The cost of repairs exceeds half the price of a new unit.
• You’re tired of recurring band issues and want a more durable alternative with better support.
Consider Switching Brands
Many users switch to other fitness trackers after repeated Fitbit failures.
• Xiaomi Mi Band: Lower cost, robust design, long battery life.
• Apple Watch: Premium build, excellent band system, strong ecosystem integration.
• Garmin Vivosmart: Durable, fitness-focused, reliable strap mechanisms.
Final Fix Checklist
Use this quick-reference guide to resolve your Fitbit band issue efficiently.
| Issue | Solution | Tools Needed |
|---|---|---|
| Broken plastic studs | Aftermarket case | None |
| Loose band connection | Test with second band | Spare band |
| Stuck debris in slot | Extract with tweezers | Tweezers, flashlight |
| Bent coupler tabs | Realignment or band swap | Tweezers, new band |
| Warranty defect | Contact Fitbit support | Internet access |
Frequently Asked Questions About Fixing a Broken Fitbit Band
Why does my Fitbit band keep falling off?
Your Fitbit band keeps falling off because the mounting studs are broken, the coupler tabs are bent, or debris is blocking the connection. Start by inspecting the plastic studs on the device sides. If they’re ripped off, standard band replacement won’t work. You need an aftermarket case to bypass the damaged attachment points.
Can I use super glue to fix my Fitbit band?
Yes, you can use super glue (cyanoacrylate) as a temporary fix for broken mounting studs. Apply it to the broken stud area, press firmly for 30 seconds, and wait 24 hours before wearing. However, this disables the quick-release button and typically fails within days or weeks, especially with active use. It’s not a permanent solution.
What is the best permanent fix for broken Fitbit Charge 4 bands?
The best permanent fix is an aftermarket protective case that slides your Fitbit module into a silicone or TPU shell. These cases have built-in band connectors that bypass the fragile original mounting studs entirely. They cost less than replacing the device and add drop protection while restoring full functionality.
How do I remove a broken strap piece stuck in my Fitbit?
Turn off your Fitbit first. Use tweezers for protruding pieces, a plastic pick for deeply lodged fragments, or a taped screwdriver to pry without scratching. A mini vacuum on low power can also suction loose pieces. Don’t force anything deeper into the mechanism.
Is Fitbit band failure covered under warranty?
Yes, band connection failures are often covered under warranty. In the US and Canada, you get 1-year limited warranty coverage. In the UK, you get 2-year coverage including normal wear and tear. Contact Fitbit support through their website to file a claim for potential replacement.
Key Takeaways for Fixing Your Broken Fitbit Band
A broken Fitbit band doesn’t mean the end of your device. The most reliable permanent fix is an aftermarket case that bypasses the fragile plastic mounting studs entirely, especially for Charge 4 and Charge 5 models. Super glue works temporarily but fails quickly, while drilling and extended screws risk destroying your device completely. For loose connections, test with a spare band first to determine if the problem is the strap or the device. Contact Fitbit support if your device is under warranty, as band connection failures are often covered defects. Avoid risky methods like WD-40 or drilling, and prioritize solutions that protect both your investment and your safety. Regular maintenance, proper handling, and choosing durable replacement bands will keep your Fitbit secure, comfortable, and tracking every step for years to come.